
Mastering tubular Peyote. The first three to four rows of any bead-weaving stitch are almost always a little bit tricky. Firstly because you do not have many beads to hold at this point and, secondly, because these are the rows in which the beads are being pulled into the right place for your stitch. Ironically, these two facts are interlinked: the way in which you hold your beads can either help or hinder you.
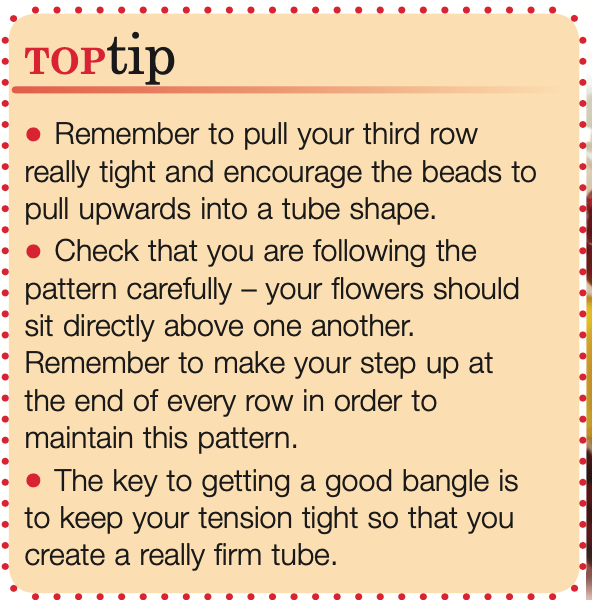
When you start tubular Peyote, you'll start with a circle of beads that forms your first two rows. You then begin adding a bead above every other bead in this circle. At this point it is very tempting to sit your beads on the beading mat so that you can see where you are going as you work around the circle. This will mean that the new beads you are adding will sit flat, out to the sides of your circle. There is nothing wrong with doing this as you add the beads, but before you start the fourth row, you will need to pick your beads up and pull the third row beads really tight to encourage them to sit on top of your circle and push the beads underneath downwards.
At this point, two things are key: firstly, pulling your thread tight to get really good tension. Secondly, as you do this, hold the circle cupped between your thumb and first two fingers. This will encourage the beads into a tube, instead of a flat circle, and help you to get that tight tension that you need. Take a look at the photo so you can see what I mean.

If you do not establish a good, tight tension in your first four rows, it can be very difficult to get your Peyote tube to feel solid as it grows, so it is worth investing a bit more time to really get the shape and tension right at the beginning. Once you have done this you will find the tube grows quite easily.
A simple increase trick
All the main bead-weaving techniques have their individual ways of making an increase. These involve specific thread paths and adding in extra beads, but this can seem a little bit overwhelming if you are just starting to learn a new technique. There is second way of increasing: just increase the size of bead you are using. So, if you are stitching with size 11 beads, replace these with size 8 beads and your work will automatically grow wider. It means you don’t have to worry about remembering a new thread path – just continue as you are. This method of increasing also adds texture to your work. You will find that the bigger beads will not only increase the width of the work, but also increase the depth. This is an idea with which you can experiment. What happens if you increase the bead size in every stitch in the row? What happens if you increase just the size of the middle bead in the row? What about increasing every other bead size? What if you continue the increase over several rows? You will find you get some interesting effects with both the size and texture of your work.
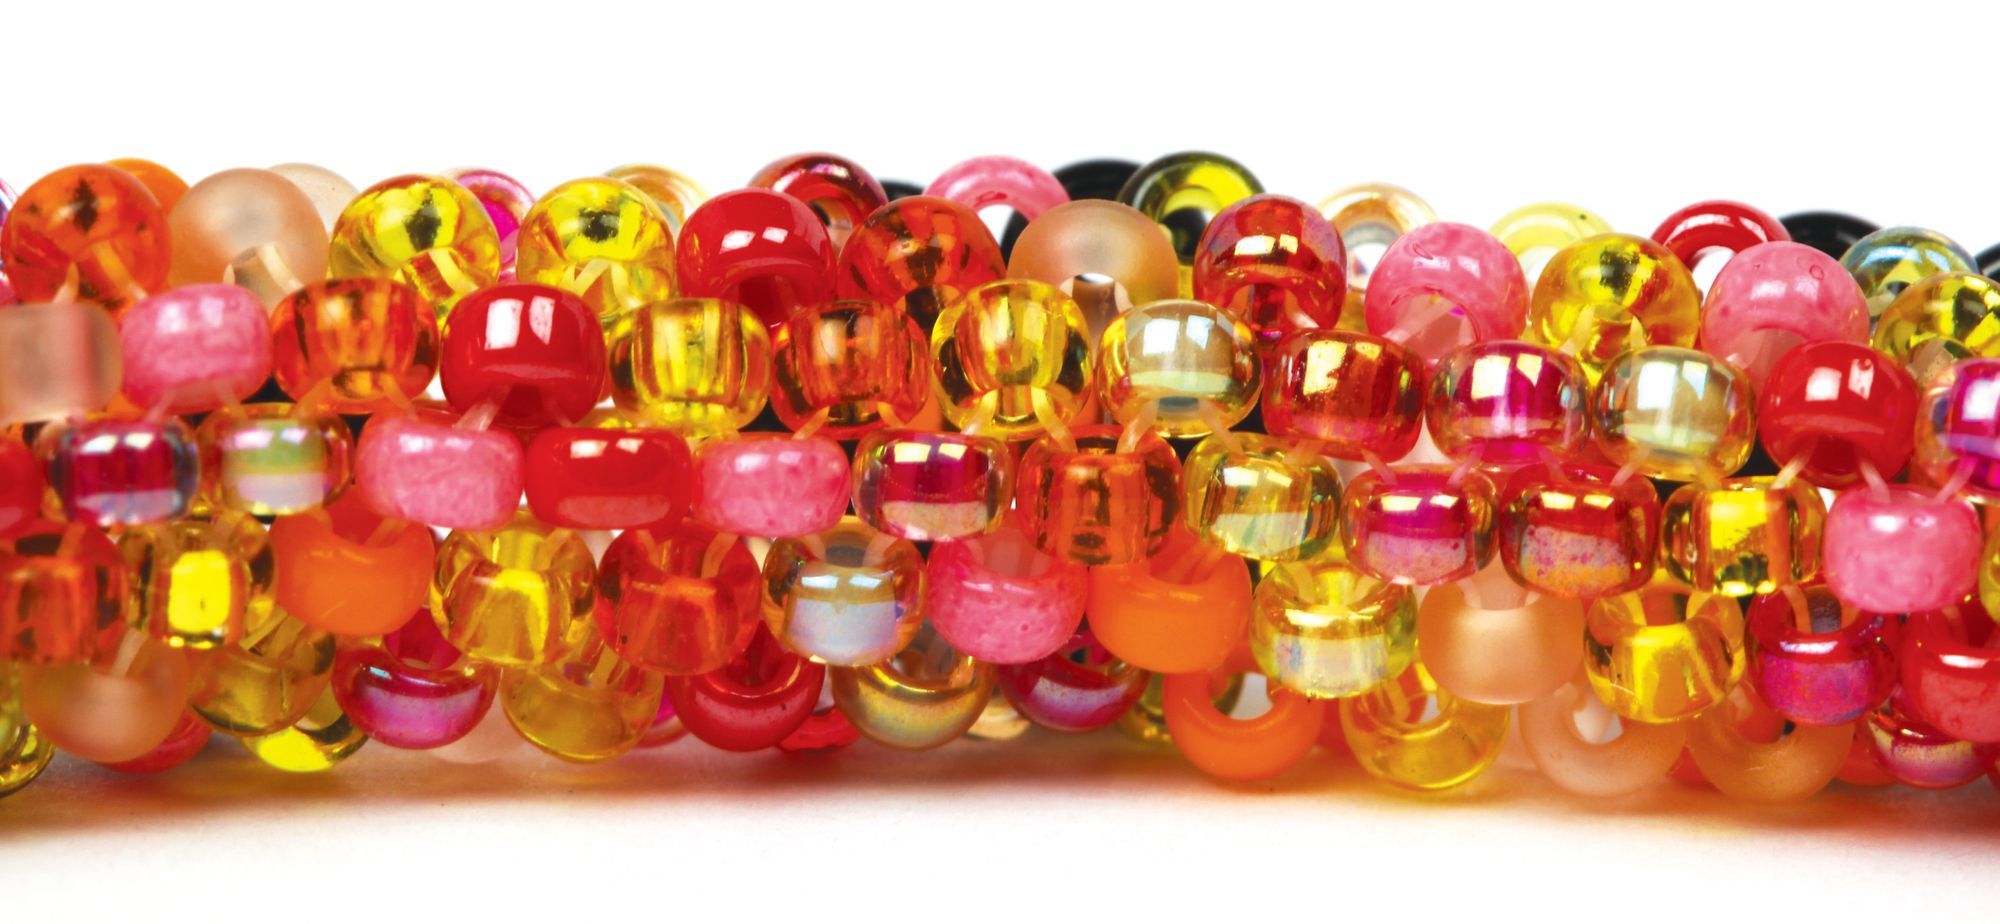
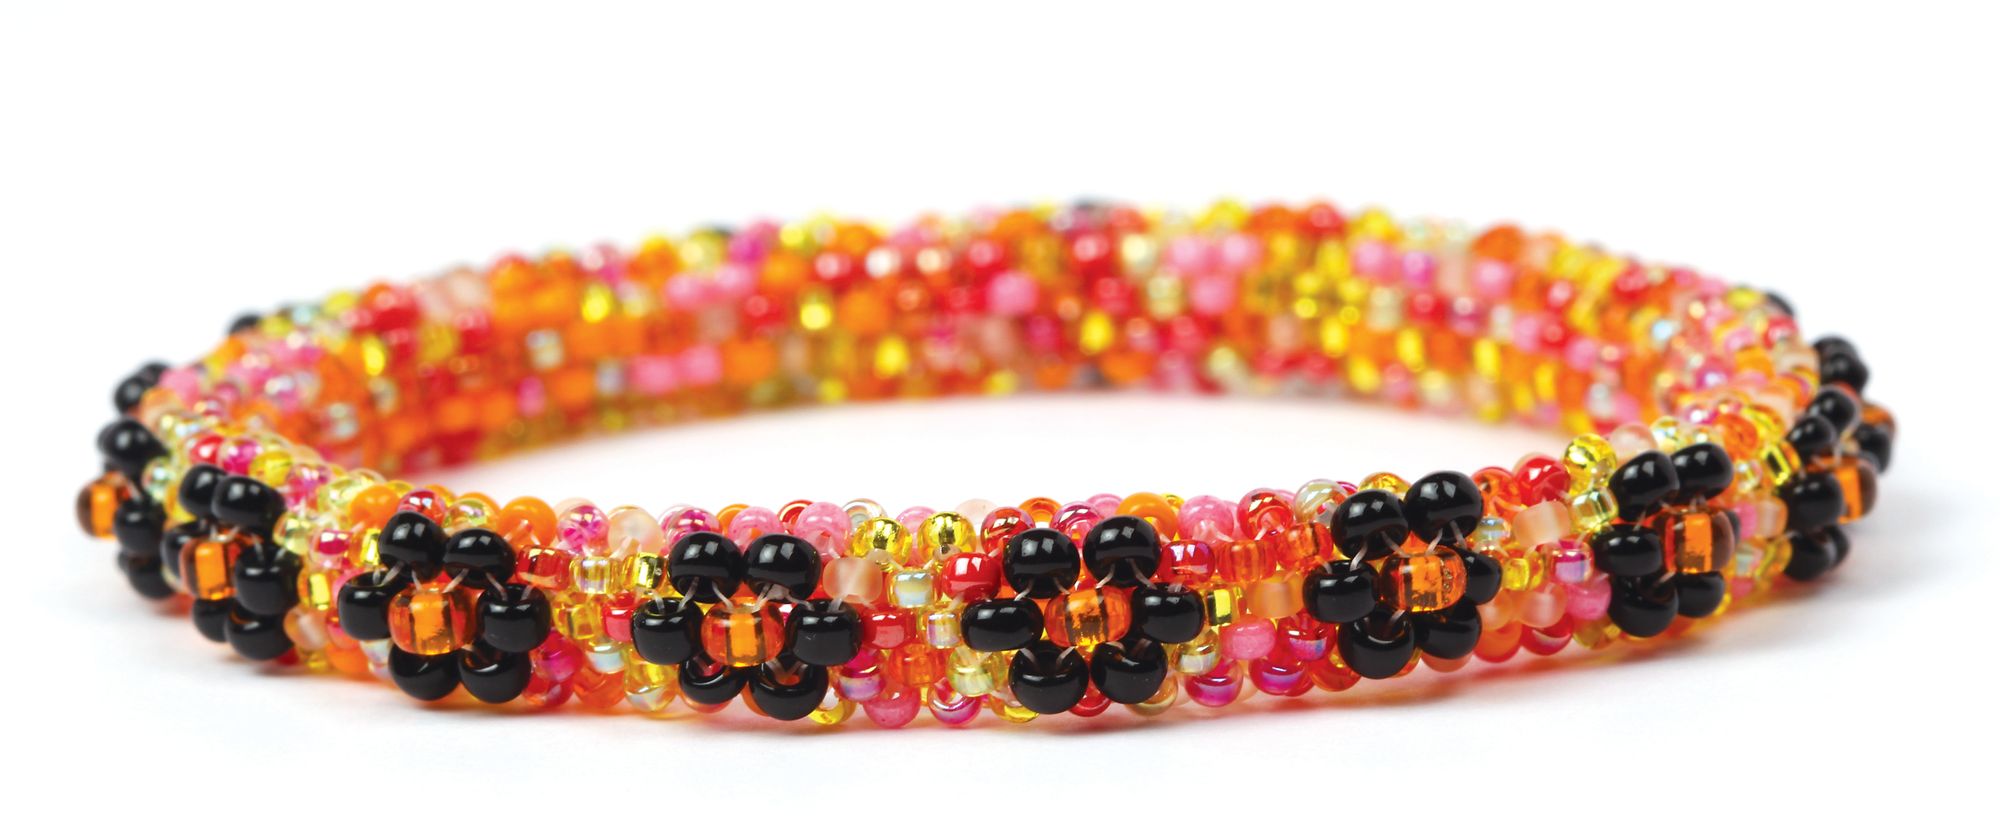
In the project below you will be working in tubular Peyote stitch to make a bangle. In order to make a bangle, your tube needs to be capable of curving to create the circular shape. Some bead stitches are flexible enough to do this, but Peyote stitch can create a very firm tube, so it may not naturally curve (unless your tension is too loose!). I have mixed up the bead sizes in this bangle design so that the little flowers are stitched in size 8 beads, whilst the background is made with size 11 beads. This change in size creates a natural curve that is perfect for making a circle. You will be working in simple tubular Peyote, so there is no need to worry about changing thread paths or anything complicated. The bead sizes will give this tube a natural curve and, when it is large enough to fit around the widest part of your hand, you can just zip the two ends together to create the bangle.
If you are not a fan of bangles, then make the tube long enough to fit around your wrist and just attach your favourite clasp to make a bracelet. This design has a wonderful textured feel. Once you have grown used to mixing your bead sizes in this way, try experimenting with some flat Peyote to see how you can give a simple Peyote strip a more interesting shape and texture.
Floral Peyote bangle
Step 1: Pick up 10 (A) and pass through all the beads again to form a circle. Knot the tail thread and working thread between two beads to hold the circle firm. Then pass on through a few more beads so your knot will be pulled inside a bead. See figure 1.
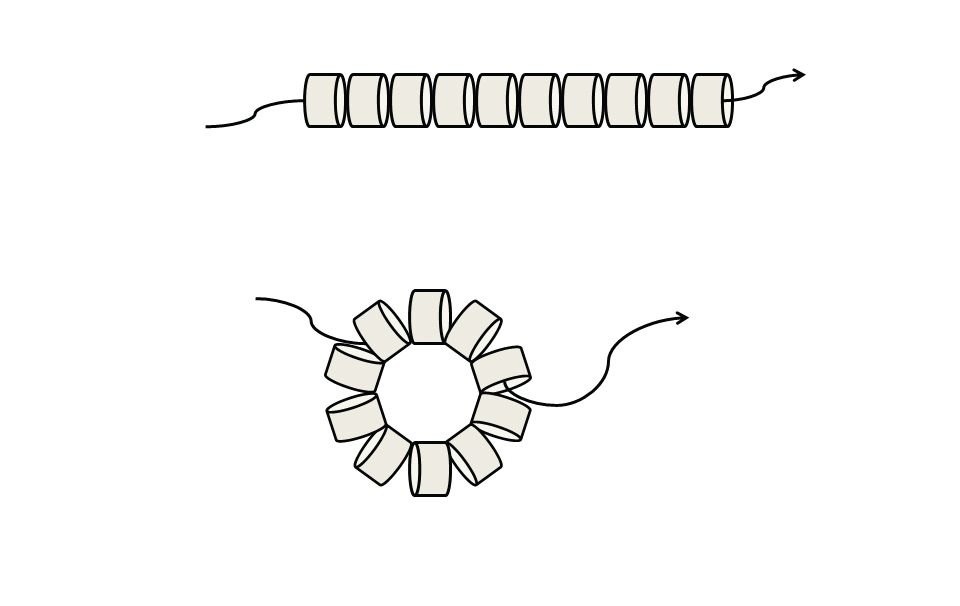
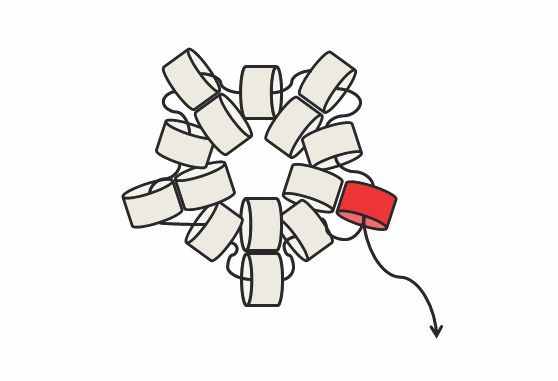
Step 2: Pick up 1 (B) and pass through the next but one bead from your circle. *Pick up 1 (A) and pass through the next but one bead from your circle. Repeat from * three times. As you add the final bead, you will need to pass through the (A) from your base circle, then through the (B) you added at the start of the row. Pull your thread tight so that the beads you have just added sit on top of the beads from the base circle. See figure 2.
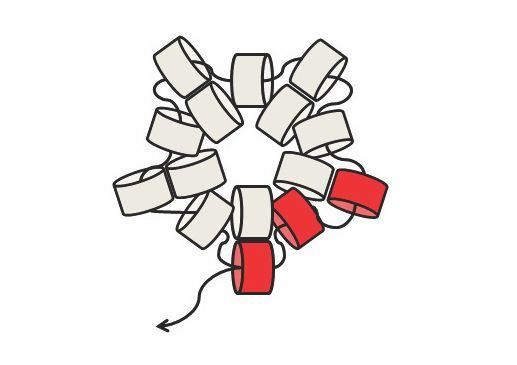
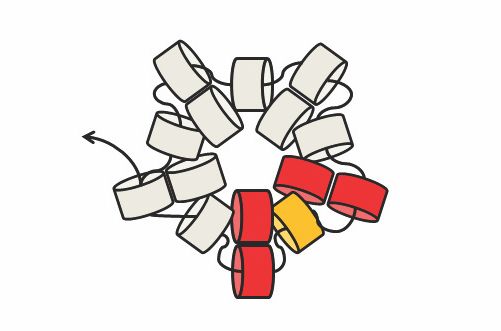
Step 3: Pick up 1 (B) and pass through the next (A) bead (this will be a bead you added in the previous row). Pick up 1 (A) and pass through the next (A) from the previous row. Pick up 1 (A) and pass through the next (A) from the previous row. Pick up 1 (A) and pass through the next (A) from the previous row. Pick up 1
(B) and pass through the (B) from the previous row and then through the (B) you added at the start of this row. See figure 3.
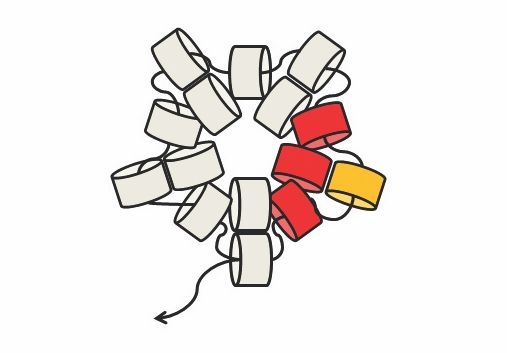
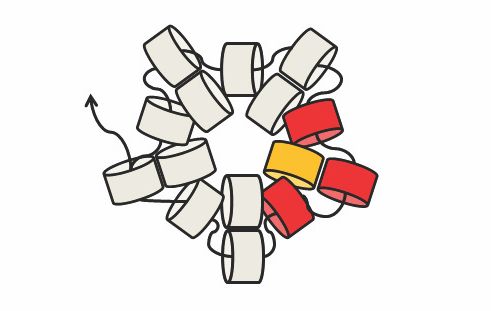
Step 4: Pick up 1 (A) and pass through the next (A) from the previous row. Repeat this 3 more times, but when you pick up the last bead, you will pass through a (B) from the previous row. Pick up 1 (C) and pass through the (B) from the previous row and the first (A) added in this row. See figure 4.
Step 5: Pick up 1 (A) and pass through the next (A) from the previous row. Repeat this twice more. Pick up 1 (B) and pass through the (C) from the previous row. Pick up 1 (B) and pass through an (A) from the previous row and the (A) added at the start of this row. See figure 5.
Step 6: Pick up 1 (A) and pass through the next (A) from the previous row. Repeat this twice more – on the last time, you will be passing through a (B). Pick up 1(B) and pass through the next (B) from the previous row. Pick up 1 (A) and pass through the (A) from the previous row, then step up through the first (A) added in this row. See figure 6.
Step 7: Stitch five rows in which you will add a single (A) bead in each stitch. Remember at the end of each row, you will need to pass through two beads in order to ‘step up’ ready to start the next row.
Step 8: Repeat steps 2-7 until your tube is long enough to reach around the widest part of your hand. Keep checking as you work: you should find that each new flower sits directly above the previous flower. This will give the bangle its curved shape.
Step 9: In your final sequence, you should add just 3 rows in step 7, so your pattern will be complete when you join the two ends of your tube. Make sure you line up the beads so that the flowers sit around the outside edge of the tube and you can join the two ends and finish off your thread.