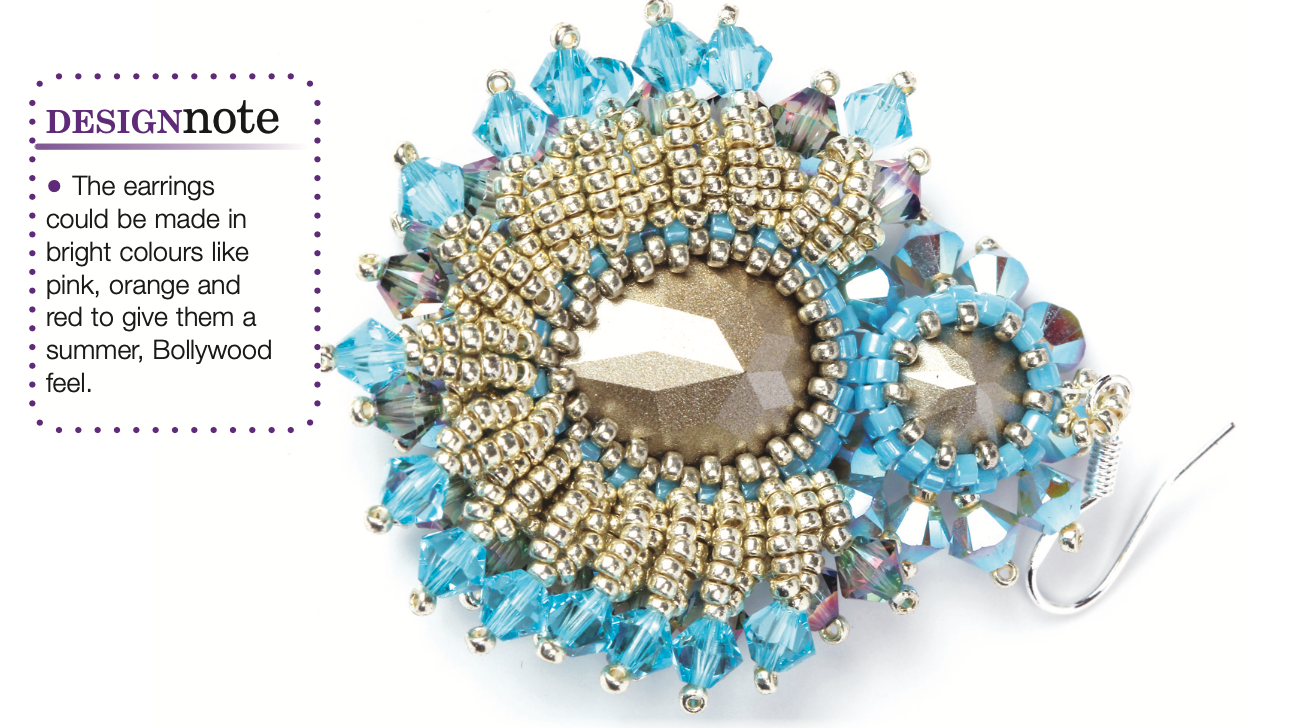
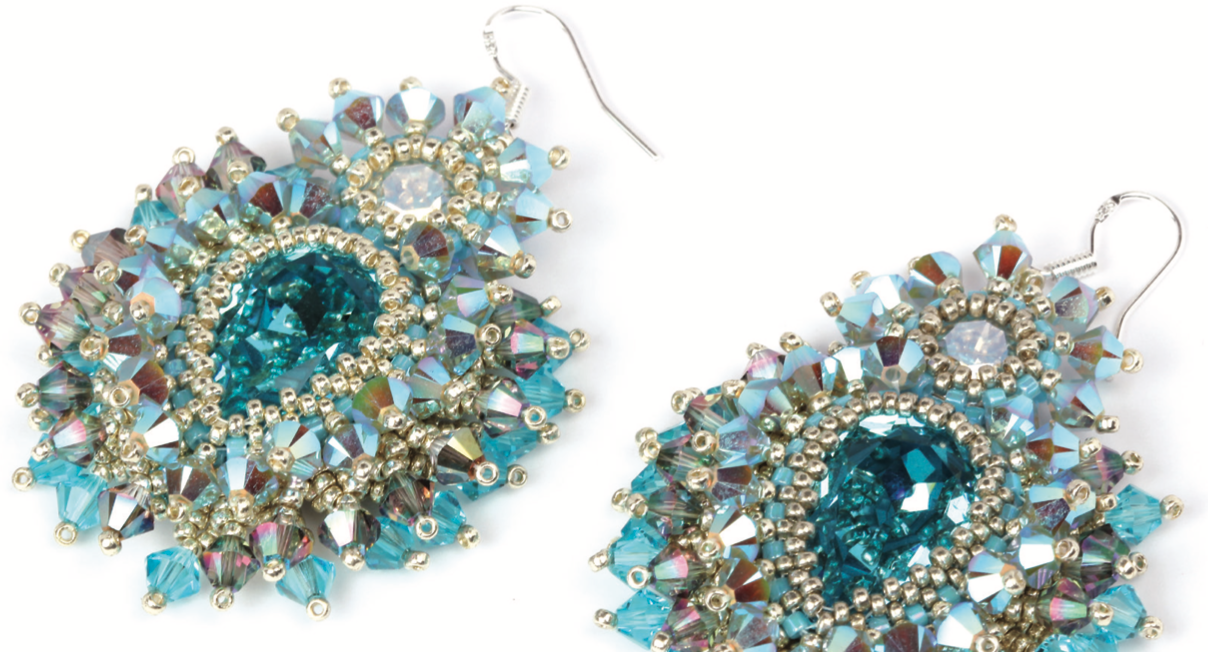
INSPIRATION: Over the years, I’ve seen the Disney film Frozen more than once with my daughter, and was inspired by all the sparkly ice the snow queen creates. I imagine if the snow queen were to wear any earrings they would be dripping in Swarovski in all crystal and blue.
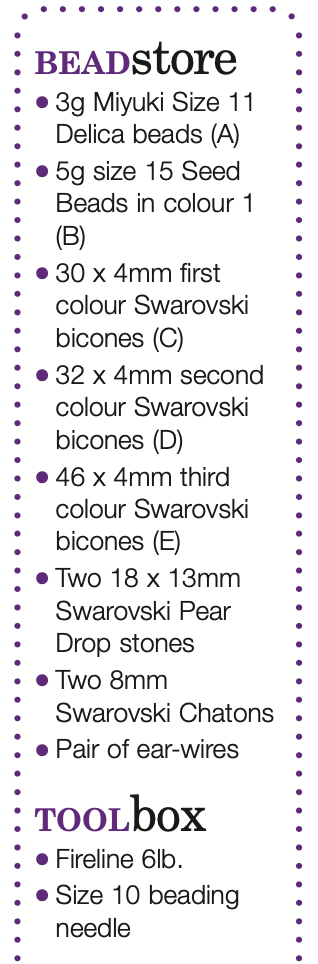
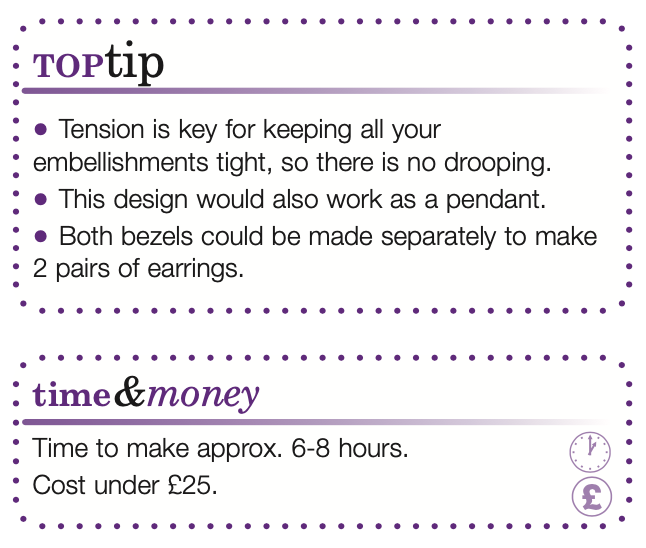
Step 1: Pick up 40(A) and tie a double overhand knot to bring them into a circle. See figure 1.
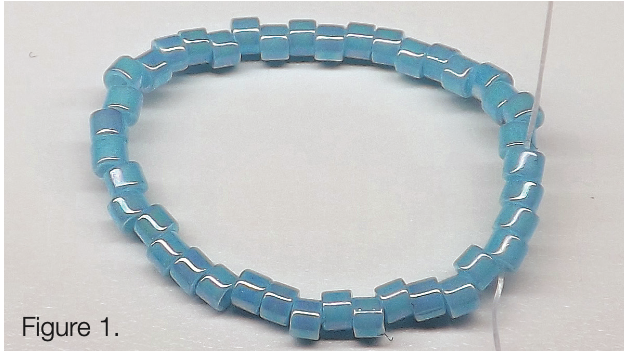
Step 2: Weave through a couple of beads and pick up 1(A). Miss the next bead in your circle and pass through the one after. See figure 2.
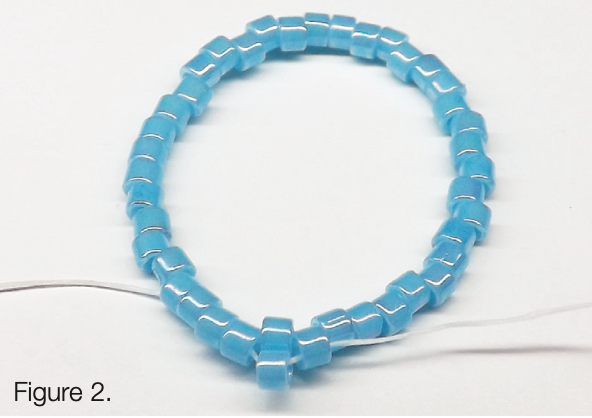
Step 3: Repeat step 2 all the way around – you should note that you are working in circular Peyote stitch. This will give you three rows of delicas: a top (outside), middle and bottom (inside). See figure 3.
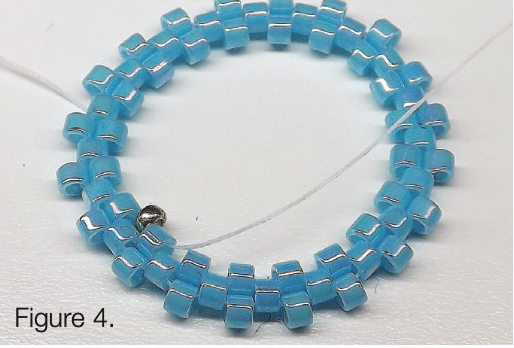
Step 4: Weave through to the inside row of your circle and pick up 1(B). Pass through the next (A) on the inside row. See figure 4.
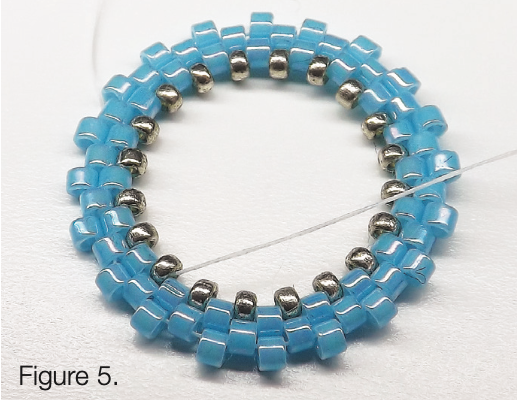
Step 5: Continue adding (B) beads all the way around the circle. At the end of the row, step down into the first (B) you added. See figure 5.
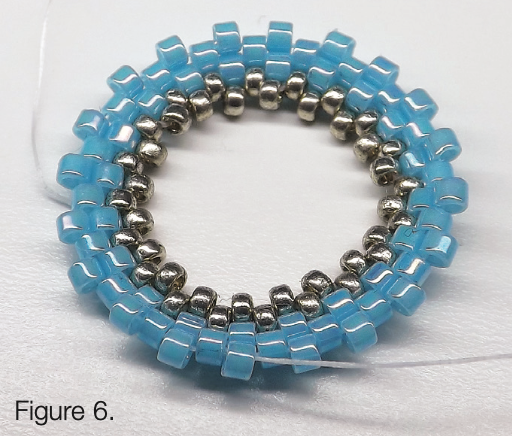
Step 6: Pick up 1(B) and pass through the next (B) in your circle. Continue adding (B) beads all the way around the circle and then weave out to the outside row of (A) beads. See figure 6.
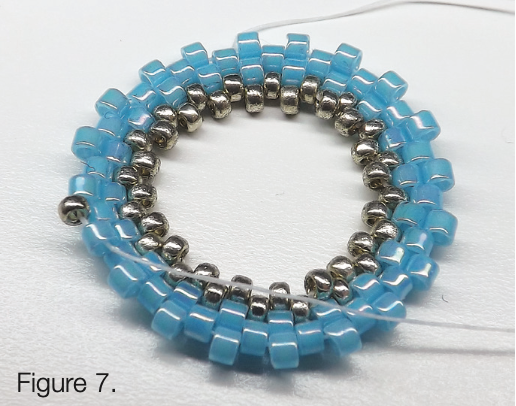
Step 7: Pick up 1(B) and pass through the next (A) on the outside row. Continue adding (B) beads all the way around the row and, at the end, step up through the first (B) you added in this step. See figure 7.
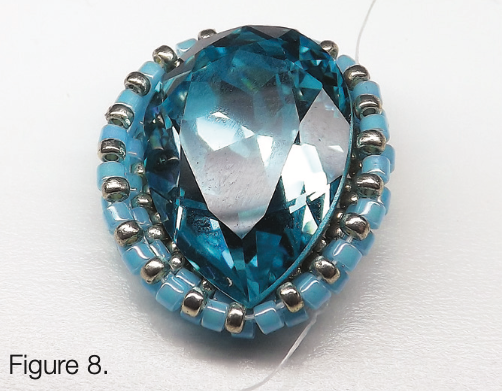
Step 8: Place the pear stone in the bezel. Pull tightly to hold the stone in. You need to make sure the point of the stone sits directly above a 15/0. See figure 8.
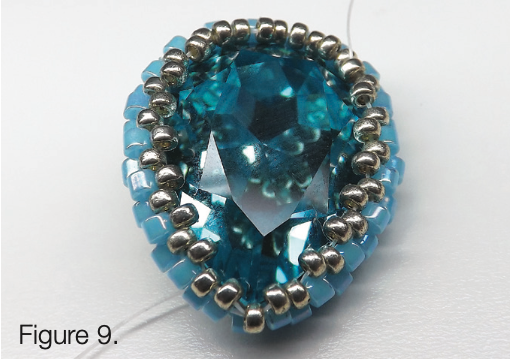
Step 9: Add a row of (B) beads and step up at the end of the row. This should secure your stone inside the bezel. See figure 9.
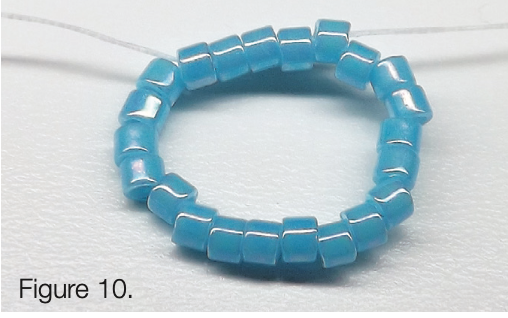
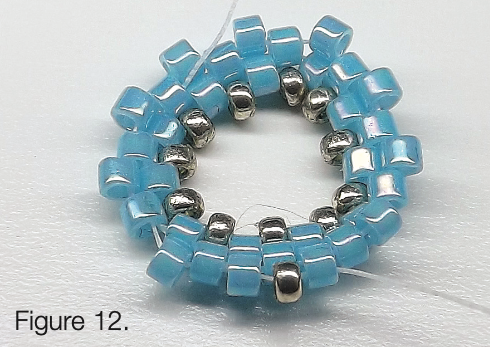
Step 10: Pick up 22 (A) and tie them into a ring. See figure 10.
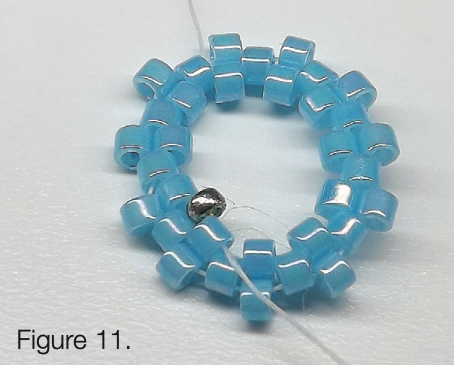
Step 11: Use the (A) beads to add a row of circular Peyote stitch. Weave through to the inside row of Delicas and pick up 1(B). Pass into the next (A) on the inside row. See figure 11.
Step 12: Continue adding (B) beads all the way around and then weave out to the outside row of Delicas. Pick up 1(B) and pass into the next Delica on the outside row. See figure 12.
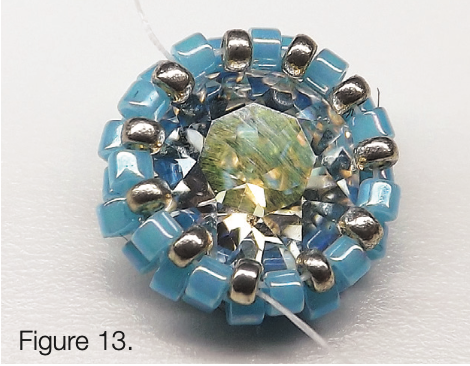
Step 13: Continue adding (B) beads all the way around the circle. Once you have finished this row, step up into a (B) and place the chaton in the bezel. Pull really tight to keep the chaton in. You can reinforce the last row to give extra tightness, then finish off your threads. See figure 13.
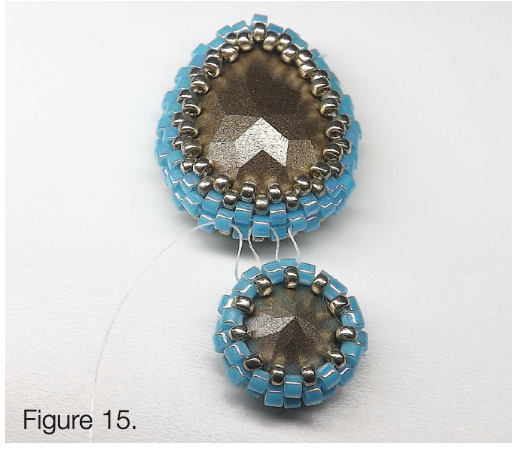
Step 14: It is now time to attach the two stones together. Start by coming out of the middle row of delicas on the top of your pear stone bezel. See figure 14.

Step 15: Go through a middle row delica on the chaton bezel and into the next middle delica on the pear bezel. Go into another middle delica on the chaton bezel and into the next delica on the pear bezel. See figure 15.
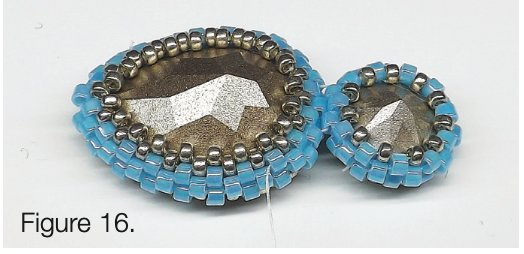
Step 16: Weave your way through to the bottom row of delicas. You want to come out of the delica that’s two away from the bezel. See figure 16.
Step 17: Pick up 7(B), 1(C), 1(B). Miss the last (B) added and come back down the (C) and the seventh (B). Pick up six (B). See figure 17.
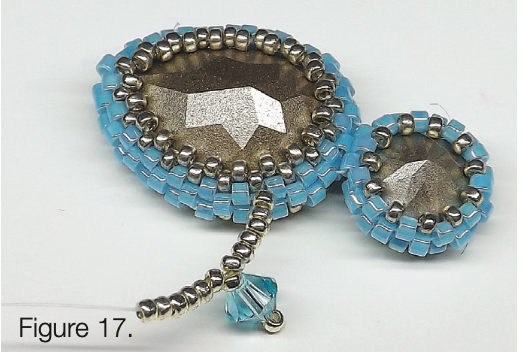
Step 18: Go into the next delica along on the bottom row. Keep your tension tight. See figure 18.
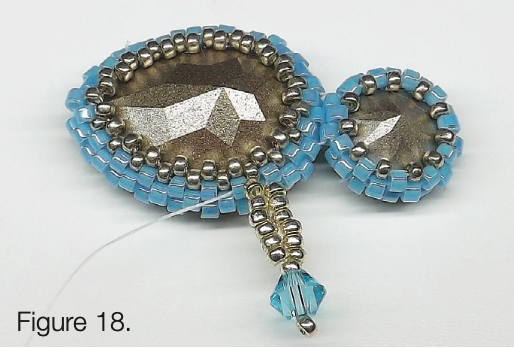
Step 19: Repeat steps 17-18 to add a total of 15 embellishments. See figure 19.
Step 20: When you finish the last embellishment on the last row, you want to either weave your way back through to the other side to be coming out of a middle delica above the first embellishment or do an about turn to come out of the middle delica above the last embellishment. Both ways will get you to where you want to be. Pick up 5(B), 1(D), 1(B). See figure 20.
Step 21: Missing the last (B) added, go back down the (D) and the fifth (B). Pick up 4(B) and go into the next middle delica along. See figure 21.

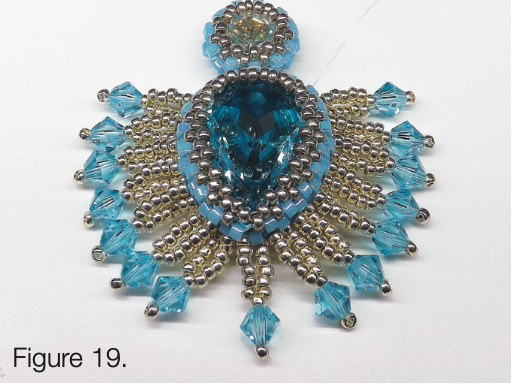
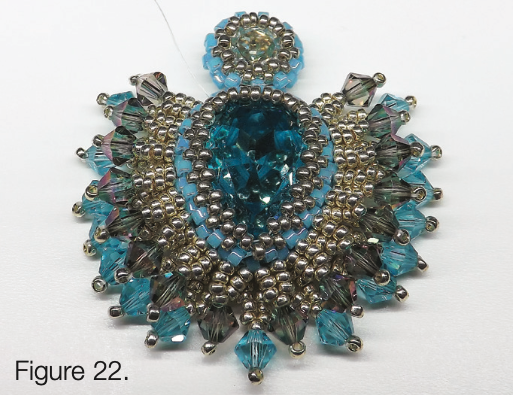
Step 22: Continue all the way around adding embellishments on this row – you should end up with a total of 16. See figure 22.
Step 23: Move to the first row of delicas using the same method as you did in step 25. Pick up 1(B), 1(E) and 1(B). See figure 23.
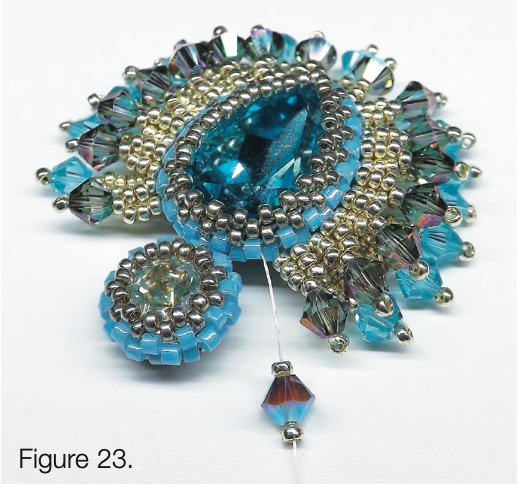
Step 24: Miss the last (B) and come down the (E) and the (B). Go straight into the next delica along on the first row. See figure 24.
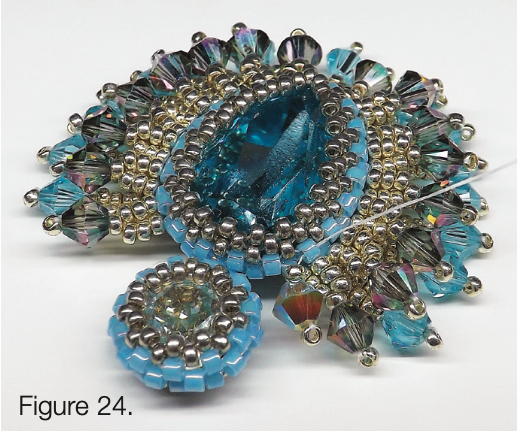
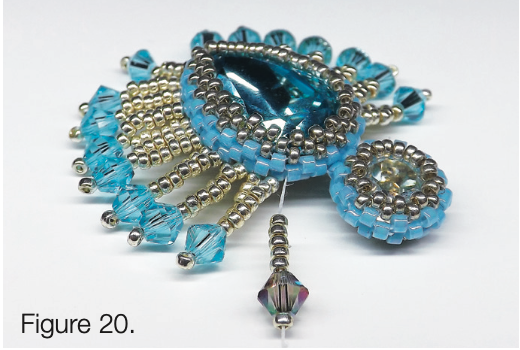
Step 25: Continue adding the embellishments all the way around. You should have 16 in total. See figure 25.

Step 26: Coming out of the delica that you exited on the last row, pick up 1(E) and go into a delica on the front of the chaton bezel. This should be the delica that is directly above the one you’re coming out of and the bicone should sit snug. See figure 26.

Step 27: Coming out of the front delica, 1(B), 1(E) and 1(B). Come back down the (E) and the (B) and go into the next delica on the front row. See figure 27.
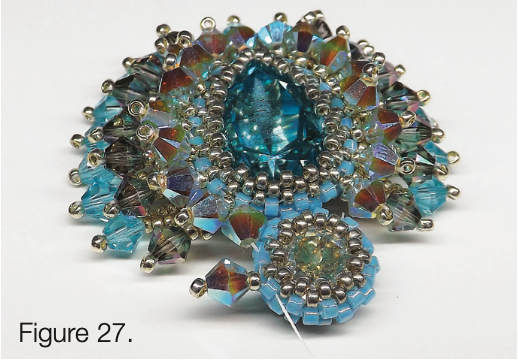
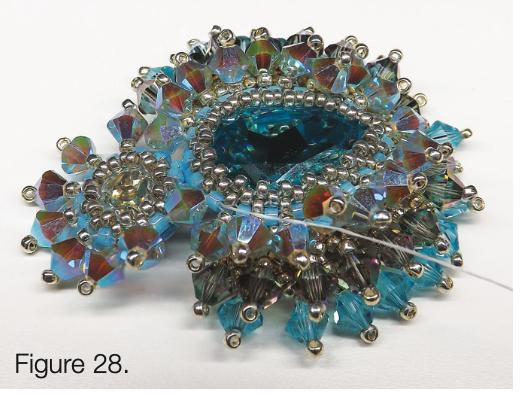
Step 28: Continue adding the embellishments all the way around the chaton. You should have seven. Coming out of the last delica exited, pick up 1(E) and go into the delica on the front row of the pear bezel that your first embellishment is coming out of. See figure 28.
Step 29: Now add the loop for the earwire: Weave through to the top delica of the middle row on the chaton bezel. (this should sit just behind the forth crystal embellishment. Pick up seven (B) and, making a loop, come back through the same delica you’re coming out of. See figure 29.

Step 30: Pull the loop tight and reinforce a couple of times. Weave off any extra theads and add your choice of earwires.