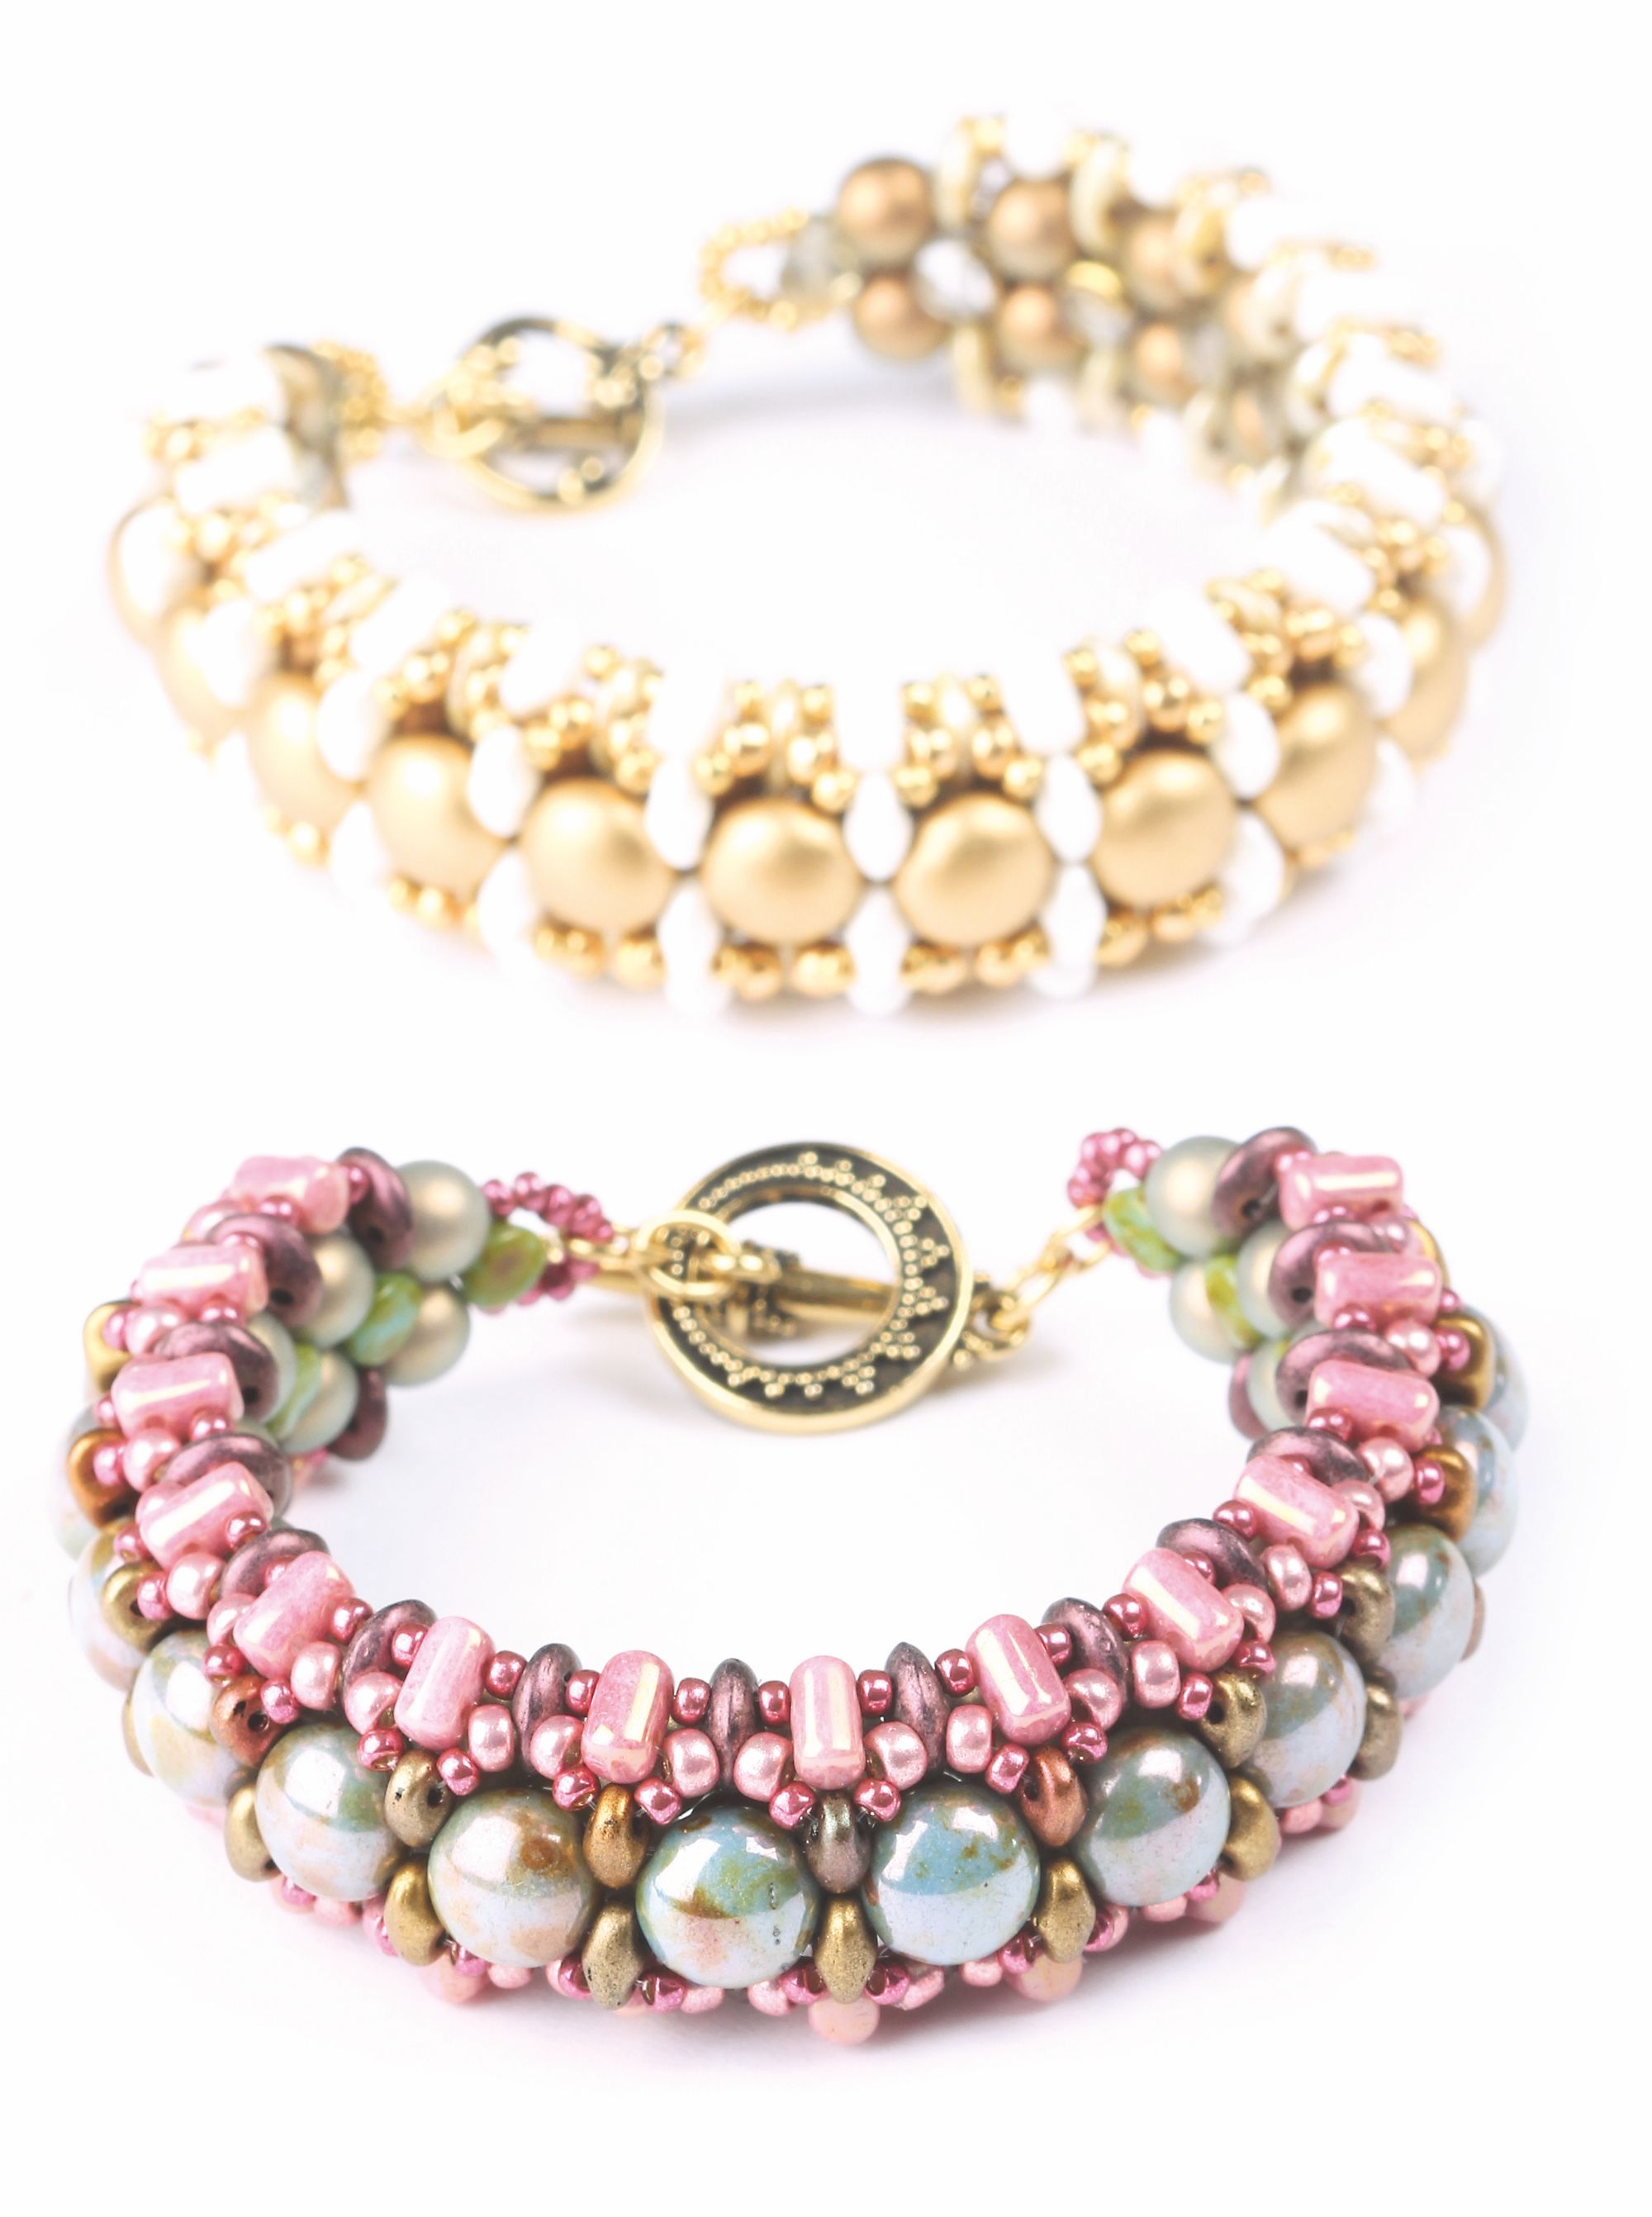
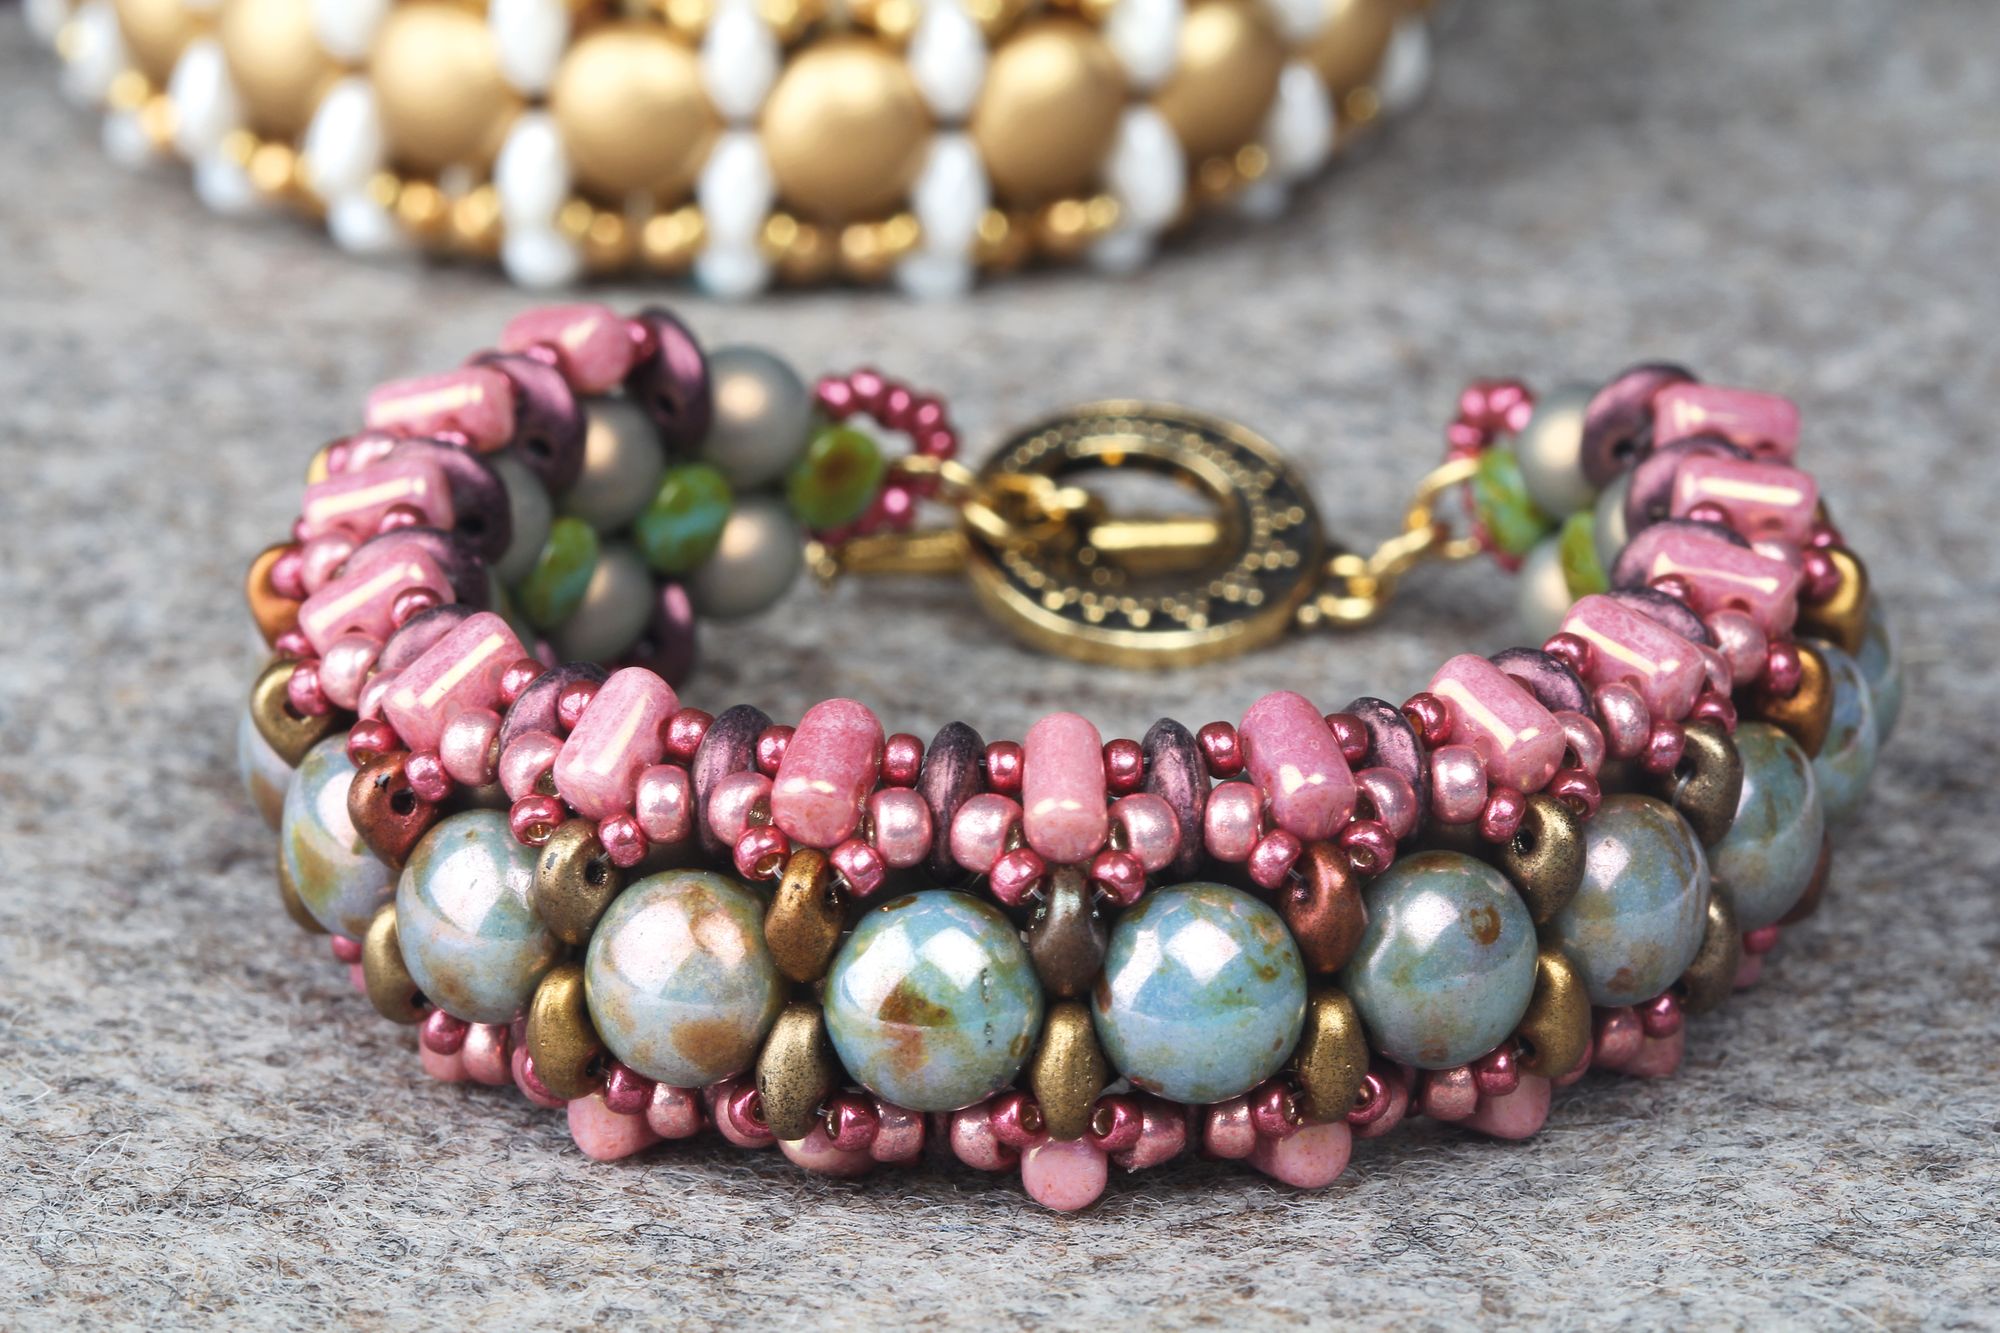
Using RAW technique and Pellet centre, we also use round beads, Rulla beads and 4 Hole Lentils to make an exciting piece. I really like how the bracelet actually follows the shape of your wrist, but it incorporates so many kinds of beads and yet feels harmonious.
This bracelet is partly made with a version of the two needle RAW (Right Angle Weave) technique. For those who are not familiar with this technique, it basically means that you put a needle on both ends of your thread and cross them through the beads that are in the centre of your bracelet as described below in the tutorial. If not indicated all steps refer to both needles/sides.
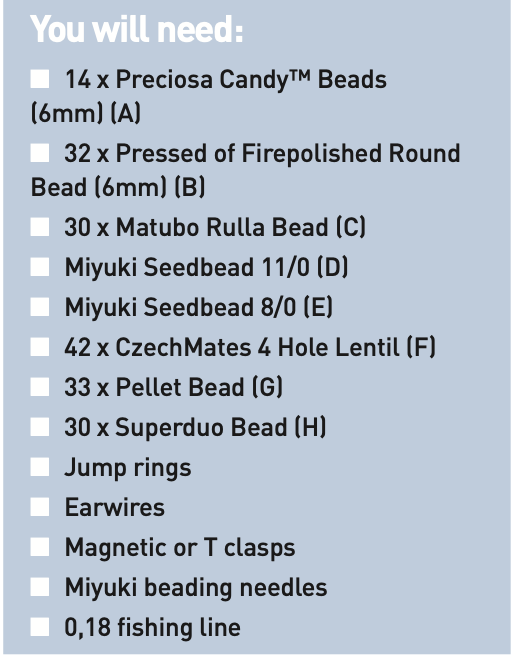
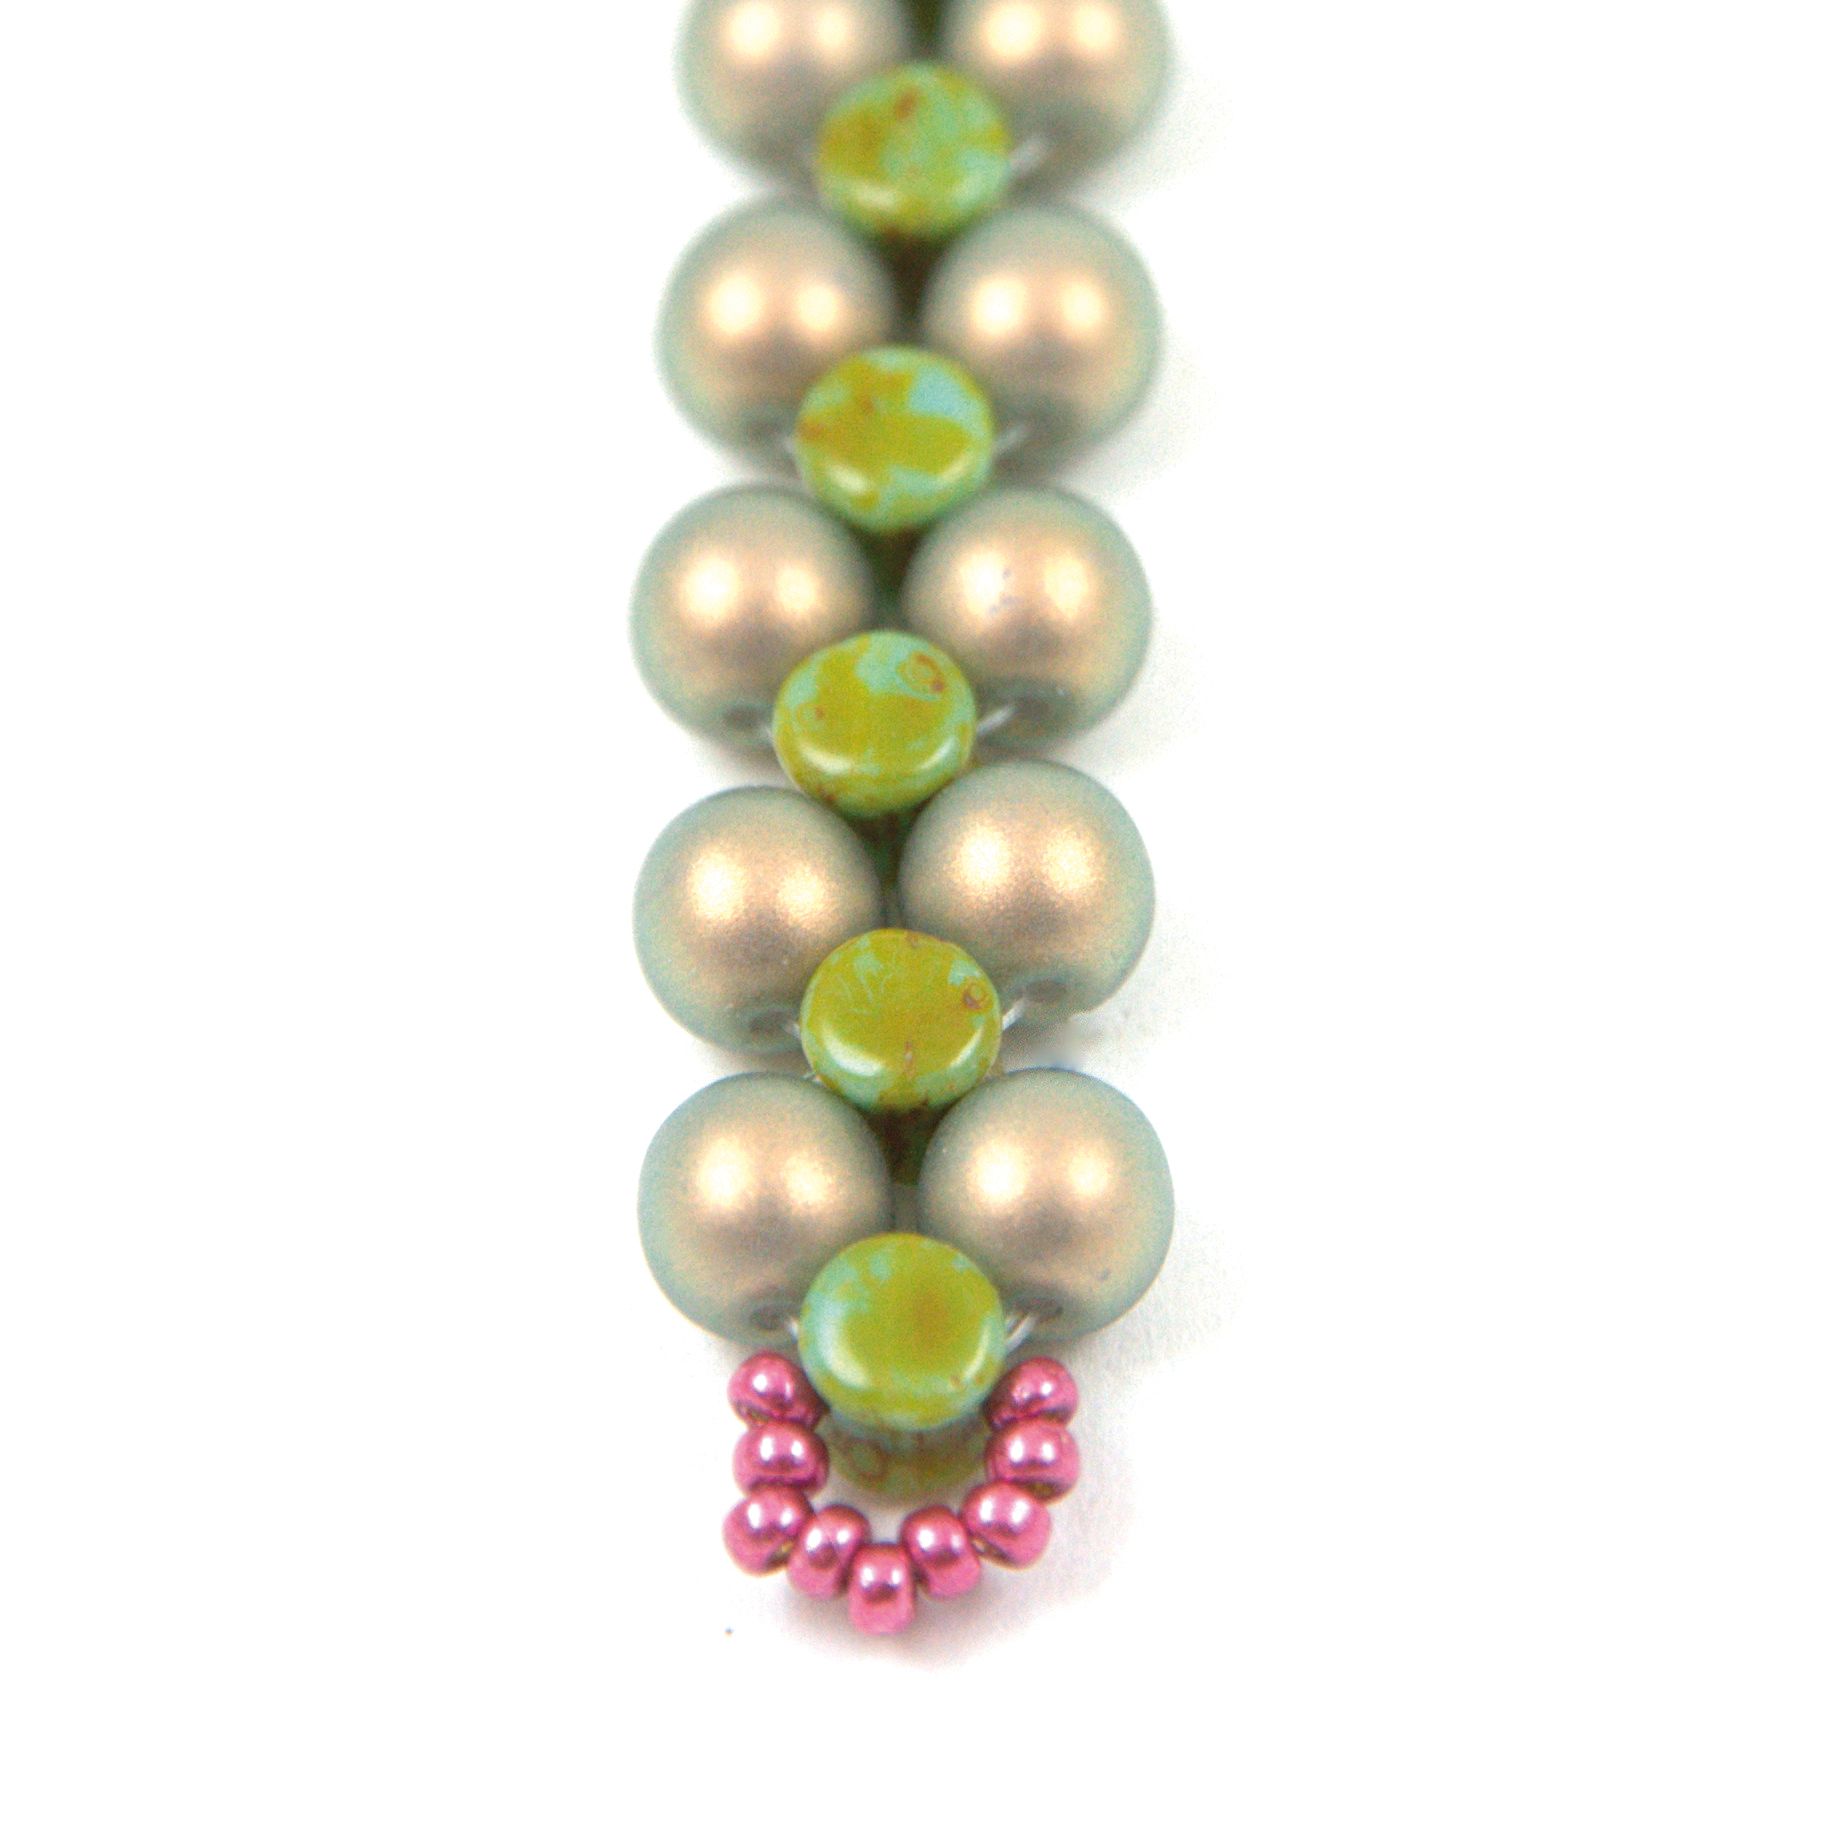
- Pick up sufficient thread/line (if you want to use a single length then you need at least two metres) and put needles on both ends. Pick up 9(D) (or as much as you need for attaching rings / clasps). Next pick up 1(G) with one of the needles and go through it from the other direction with the other. Now pick up a 1(B) with each needle and repeat the (G) “manoeuvre” all over again. Repeat as long as you reach the required length. (Take the (D) “circles” at the ends, the jump rings and the clasp into consideration when determining the length).
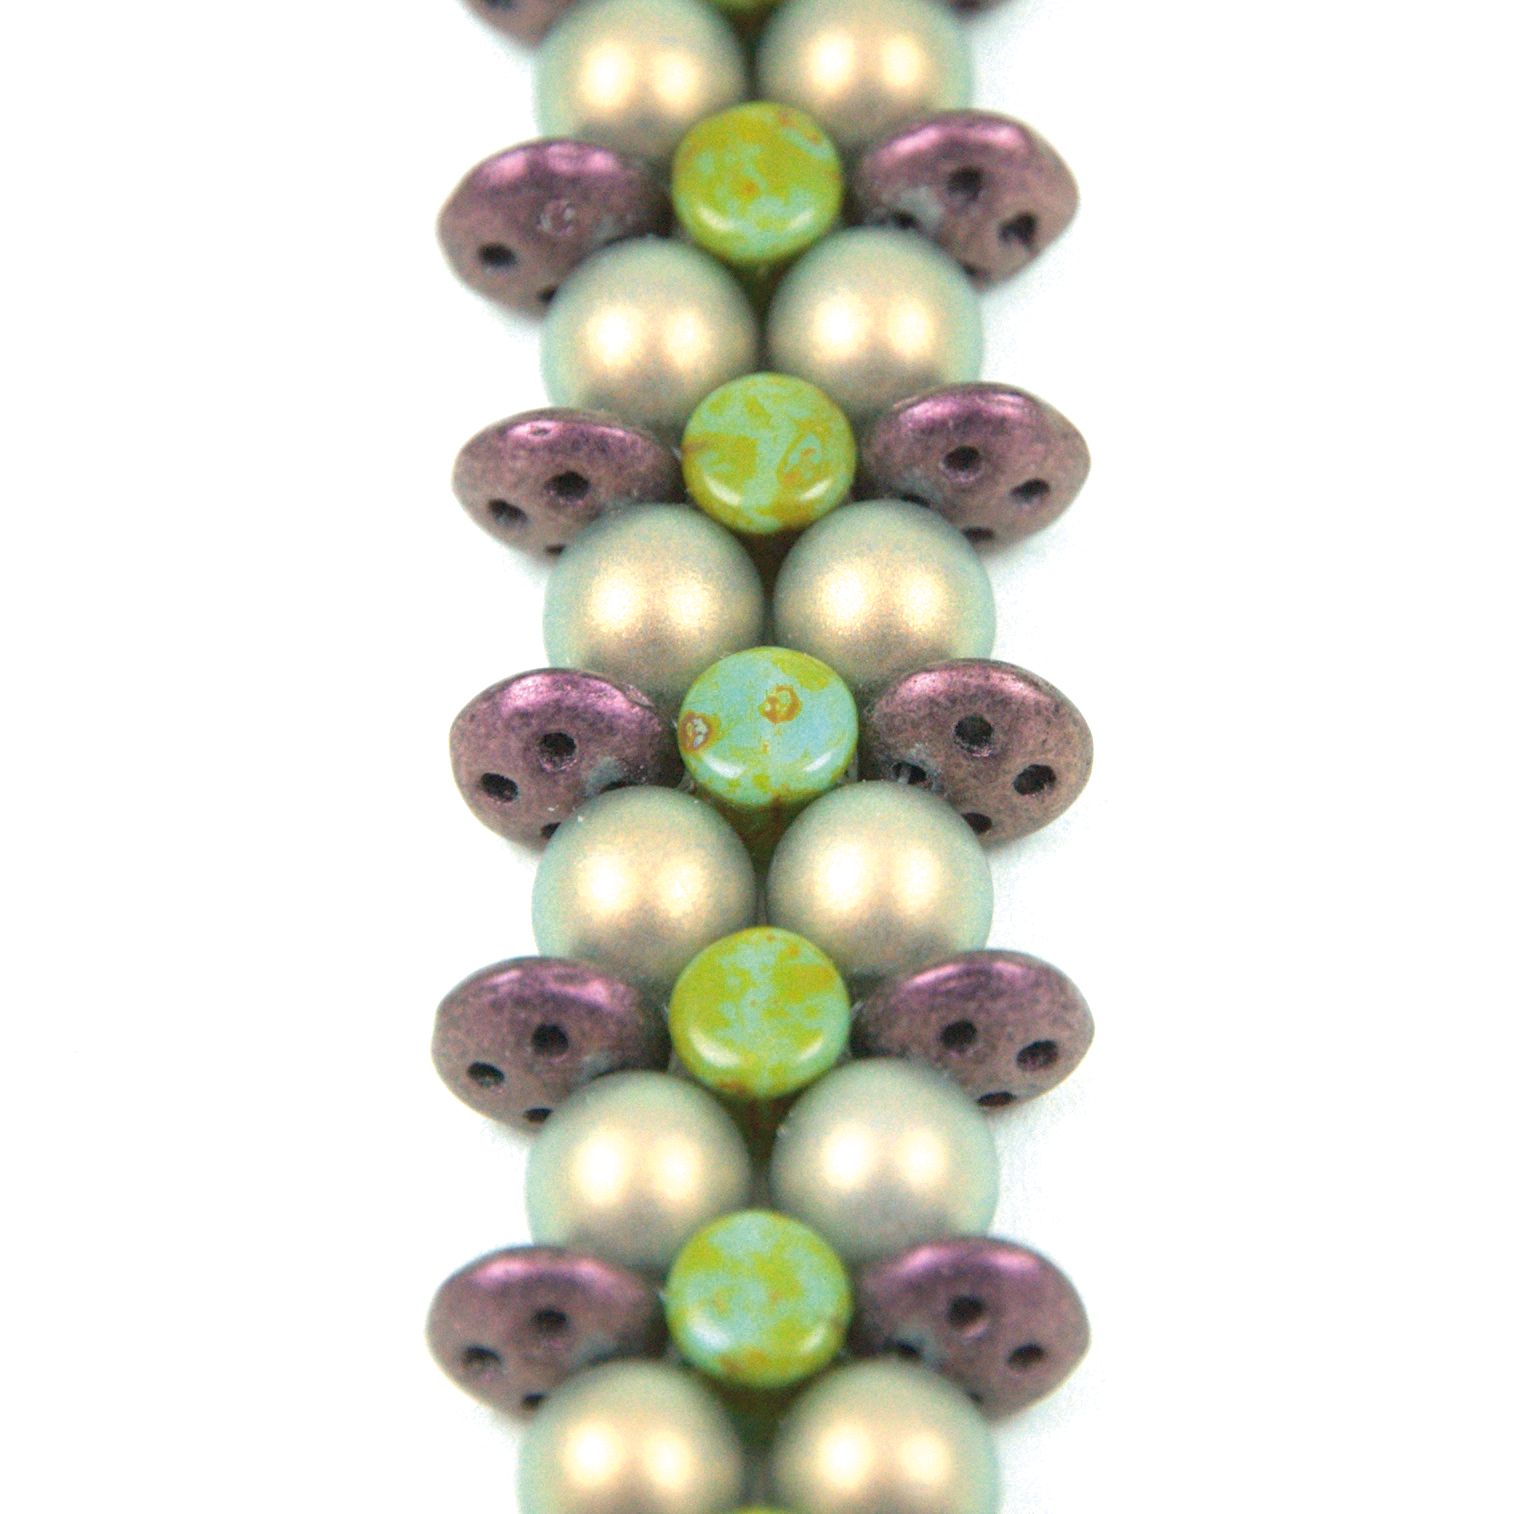
2. After coming out of the last (G) pick up 9(D) and go through them with the other needle from the opposite direction. Go back into the (G) from opposite directions. Coming out of the (G) go back through (B) and pick up (F)’s between the (B)’s.
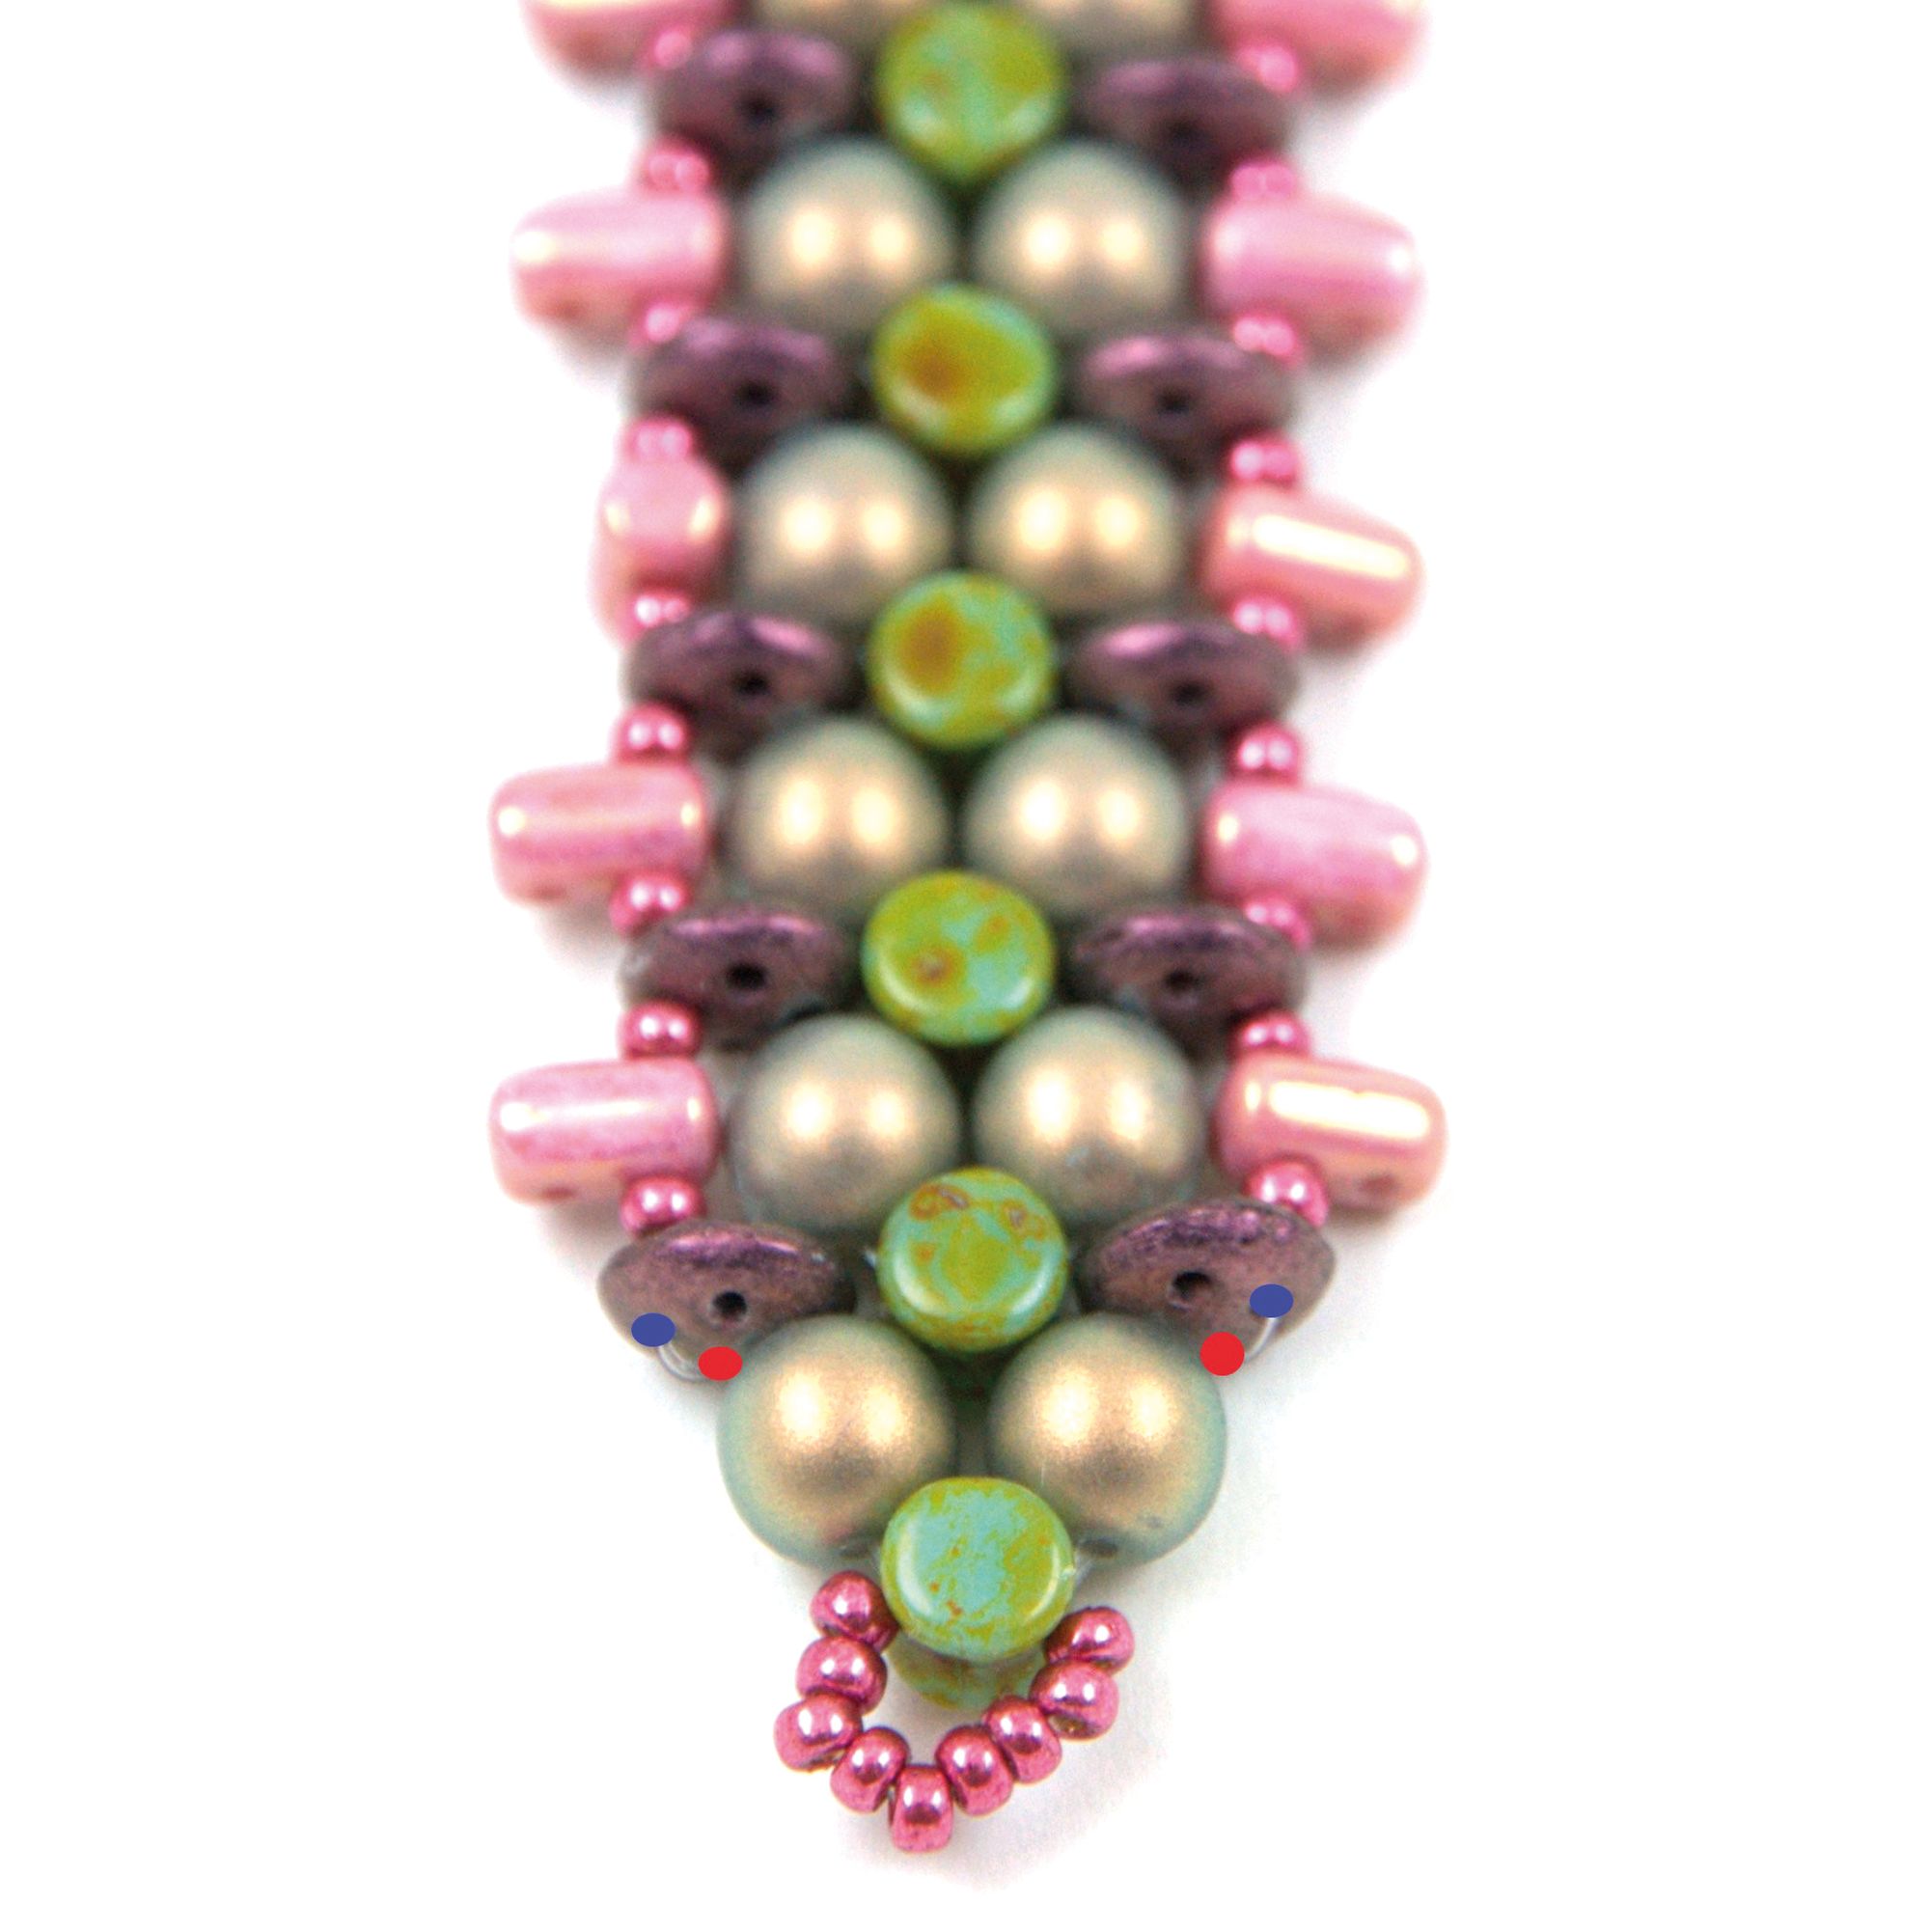
3. Pass through the last (B) and cross the threads through (G). Now go through the first (B) and (F). Here we need to change the hole, but keep our general direction, which we do by taking advantage of the four holes of the (F). After coming out of the first (F) go into the neighbouring hole (Red Dot on picture below) and then go into the hole opposite your first hole (Blue Dot on picture below).
4. Once here pick up 1(D), 1(C), 1(D) in between the same holes of the (F) beads (top of the bracelet on the picture). Once you get through the last (F), transfer to the hole opposite the Red Dot (from previ- ous picture), or the the “top” of (F) as this- will be the face of your bracelet) and pick up (E) beads in between the (C) and (F).
5. When you come out of the last (F) go back into the blue dot hole then come out of the red dot hole and return back into your initial hole then through the (E) and pick up 1(D), 1(H), 1(D), jump over the (C) bead and go into the next (E). Repeat this over every (C).

6. Repeat the beginning of Step 5 but this time go through (E), (D), (H) and then turn back through the top hole of (H). Pick up another (H) and go into the top hole of the (H) on the other side. Pick up (A) beads in between the (H)’s and at the other end add another (H), just as you did at the beginning. Connect the (A)’s and the (H)’s on the other side as well. Once you reach the last (H) carry on through the standalone (H) and the (H) on the other side, turn around through its other hole and pick up 3(D) and connect into the free hole of the standalone (H) and then repeat on the other side.
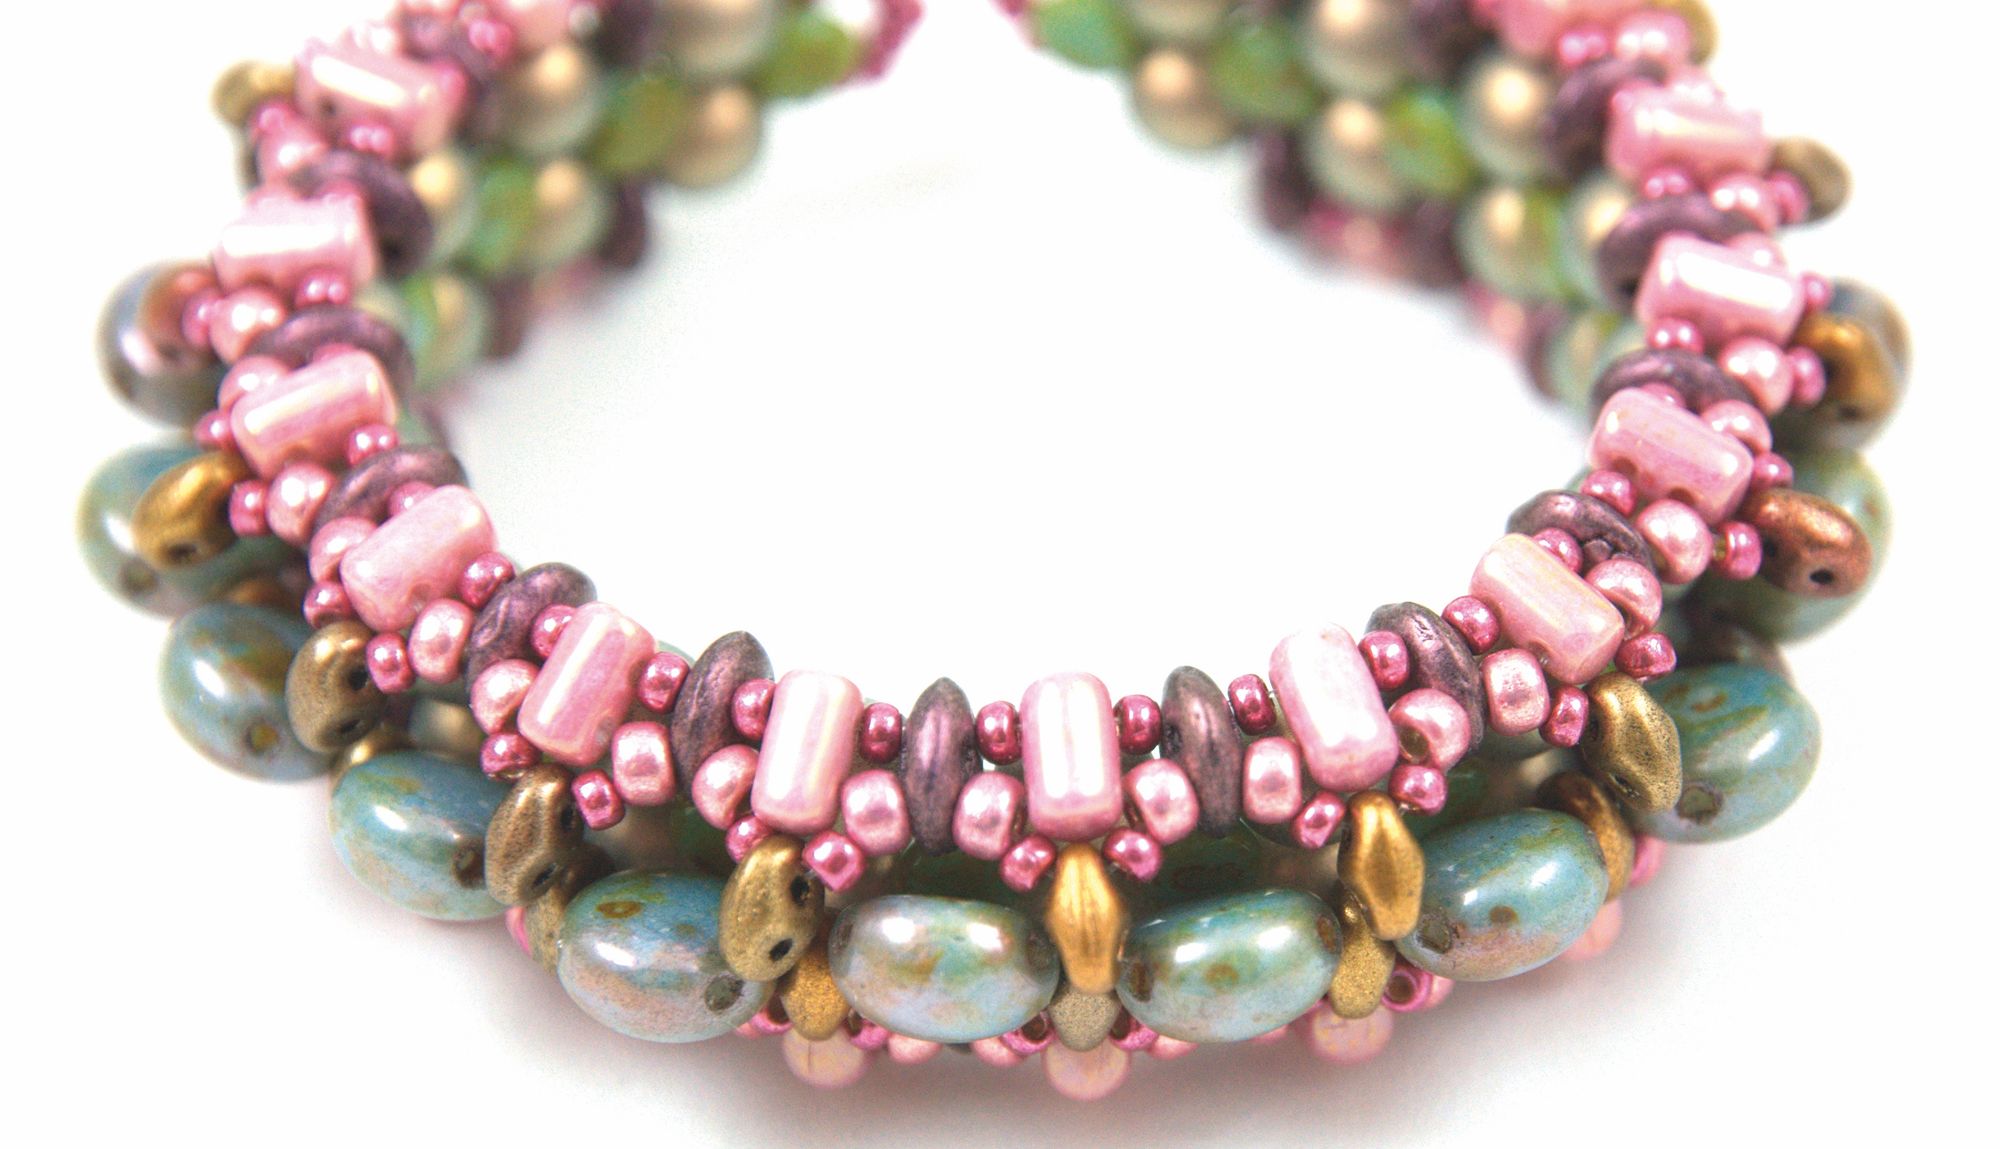
Turn around and (as shown on picture below) connect back to the first (A). Re- peat the same at the other end then go through the (H)’s and (A)’s a couple of times. Add rings and clasps.
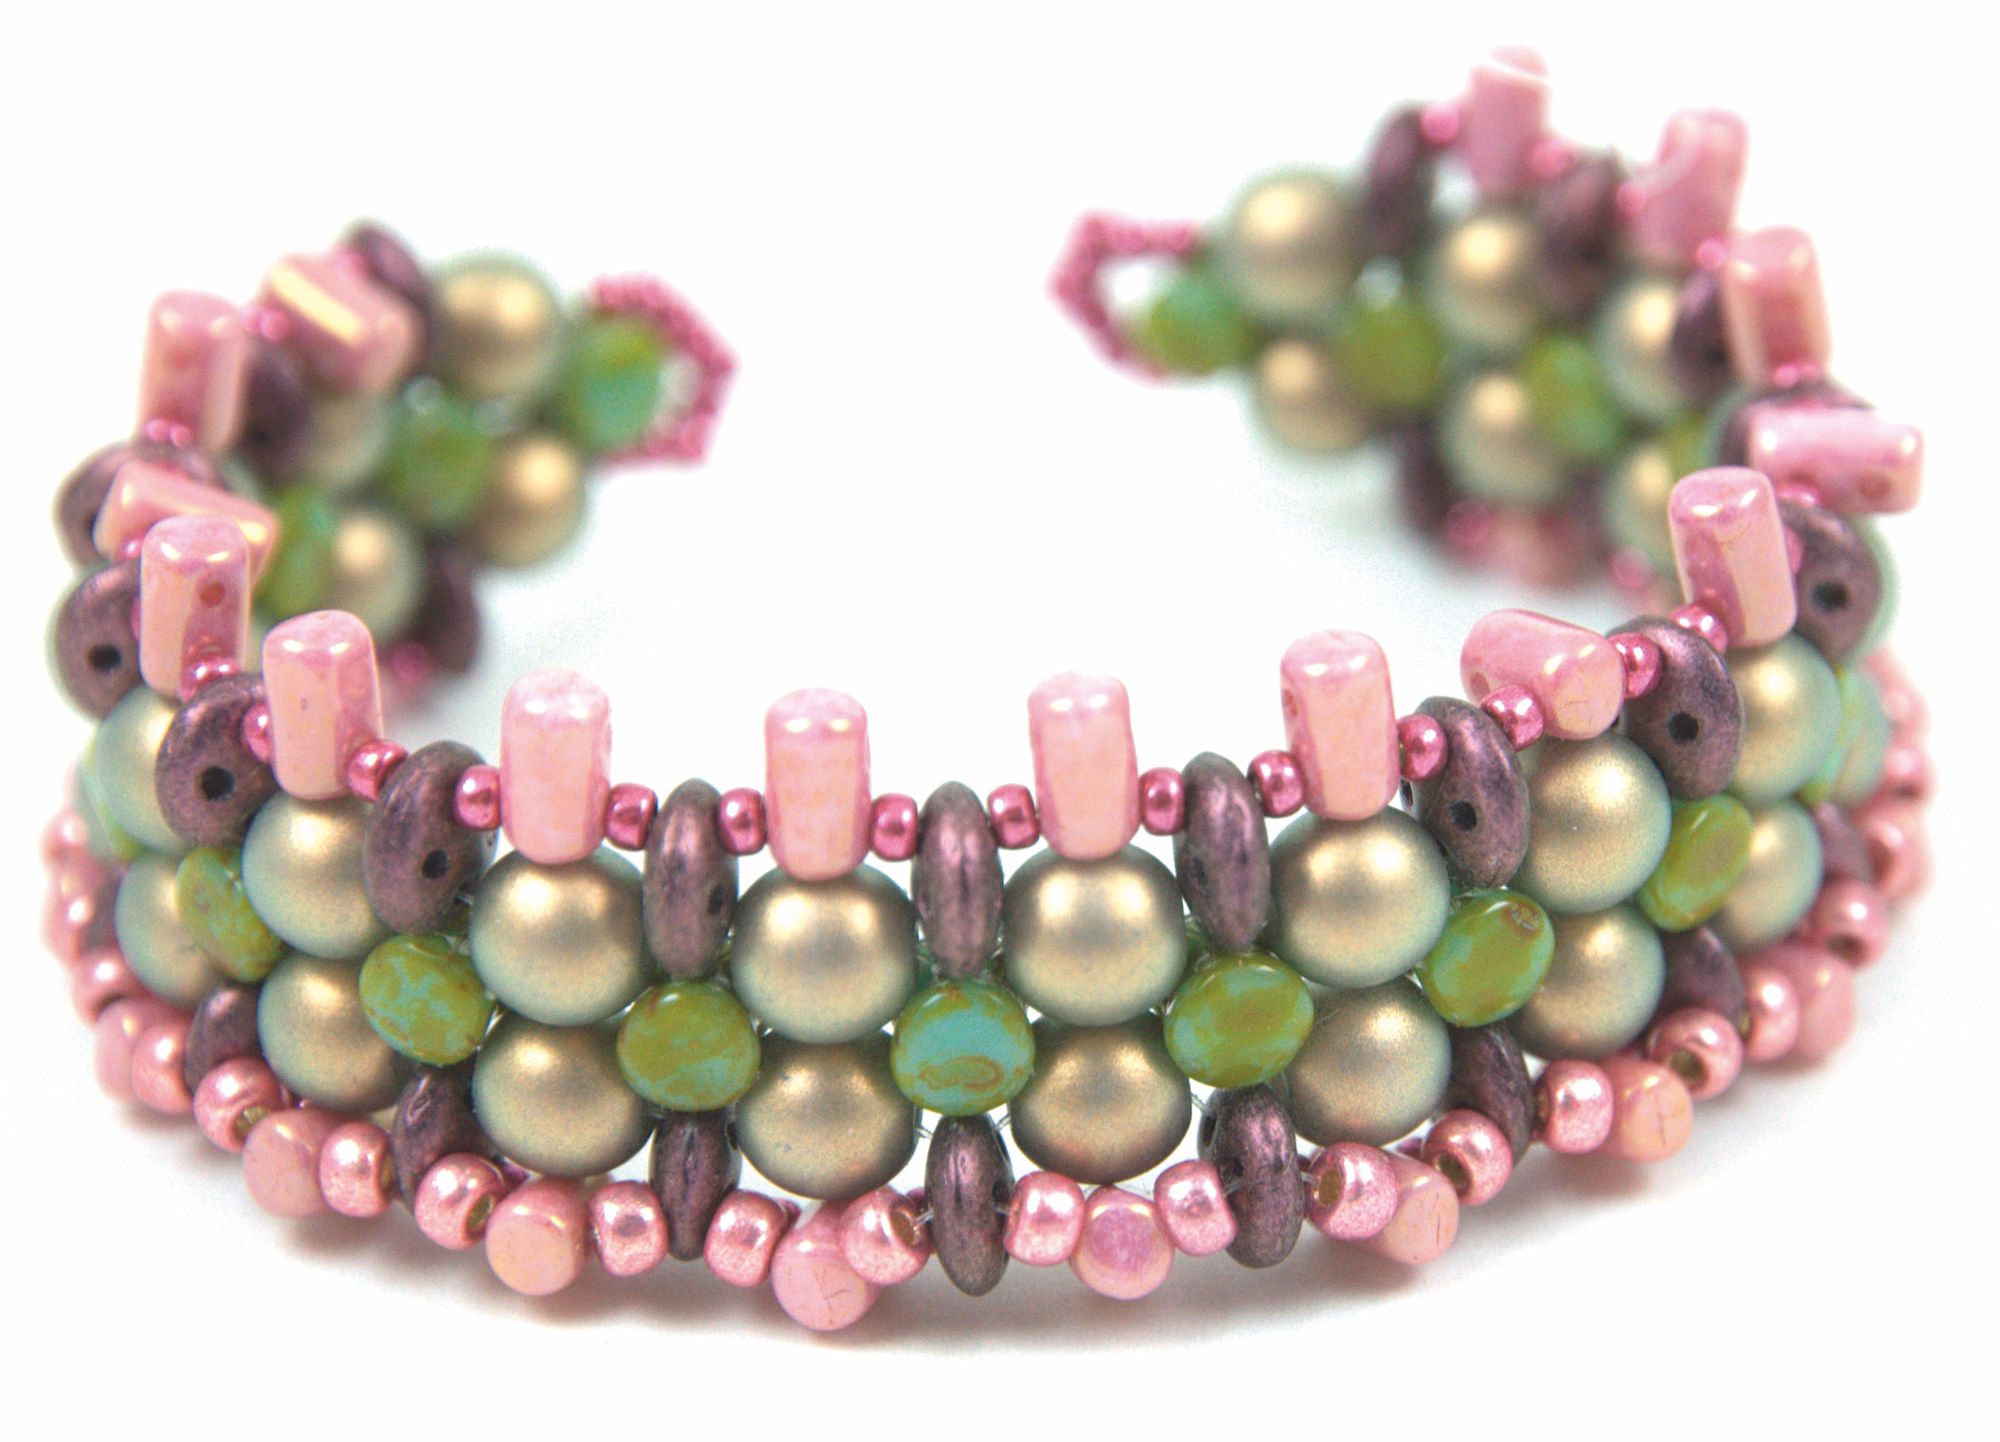
And you will have your beautiful finished piece, as below.