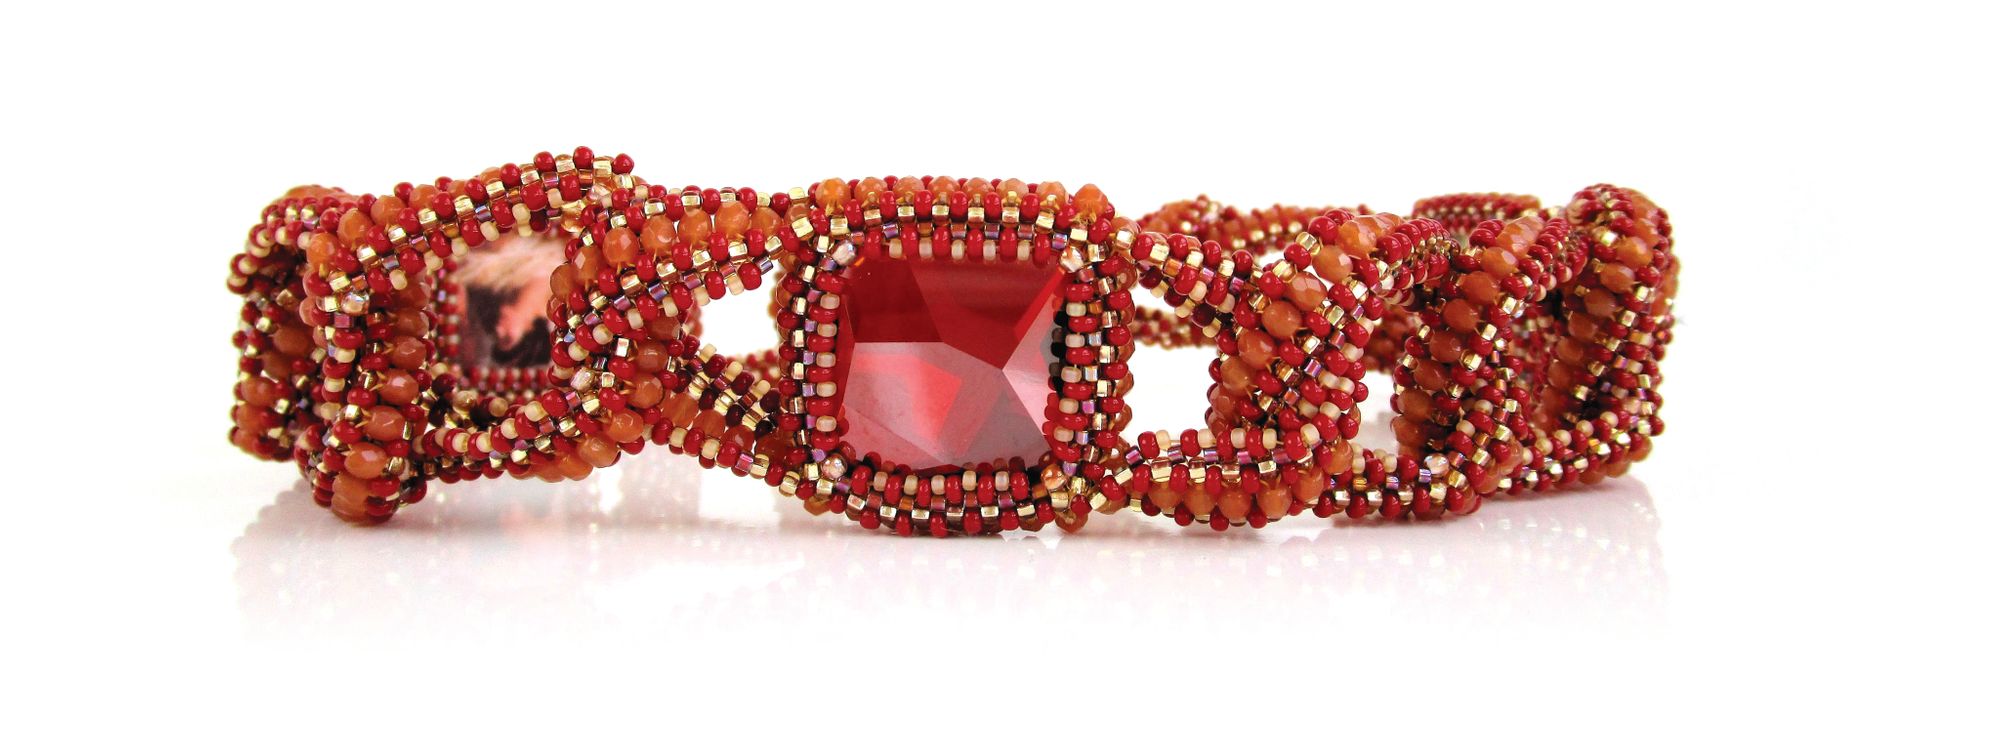
If you’ve been inspired by some of the beautiful beadweaving projects available, but are unsure where to start then fear not! Here we explain step by step one of the most popular stitches, as well as all of the kit you need to get started. Right Angle Weave can be used for many of the same purposes as peyote, it creates a more flexible piece of work, so is ideal for bezels on stones of all shapes and sizes as well as for ring bands. This stitch is often the basis for more complicated projects, and there are also many modifications to RAW, so it is an ideal stitch to conquer early on!
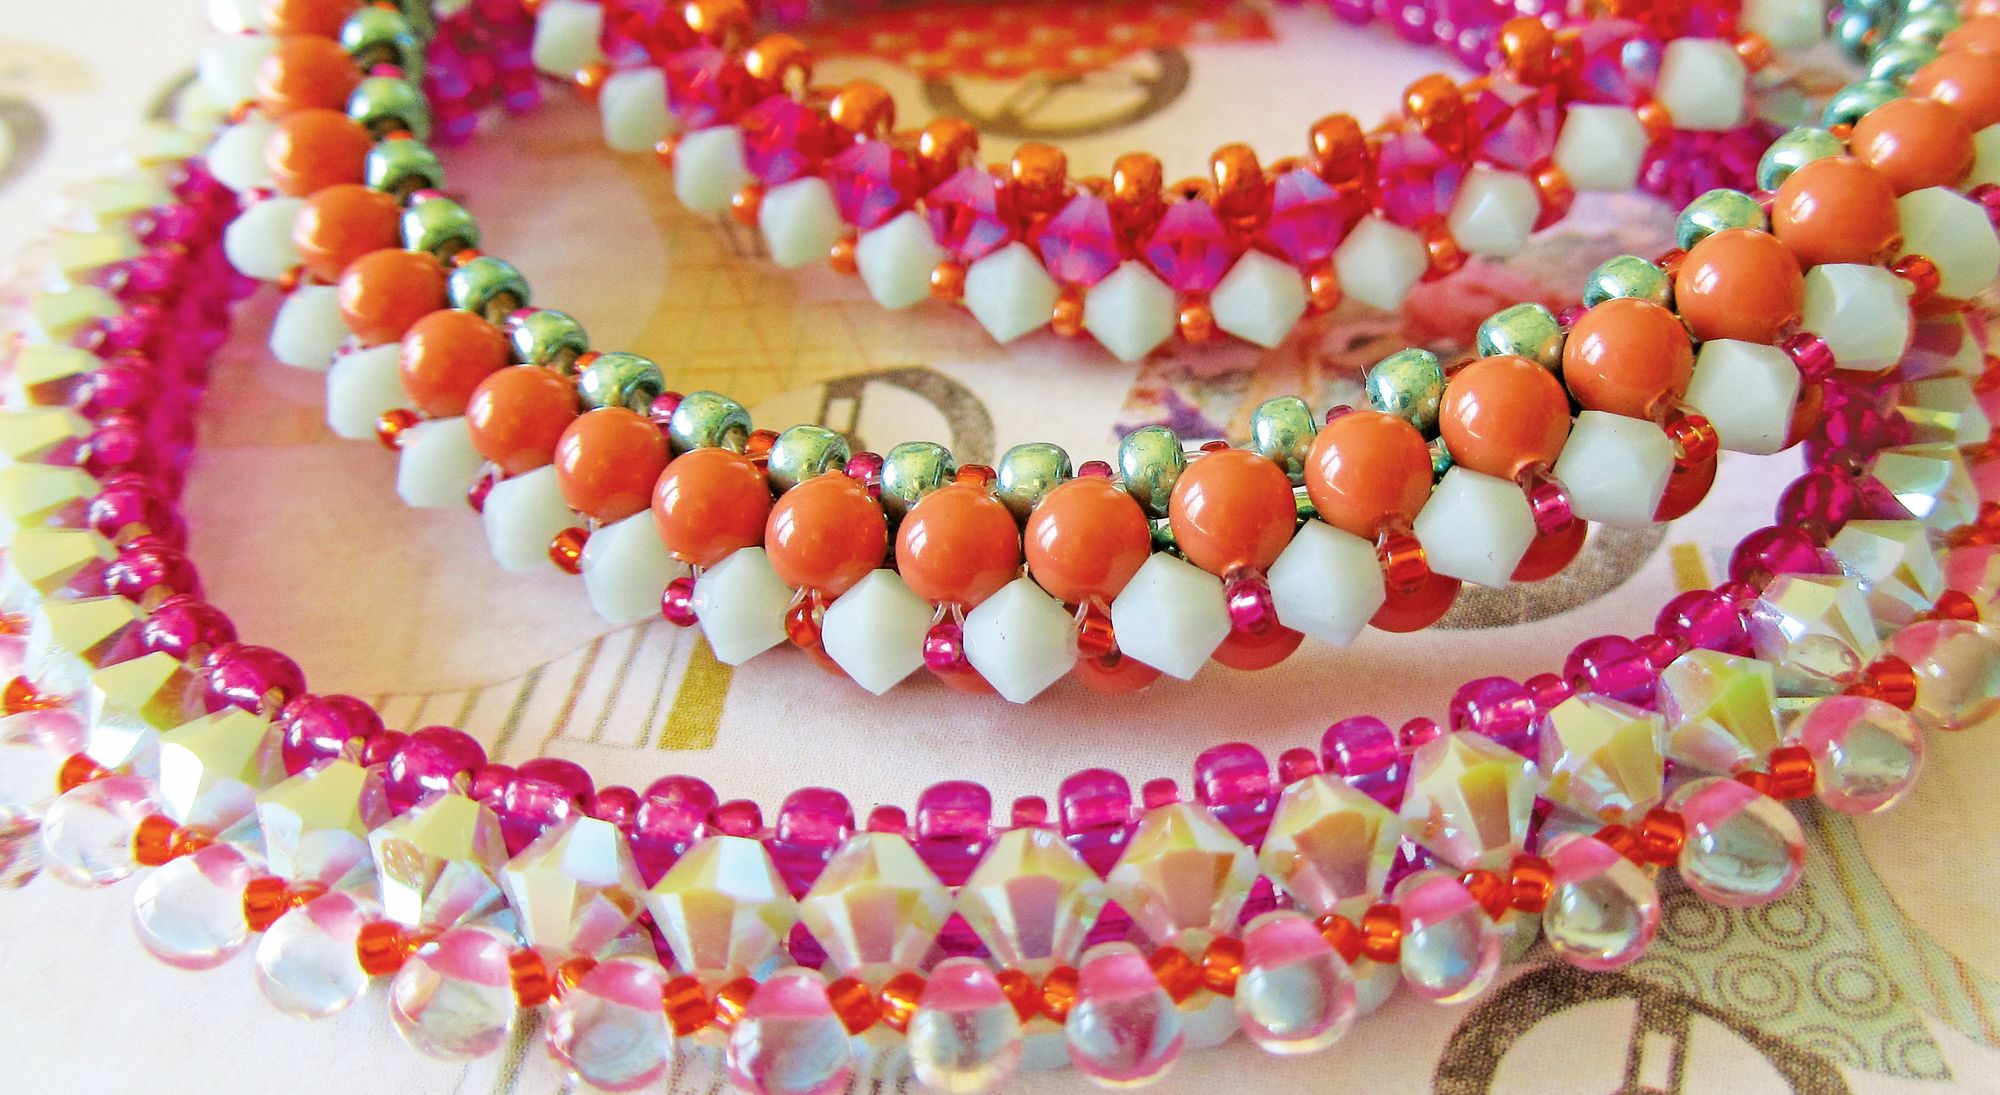
Right Angle Weave can be worked using all of the usual beadweaving threads such as Fireline, One-G or KO and many types of beads such as seed beads and Delicas.
One difference with RAW is that the shape of the thread- paths means that you can also easily stitch with larger faceted beads such as bicones. The shape of bicones means they sit together rather nicely in the stitch. RAW lends itself to 3- Dimentional designs. This type of 3D work with crystals is often seen in Japanese beadwork.
Another differentiator of RAW is the thread. In addition to regular beading threads you can also easily use clear Monofilament thread such as Supplemax when stitching RAW. A very thin thread such as 0.15mm can be used with a needle, while the 0.25mm is good for many projects and you don’t need to use a needle. This thread is ideal for 3D projects or when working with crystals.
RAW can be finished in the same was as with other stitches, but if you are work- ing with Supplemax of Fireline I recommend avoiding the use of knots and instead just working through the beadwork, following the thread- path, until it feels secure and unlikely to come loose.
Let’s get started!
Right Angle Weave (RAW) – single needle
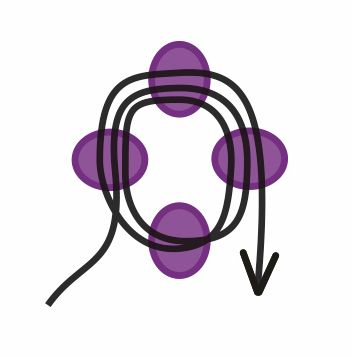
- Pick up 4 x seed beads. Pass through the first bead again, working away from the tail, to join in a loop. Pass through all these beads again to reinforce this first unit and prevent it slipping while you work. It’s good practice to pass through the next two beads to get away from the tail thread.
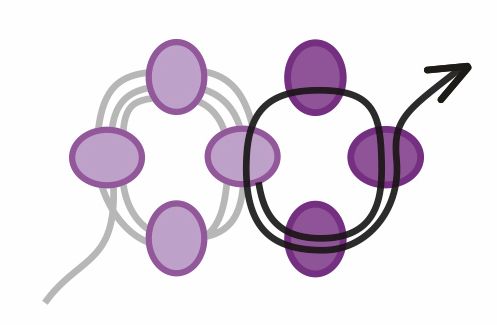
2. Pick up 3 x seed beads. Pass through the bead you exited from in the first unit to create a loop. Pass through the first two beads added in this step. This is Unit Two. To continue in RAW, repeat this step until you have the desired number of units.
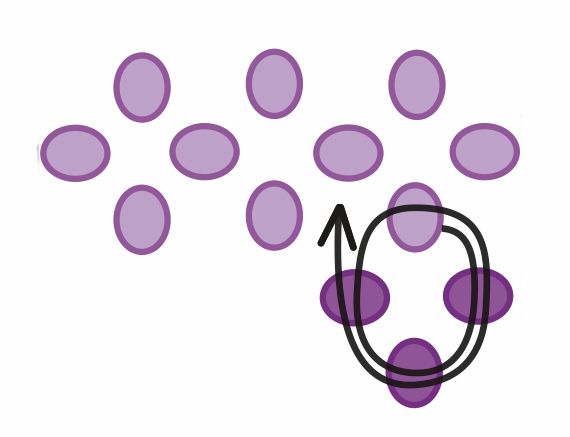
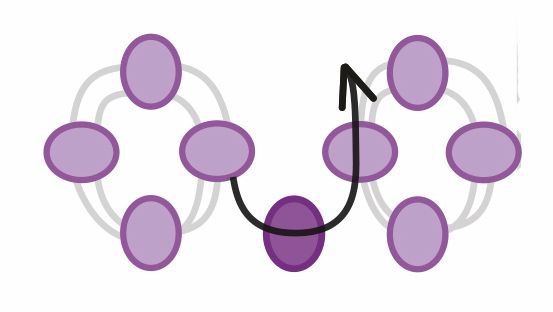
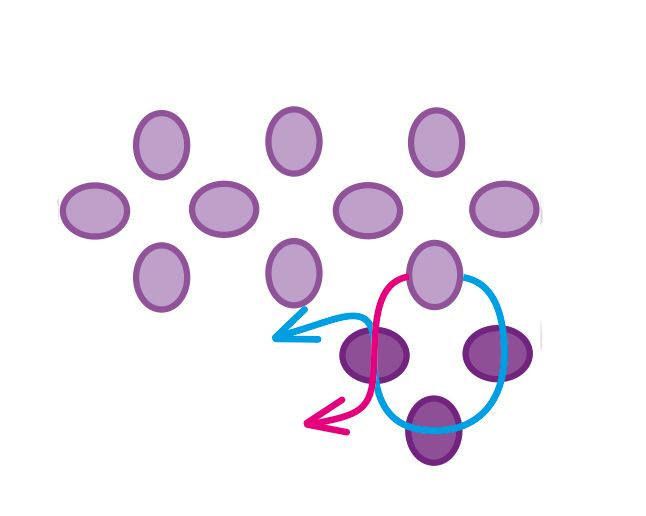
3. To create an additional row, work through to exit from a side bead in the final unit (the third bead picked up in that unit). Make sure you are exiting towards the end of the strip, not towards the beginning. Pick up 3 x seed beads. Pass through the bead you exited from and the three beads again.
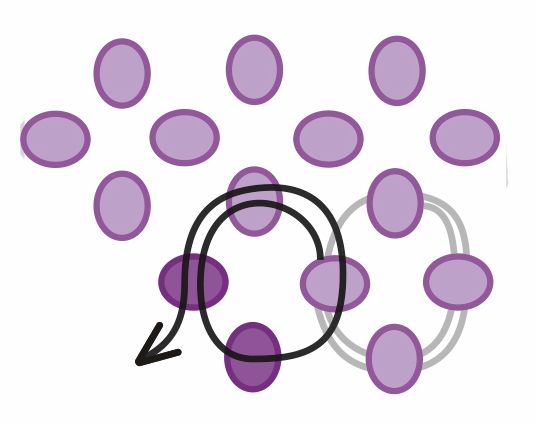
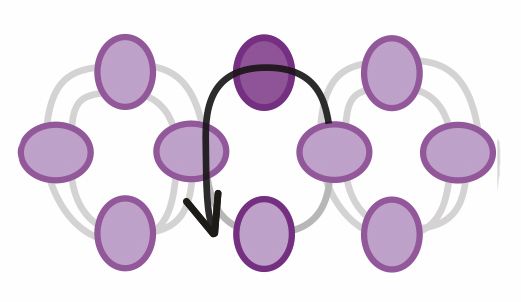
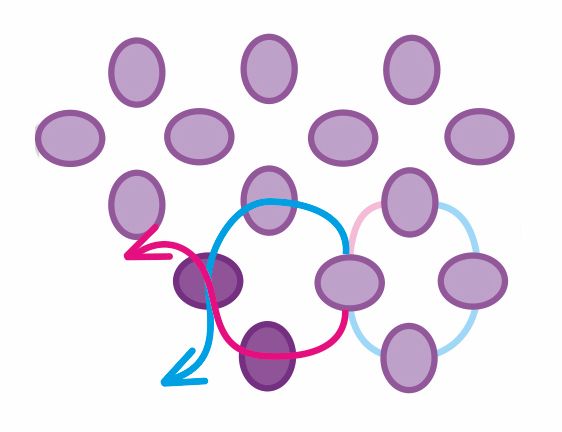
4. Pass into the next side bead on row1. Pick up 2 x seed beads Pass into the third bead from the previous unit and the side bead again. Pass into the first bead from the new unit. Now you are in position to start the next unit.
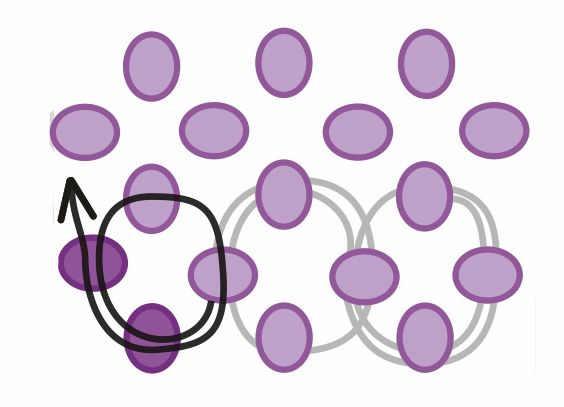
5. This time, pick up 2 x seed beads and then pass into the next bead in the side of the row, working towards the previous unit. Pass through the last bead from the previous unit and the two new beads. Repeat steps 4 and 5, adding two beads each time and joining to the side of row one.
Joining single needle RAW
This is useful for bezels. To join a strip of RAW to make a complete ring, follow these steps.
6. Exit from the end bead. Pick up 1 x seed bead. Ensure your strip is not twisted and pass through the end bead from the first unit.
7. Pick up one more seed bead and pass through the bead from the last unit. This will create a complete unit. Check your strip is not twisted.
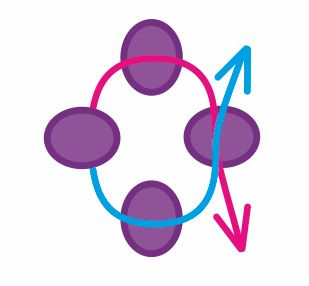
8. You’ll begin with a needle threaded on each end of your working thread. Pick up 3 x size 11 seed beads with your right hand needle, let them drop down the thread. Pick 1 x size 11 with your left hand needle, pass the right needle through this bead but in the opposite direction – this is a crossover bead. This is the first unit of right angle weave. Push this unit a third of the way down your thread.

9. To create the next unit, pick up 1 bead on each needle, then pick up another bead on the left needle and pass the right needle through the bead (crossover). Continue in this way until you have a strip of RAW the desired length.
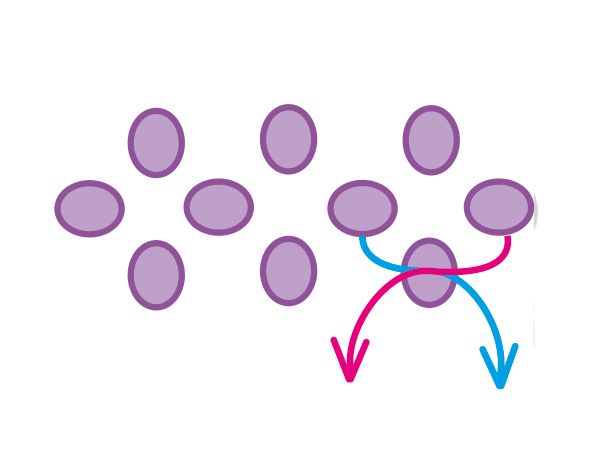
10. To create a second row, exit from a side bead with your right hand needle (the first or third bead picked up in a step). With the second needle, follow the threadpath through the beads to exit from the same bead but from the opposite side.
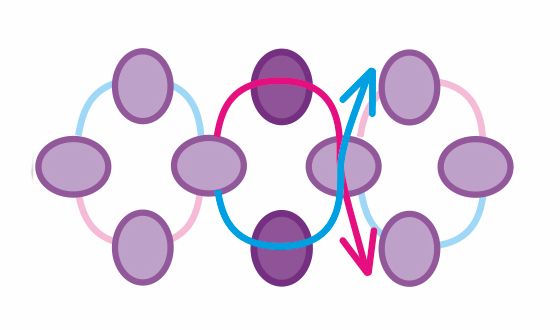
11. With the thread exiting towards the end of the strip (shown in blue in the diagram), pick up 3 x seed beads. Take your other thread through the third bead in a crossover.
12. Take the thread nearest row 1 (shown in blue in diagram) through the next edge bead in row 1. On the other thread pick up 2 x seed beads. Cross the threads through the second bead picked up in this step. Repeat this step to continue the row.
Joining two needle RAW
To join a strip of two needle RAW to make a complete ring, follow these steps.
13. Exit from the end bead, with both threads coming from opposite sides of the bead. Pick up 1 x seed bead on each needle. Ensure your strip is not twisted and pass both needles through the end bead from the first unit (crossover).
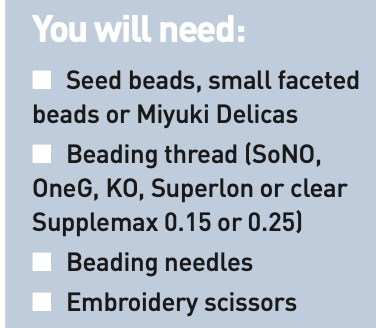
BEADLINK: Author: Chloe Menage of www.pinkhot.co.uk