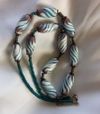
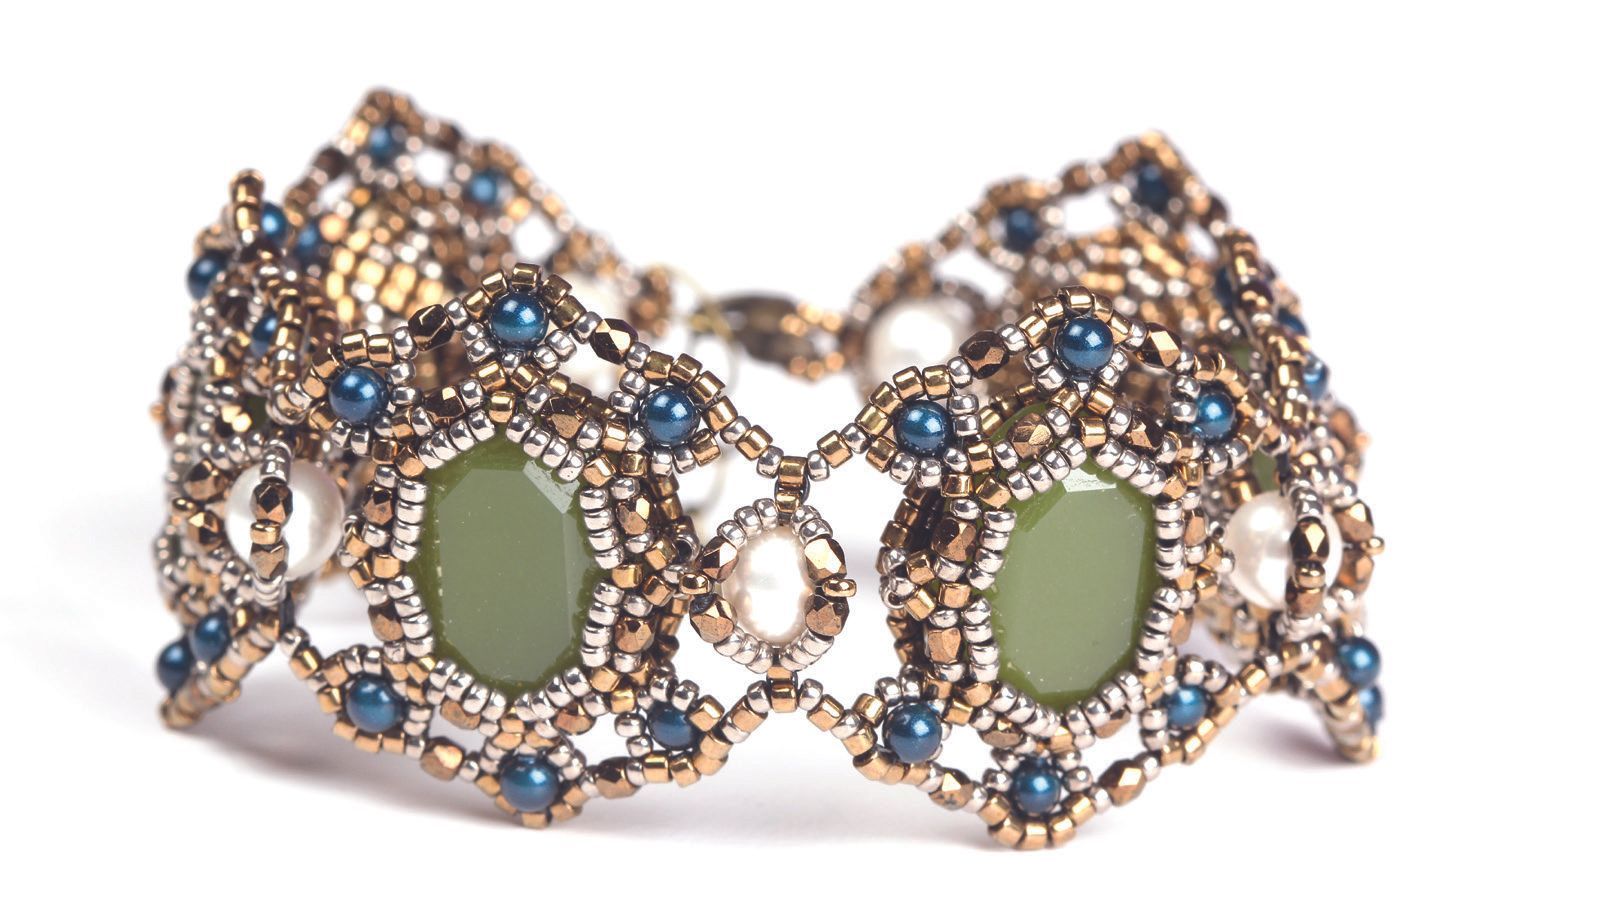
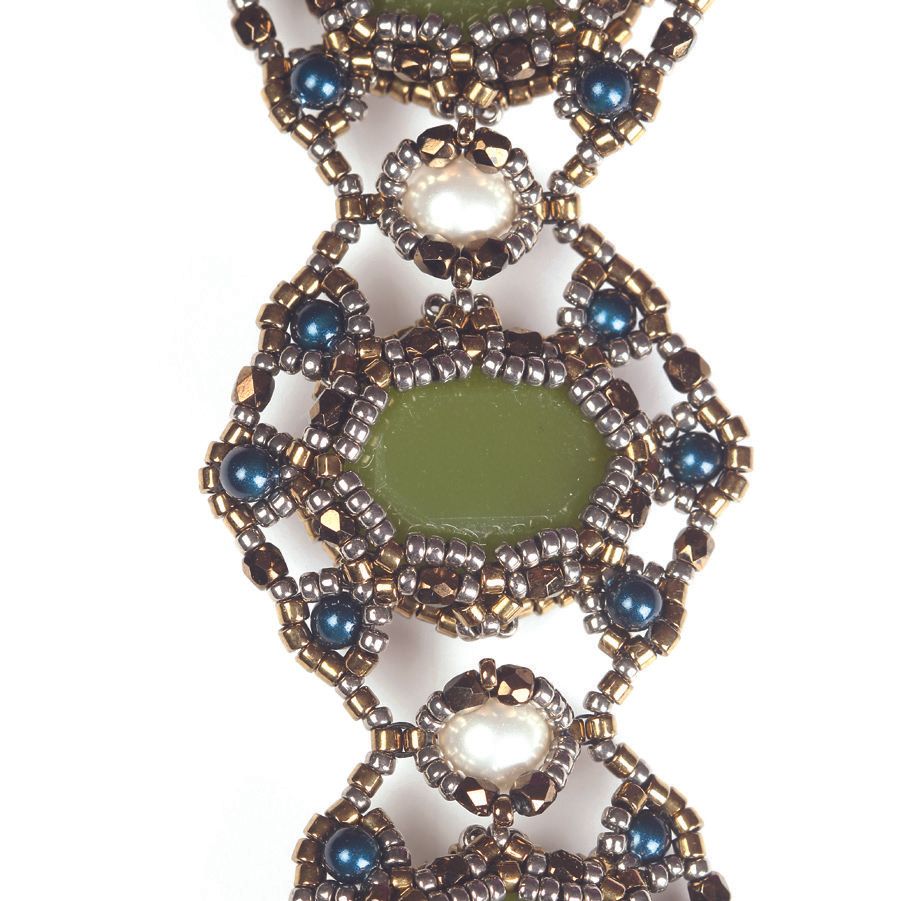
Inspired by Flemish Baroque Painter Clara Peeters, who was well known for her paintings of food and banquets. This stunning bracelet is wonderful if you’re looking for a project you can really get your teeth into. After the bracelet, you can go on to make a fab pendant to match, which would look great on a beaded rope. The bracelet looks the best when it’s beaded from metallic looking seed beads, and there is a huge selection out there to choose from! If the cabochons and the pearls are vibrant, eye-catching colours, the bracelet becomes more dynamic. You can use Swarovski Elements oval shaped fancy stones for even more bling and luxury.

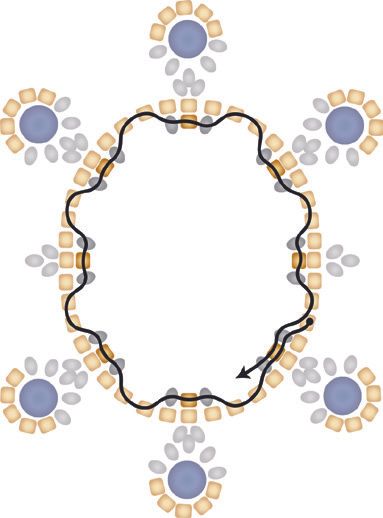
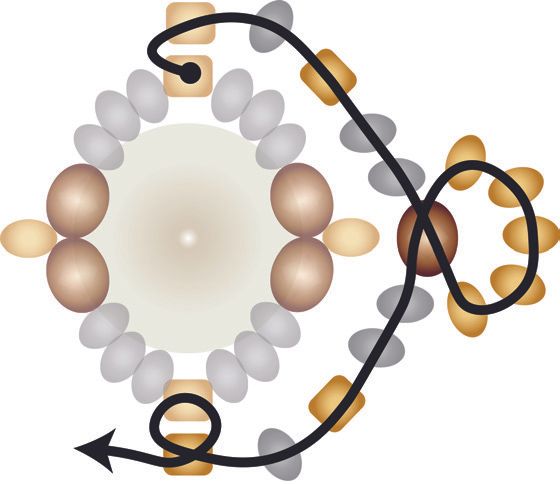
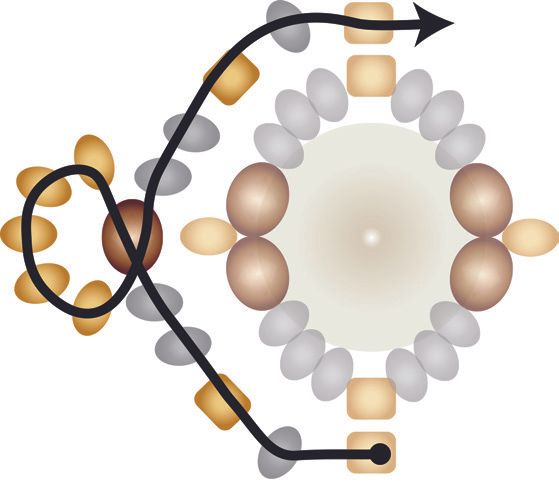
- String 40(A) beads and weave once more through the first one to join the beads.
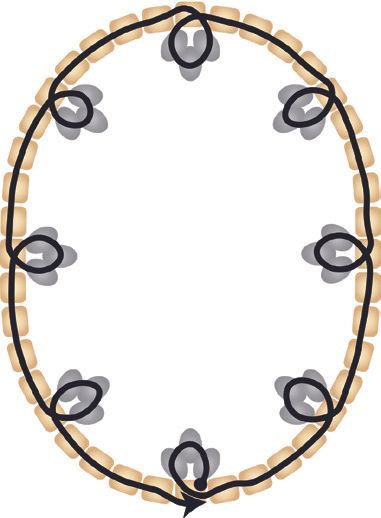
2. Pick up 3(B) and sew back through the (A) bead you’re coming out of. Sew through 5(A) and repeat adding the (B) beads seven more times. All together you should have 8 picots, each one con- sisting of 3(B) beads and there should always be 4(A) beads in between them. Finish by going through the (A) bead you exited at the beginning of this step.
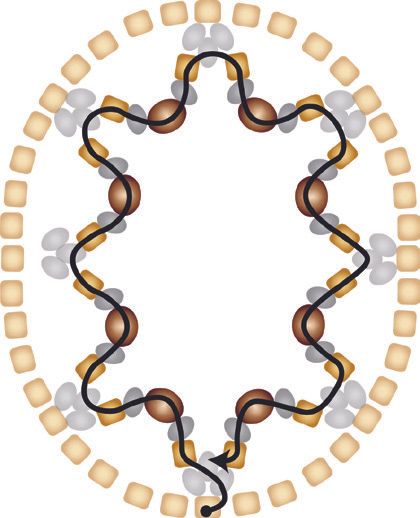
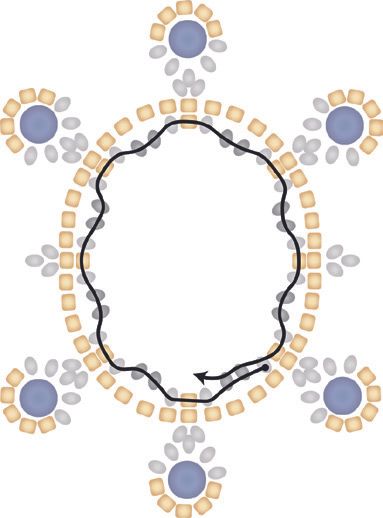
3. Sew through the first 2(B) beads you picked up at the beginning of Step 2. You are now exiting the middle bead of the first picot you created. * Pick up 1(A), 1(B), 1(C), 1(B), 1(A) and sew through the middle bead of the picot from the left hand side. Continue from * all around, until you reach the middle bead of the first picot.
4. You are now exiting a (B) bead in the middle of the picot you created at the beginning of Step 2, and your thread is hanging from the right hand to the left hand side. Sew through (A), (B), (C), (B),* Pick up 1(A) bead and sew through the nearest combination of (B), (C), (B) beads on the left hand side. Repeat from * seven times. After filling in the last (A) bead and sewing through (B), (C), (B), sew through the first (A) bead you added at the beginning of this step.
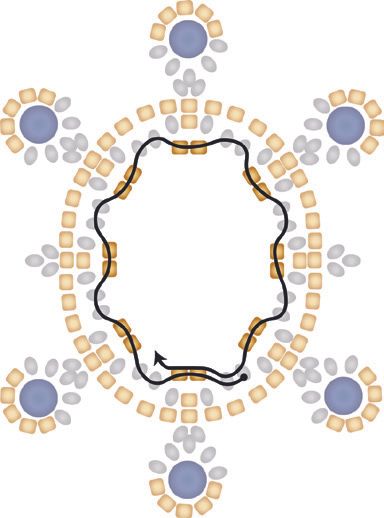
5. * Pick up 4(B) beads and sew through the nearest (A) bead on the left hand side, from the ones you picked up dur- ing Step 4. Repeat from * seven times. Finish by going through the (A) bead you were exiting at the beginning of this step.
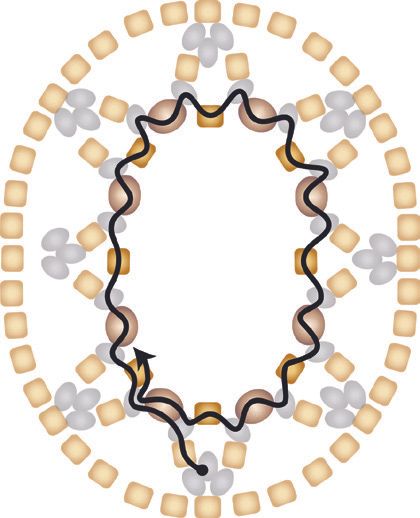
6. Sew through (B), (C), (B), (A), (B), (C), (B), (A), (B) and you are now exiting the middle bead of the fourth picot of the 3(B) beads you created in Step 2. Important: during the next steps not all beads will be visible on the diagram to make it easier to read. The initial circle of 40(A) will not be drawn, and the diagrams will show only the middle beads of the picots. Please don’t remove any of the beads!
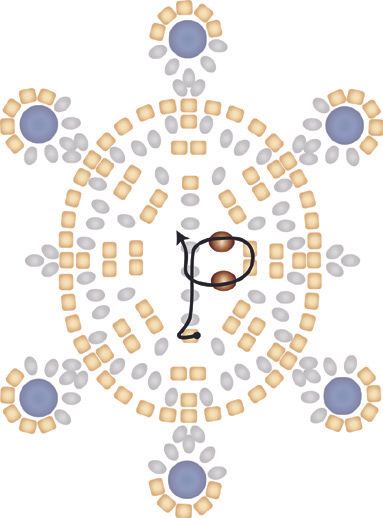
7. Pick up 1(D) and 1(A) and sew back through the (D) bead, moving through the (B) you exited at the beginning of this step.
8. Pick up 2(B) and 2(A) and sew through the (A) you added in Step 7. Pick up 2(A) and 2(B) and sew through the (B) you were exiting at the beginning of this step.
9. Sew through (A), (B), (C), (B), (A), (B) to get to the middle (B) bead of the next picot.
10. Repeat Steps 7-8 to attach and decorate one more (D) bead.
11. Repeat Steps 9-10 to attach and deco- rate the third (D) bead.
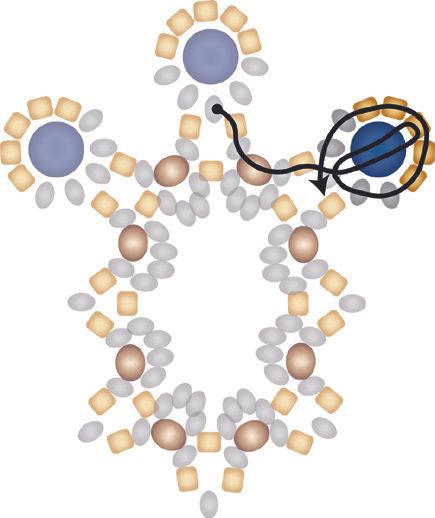
12. You are now exiting the (B) bead un- der the third (D). Skip one picot and sew to the second one by moving through (A), (B), (C), (B), (A), (B), (C), (B), (A), (B).

13. Repeat Steps 7-11 to attach and deco- rate 3(D) beads at the lower part of the motif. You are now exiting the (B) to which you attached the sixth (D) bead (outlined with green on the diagram).
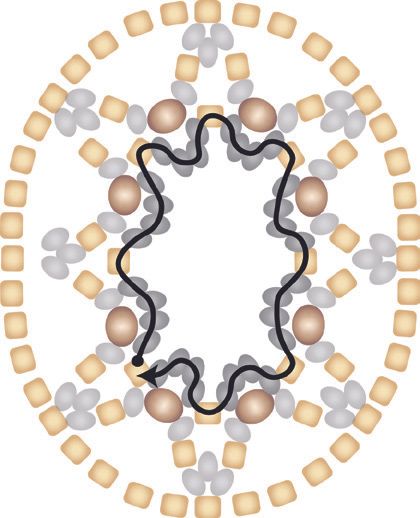
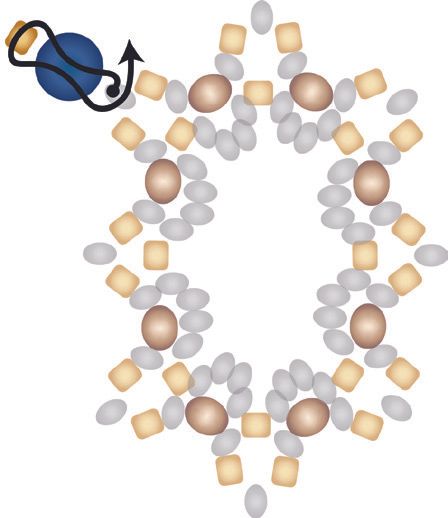
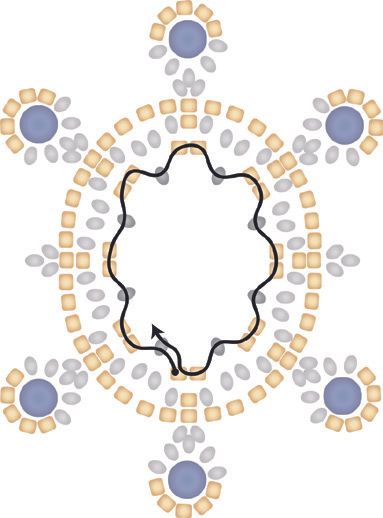
14. In this step you will need to move from the (B) with green outline, to the (A) with red outline. Do this by sewing through (A), (B), C), (B), (A), (B), (B) and the (A) bead, which is holding the picot without a (D) bead on the left hand side of the motif. It is part of the initial circle of 40(A) beads you picked up in Step 1.
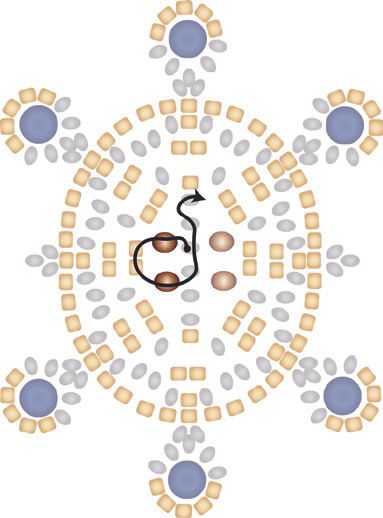
15. You are now finished working on the front side of the bezel. Flip it over, so you are looking at the back side now and the (A) with red outline with your thread is on the right hand side. The thread should hang downwards. Place the cabochon in the bezel, with the front side facing down. Sew through 3(A) beads below the (A) holding the picot.
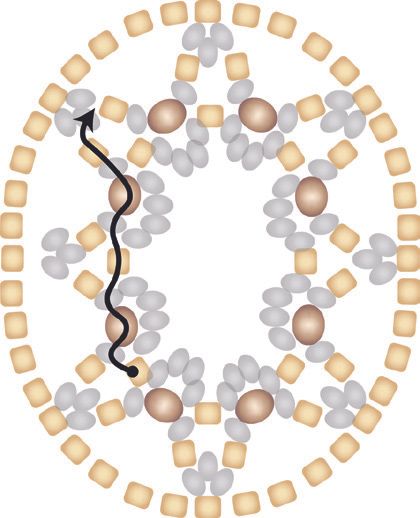
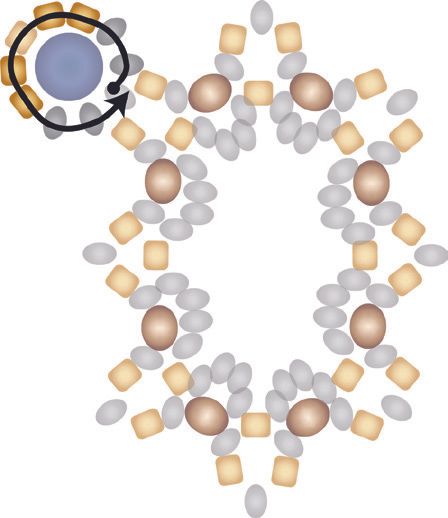
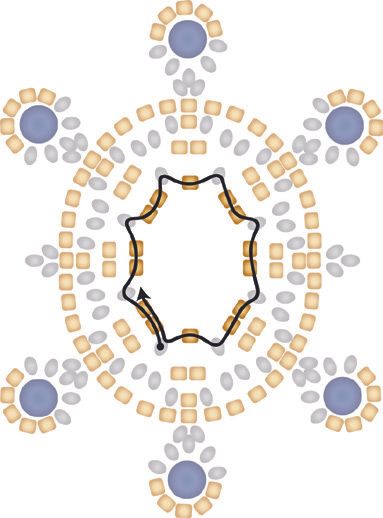
Important: the cabochon will not be on the diagrams during the following steps to make them easier to read. Please don’t remove it!
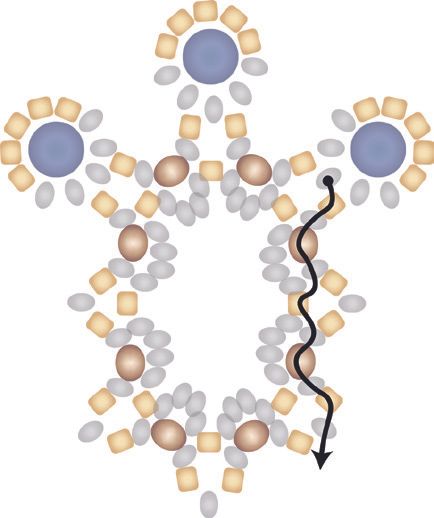
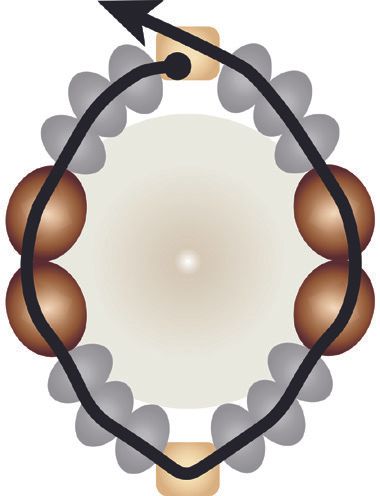
16. You are now in the initial circle of 40(A) you picked up in Step 1. * Pick up 1(B), 1(A), 1(B), skip 3(A) beads in the circle and go through 2(A) exactly between two picots. Repeat from * seven times. After adding the last grouping of (B), (A), (B) and sewing through 2(A) beads from the circle of 40, sew through the first group- ing of (B), (A), (B) (you picked up at the beginning of this step), to step up to the next row.
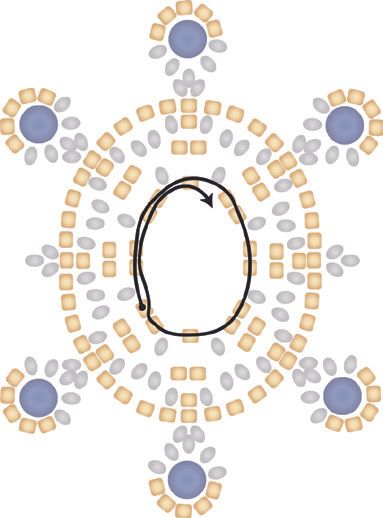
17. * Pick up 2(B) and sew through the near- est grouping of (B), (A), (B) on the left hand side. Repeat from * seven times. After filling in groupings of 2(B)s all around, sew through the first 2(B) you added at the beginning of this step, to step up to the next row.
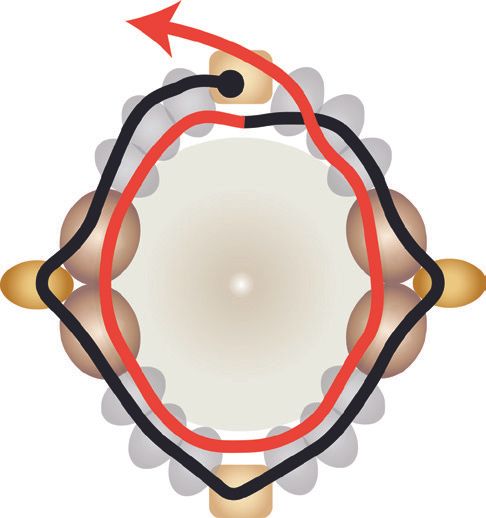
18. * Pick up 2(A), sew through the closest grouping of 2(B) on the left hand side. Repeat from * seven times. Sew through the first grouping of 2(A) beads you added at the beginning of this step to step up to the next row.
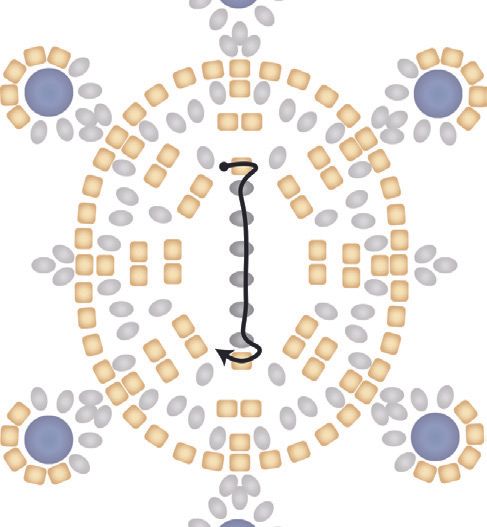
19. * Pick up 1(B), sew through the closest grouping of 2(A) on the left hand side. Repeat from * seven times. Sew through the first (B) you added at the beginning of this step to step up to the next row.
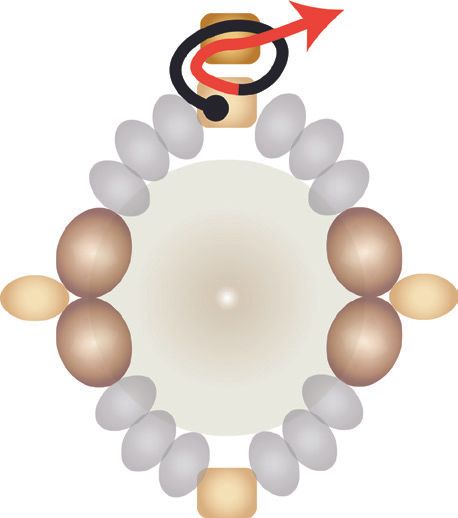
20. * Pick up 2(A) and sew through the clos- est (B) bead on the left hand side. Repeat from * two more times. ** Pick up 1(A) and sew through the closest (B) bead on the left hand side. Repeat from * three times.
Repeat from ** one time. Sew through the first grouping of 2(A) you added at the beginning of this step, to step up to the next row.
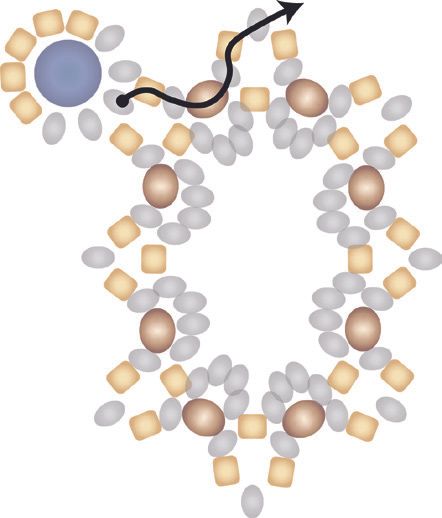
21. Join all the (A) added in the previous step by going all around through the beads. Finish after sewing through the (A) bead at the top of the motif.
22. You are exiting now the (A) at the top of the motif, and the thread should hang from left to right. Pick up 6(B) and sew through the (A) at the bottom, opposite from the (A) you were exiting at the be- ginning of this step.
23. Sew back up through 4(B) beads, pick up 1(C) and sew downwards through 2(A) on the right hand side. Pick up 1(C) and sew up through 2(B) beads. This will be the middle two of the six you picked up in Step 22.
24. Pick up 1(C) and sew down through 2(A) on the left hand side. Pick up 1(C) and sew up through 4(B) beads. This will be the upper four of the six you picked up in Step 22. Sew through the (A) bead at the top from the left to the right hand side.
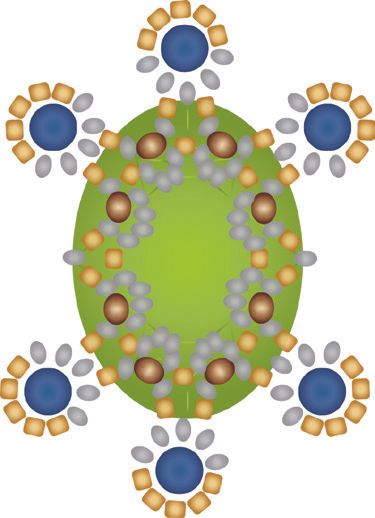
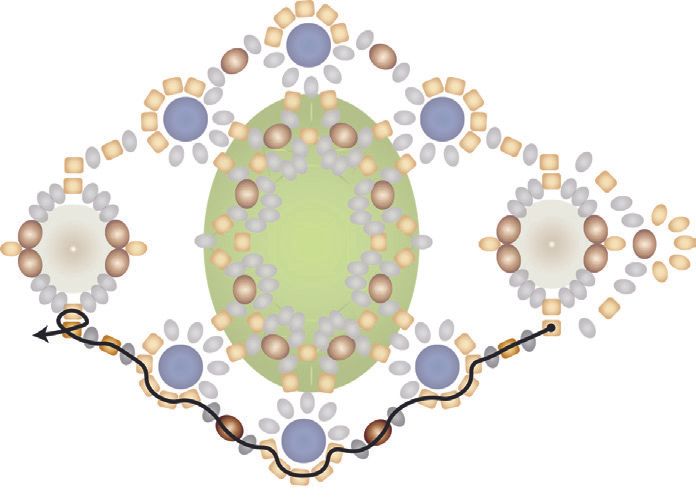
25. Secure and cut off both ends of the threads. Your first motif is ready. Bead as many motifs as you need for a bracelet. My 18cm / 7.01 inch bracelet (measured without the clasp and extension chain), has 6 motifs.
26. Start to work with a new thread. Pick up 1(A), 1(E), 1(A) and sew back through the (E) bead. Sew through the first (A) once more, from the same direction as before.
27. You are exiting now the (A) bead at the top, with the thread hanging from the right to the left hand side. Pick up 3(B), 2(C), 3(B) and sew through the (A) at the bottom, from the left to the right hand side. Pick up 3(B), 2(C), 3(B) and sew through the (A) at the top, from the right to the left hand side.
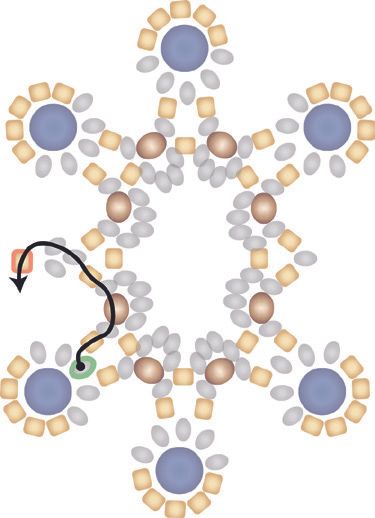
28. Sew through 3(B) and 1(C). Pick up 1(F). Continue downwards through (C) and 3(B). Sew through (A), 3(B), 1(C). Pick up 1(F). Continue through (C) and 3(B). Skip the (A) at the top and sew through 3(B), 2(C) and 3(B). Skip the (A) at the bottom and sew through 3(B), 2(C) and 3(B). Finish by going through the (A) bead at the top, crossing it from right to left hand side.
29. Pick up 1(A) and sew through the (A) at the top of (F), from the right to the left hand side. (You can go through these beads again once more to strengthen the connection.) Finish by sewing through the new (A) bead from left to right hand side.
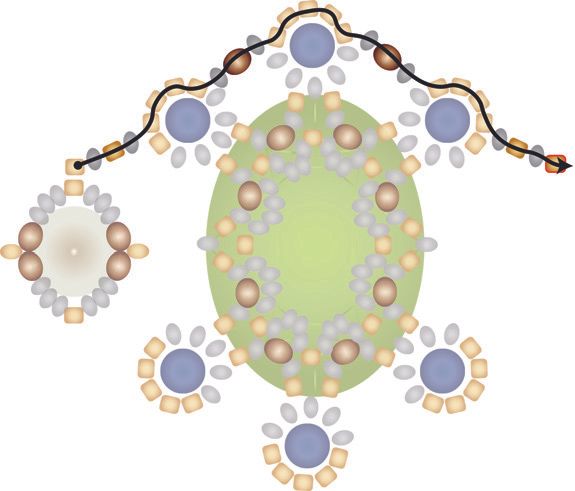
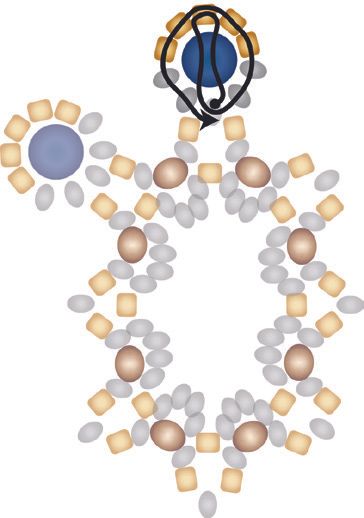
30. Pick up 1(B), 1(A), 1(B) and attach it to a motif you made earlier (Steps 1-25).
Do this by going through the 4(A) beads around 1(D), at the top left of the cabo- chon. Pick up 1(B), 1(C), 1(B) and sew through 5(A) around the (D), at the top of the cabochon. Pick up 1(B), 1(C), 1(B) and sew through 4(A) beads around the (D), at the top right of the cabochon. Pick up 1(B), 1(A), 1(B), 1(A).
31. Pick up 1(A) and attach it to the last (A) you picked up in Step 30 (with red outline). You can go through these beads again once more to strengthen the con-nection. Finish by going through the new (A), from right to left hand side.
32. Pick up 1(F) and 1(A) and sew back up through (F). Sew through the (A) you attached in Step 31, from the right to the left hand side. Decorate (E) by repeating Steps 27-28. Finish by going through 1(A) at the very top (with red outline on the diagrams), from the left to the right hand side. Repeat from step 30 until you connect all the motifs you made and your bracelet is long enough. Finish by adding and decorating an (E).
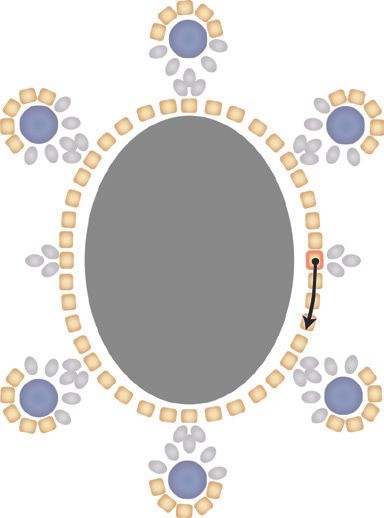
33. After adding and decorating the last (E) sew through the (A) at the very top, from left to right hand side. Pick up 1(B), 1(A), 1(B), 1(B), 1(C). Pick up enough (B) beads to form a loop for the extension chain. If the extension chain has soldered rings, now is the time to pick it up on your thread. Sew once more through the (C), from the same direction as before. Pick up 1(B), 1(B), 1(A), 1(B), 1(A). Attach the last (A) to the (A) bead below the last (E).
34. Pick up 1(B), 1(A), 1(B) and sew through 4(A) beads around the (D), at the bottom right of the cabochon. Pick up 1(B), 1(C), 1(B) and sew through 5(A) beads around the (D), at the bottom middle of the cabochon. Pick up 1(B), 1(C), 1(B) and sew through 4(A) around the (D), at the bottom left of the cabochon. Pick up 1(B), 1(A), 1(B), 1(A) and attach the last (A) to the (A) bead below the (E). Repeat Step 35, until you have joined all the motifs with the cabochons and the (E) beads.
35. After joining all the motifs you are exit- ing an (A) at the very bottom under an (E) bead, with the thread hanging from the right to the left hand side. Pick up 1(B), 1(A), 1(B), 1(B), 1(C) and also pick up enough (B) beads to form a loop, for the lobster clasp. If the lobster clasp has a soldered ring, now is the time to pick it up on your thread (precisely in the middle of the (B) beads). Sew once more through (C), from the same direction as before. Pick up 1(B), 1(B), 1(A), 1(B). Sew through the topmost (A) bead over the (E). Reinforce the bracelet by sewing all around the beads on the edge. Secure and cut off the extra threads, add clasp if you haven’t already done so.

BEADLINK: www.thestorytellingjeweller.com