When perusing the shops for inspiration for August's ‘Hot on the High Street’, I found that tropical colours and flowers seemed to be the order of the day and what could say summer more than flowers and bright colours?
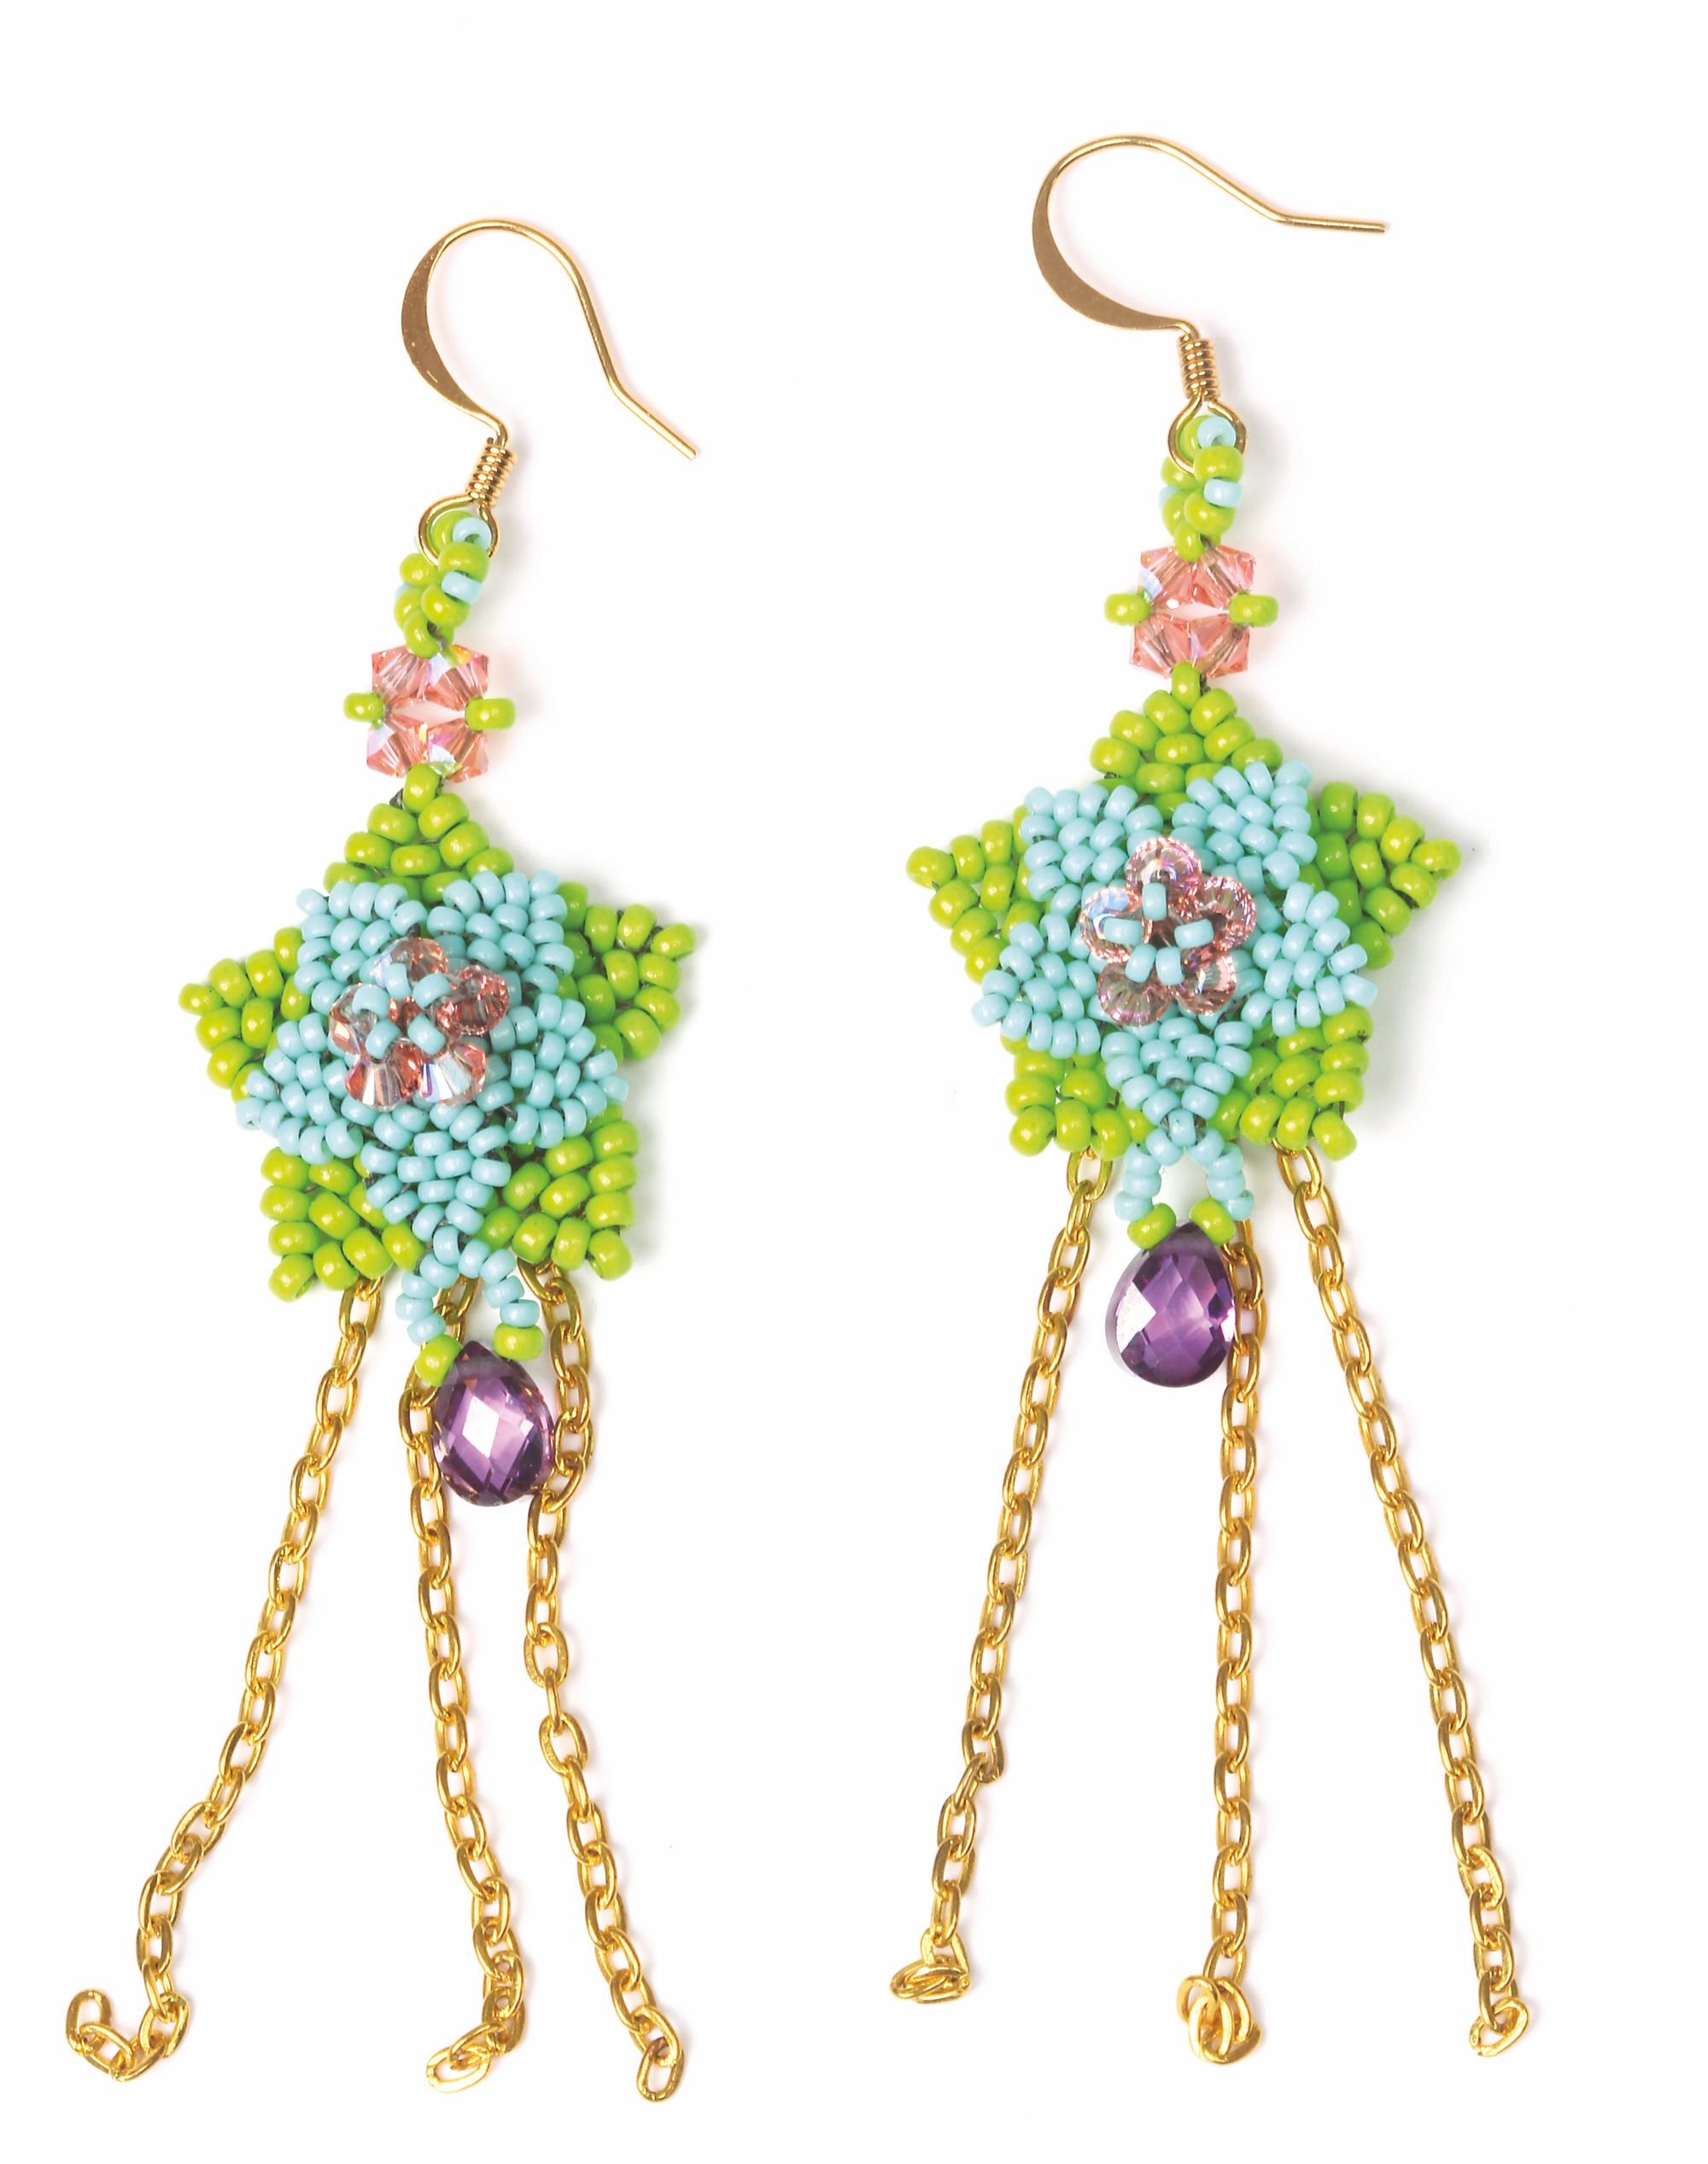
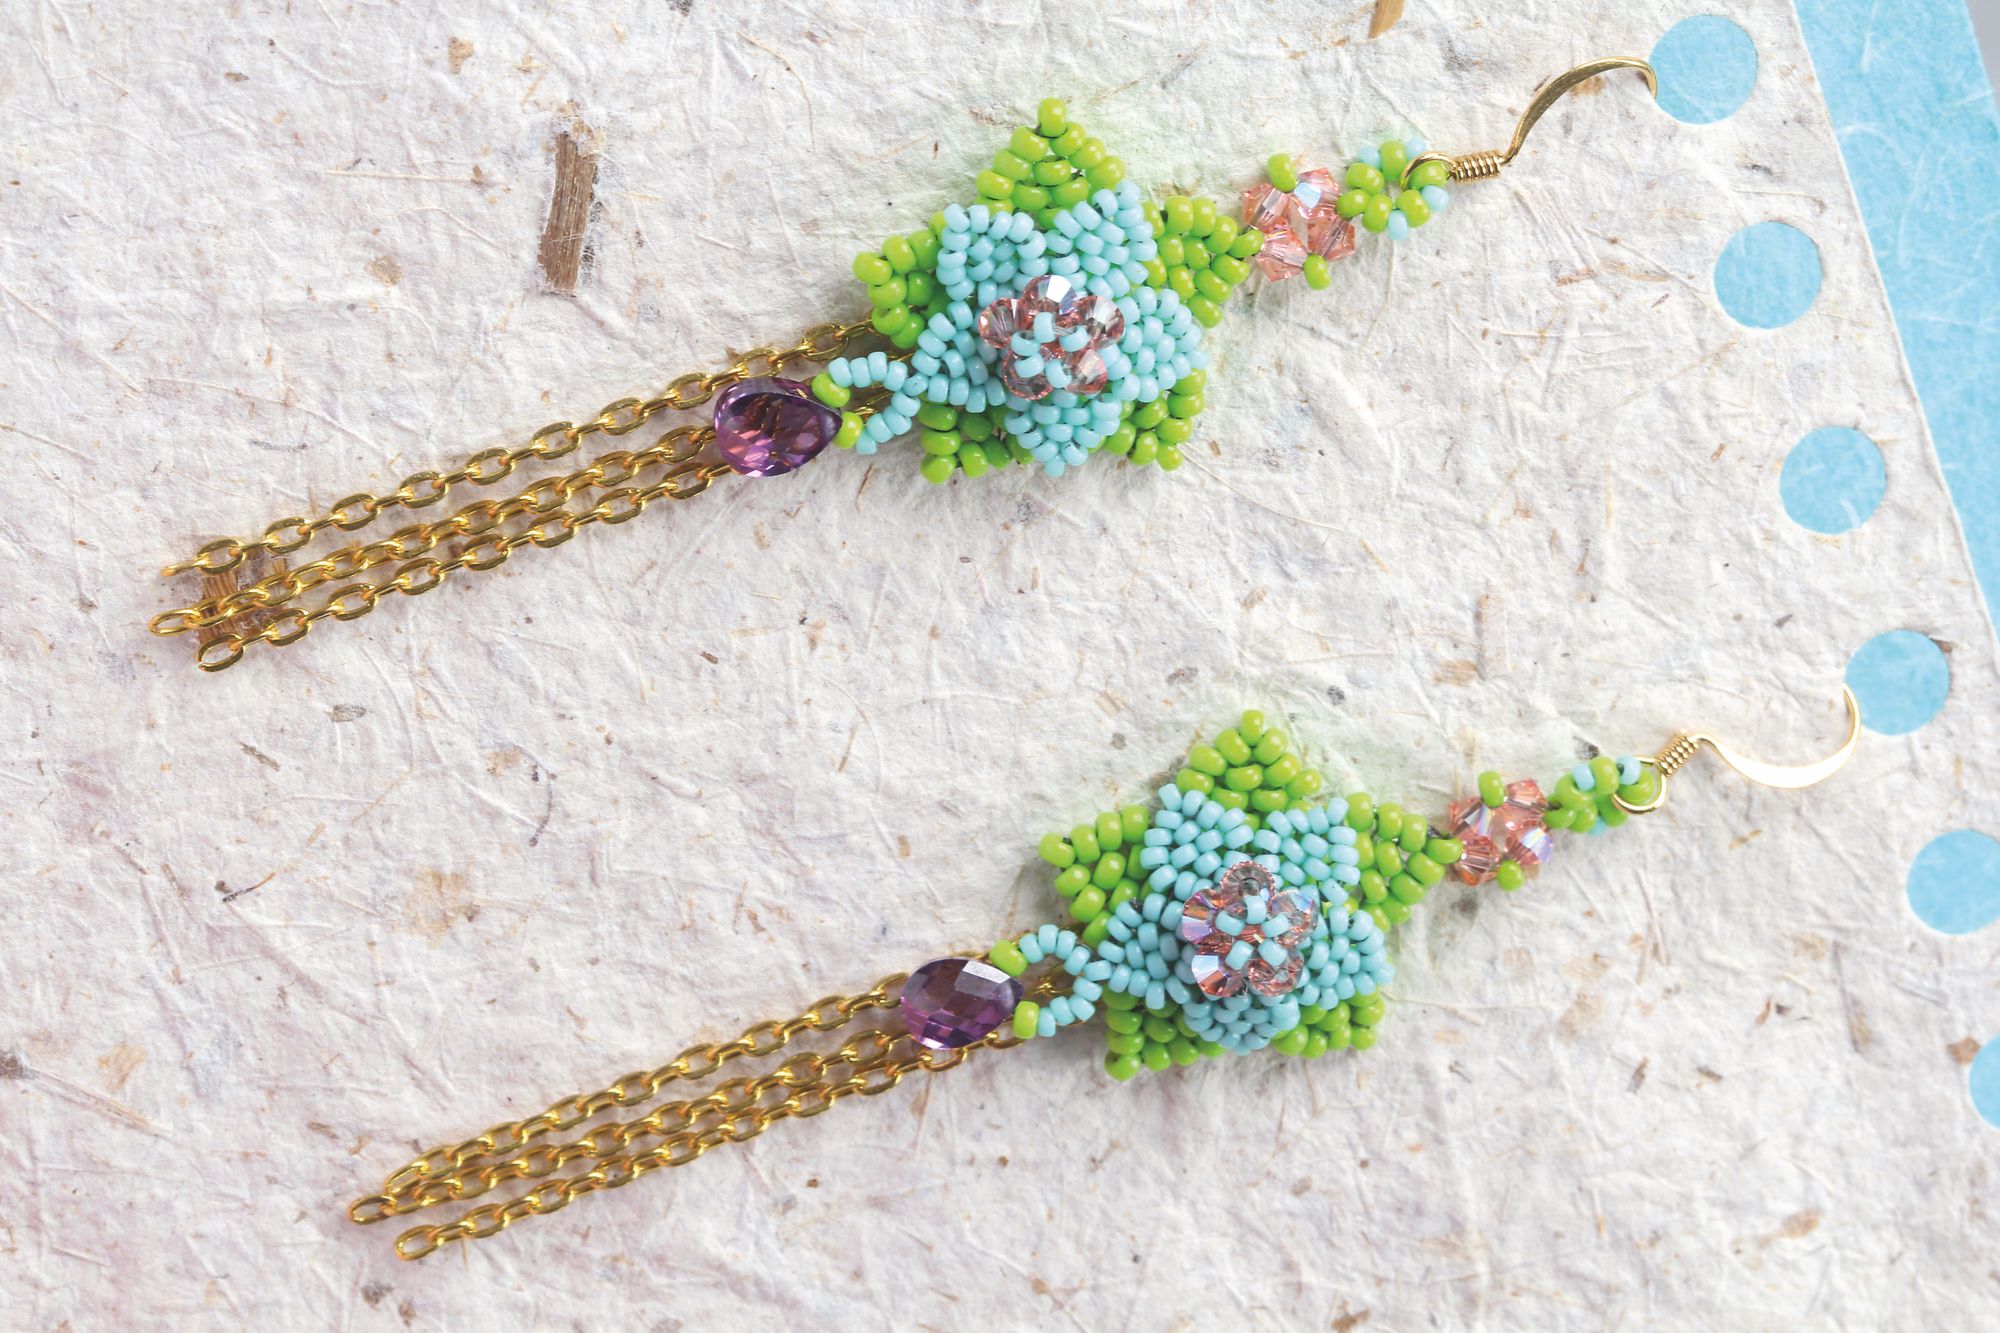
Now I’ve always been in love with the Miyuki Duracoat Opaque colours, but I’m especially drawn to the Kiwi colour, and when paired with the Catalina colour it was just a match made in heaven. With my colours chosen I then set about making the little odd count peyote petals.
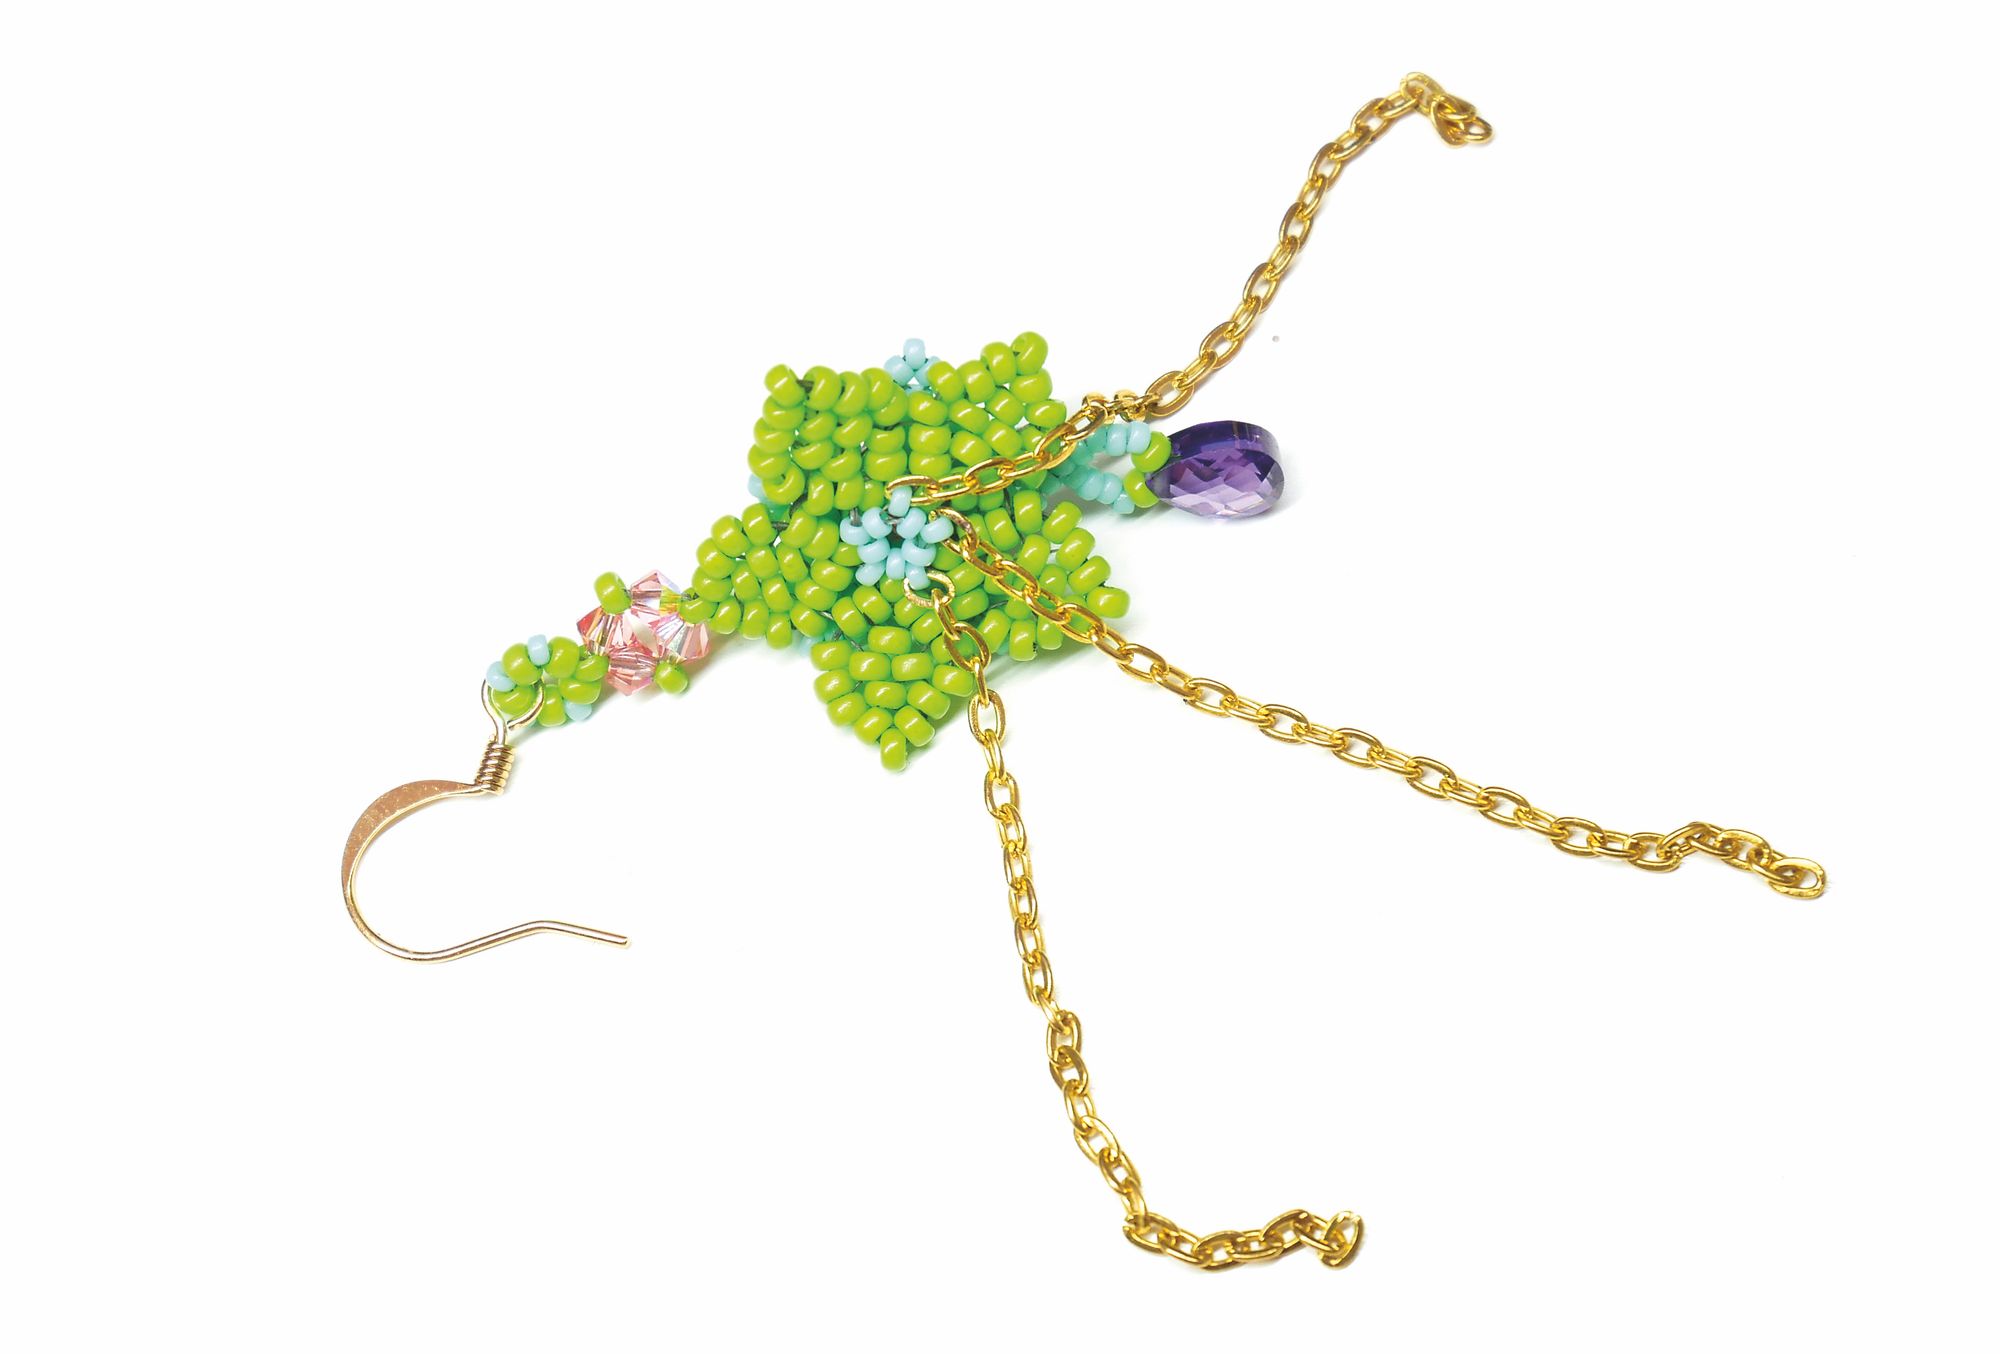
I found this was one of those designs that just went right from the word go. Each piece fell into place perfectly, and I was so happy with the final result. The only part I couldn’t decide on was what to put in the middle of the petals. I finally decided on the 3mm Rose Peach Shimmer Bicones as they added a lovely effect but the colour complemented rather than overpowered the rest of the flower (not that I think anything could overpow- er the Kiwi colour). The drop I used was a faceted Amethyst gemstone, but an Amethyst Swarovski 11x9mm drop would also work perfectly. Once you have the pattern of the petals in your head, they work up quickly, and the whole project takes about two hours. Since it’s just seed beads and a bit of crystal you could make the earrings for under £10 with lots of beads to spare in your tubes.
These lovely little earrings would also make a pretty pendant if earrings are not your thing, and if you’re feeling confi- dent, you could even make a bracelet by connecting the petals using an up and down effect. Whatever you choose to make using this project, we hope we’ve inspired you. Enjoy!
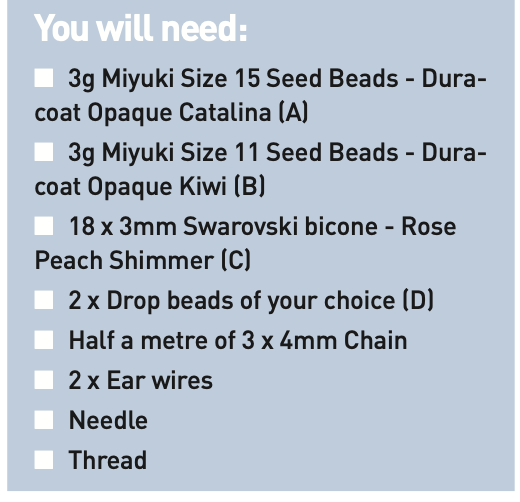
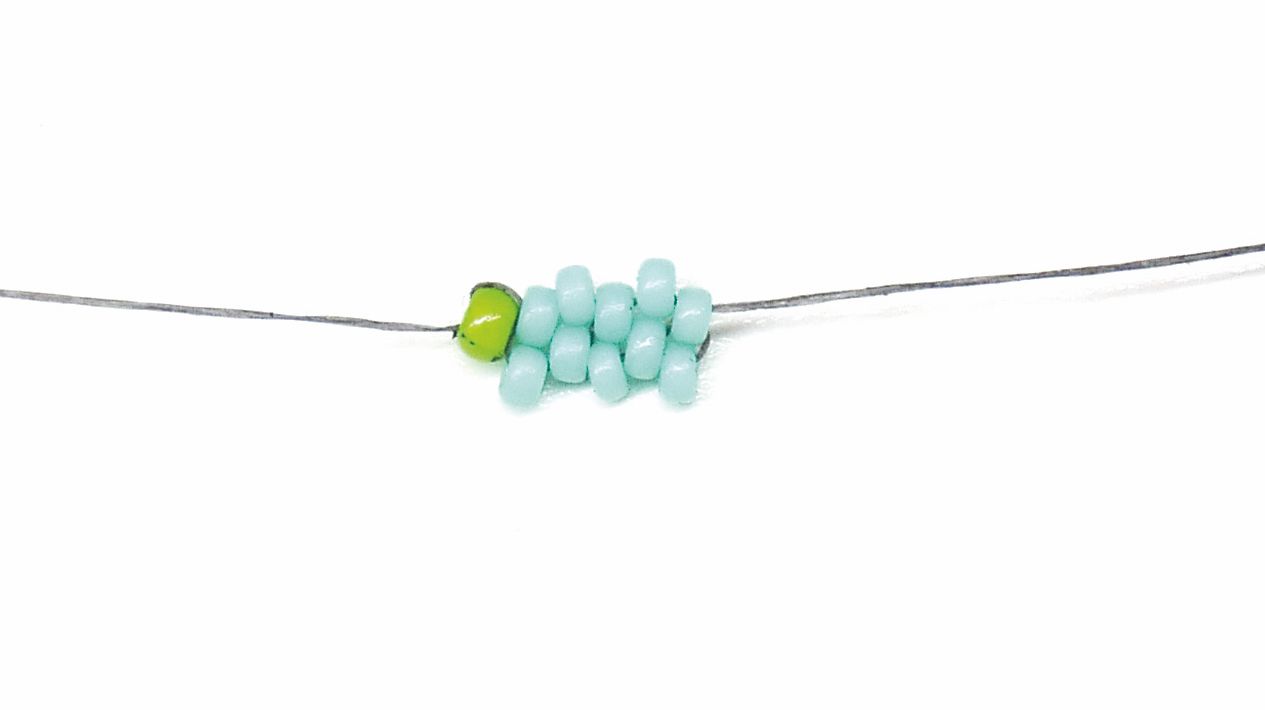
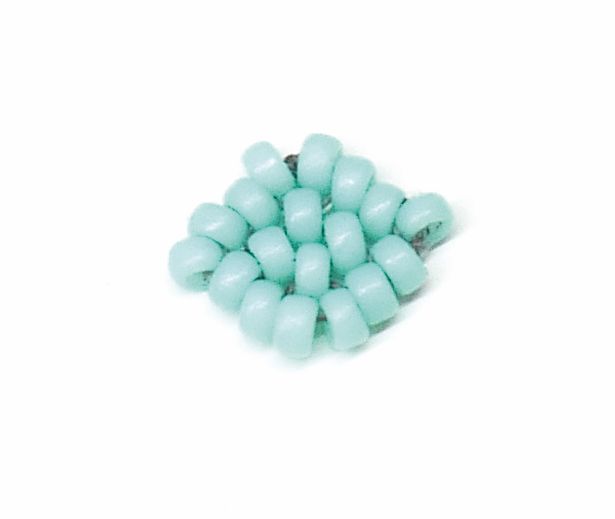
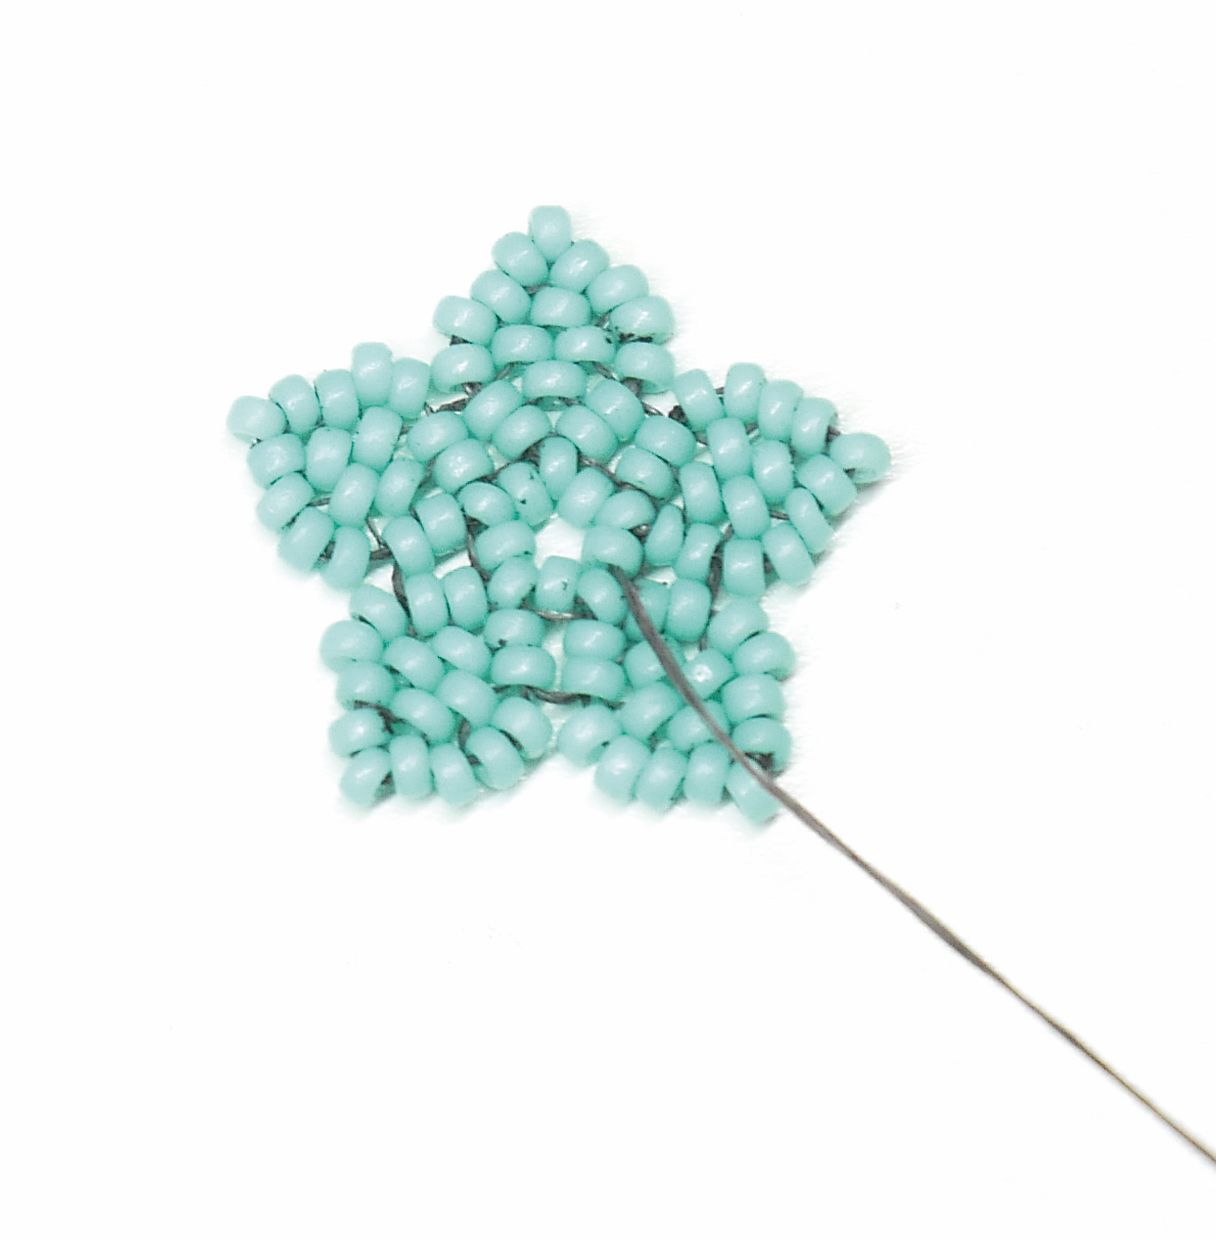
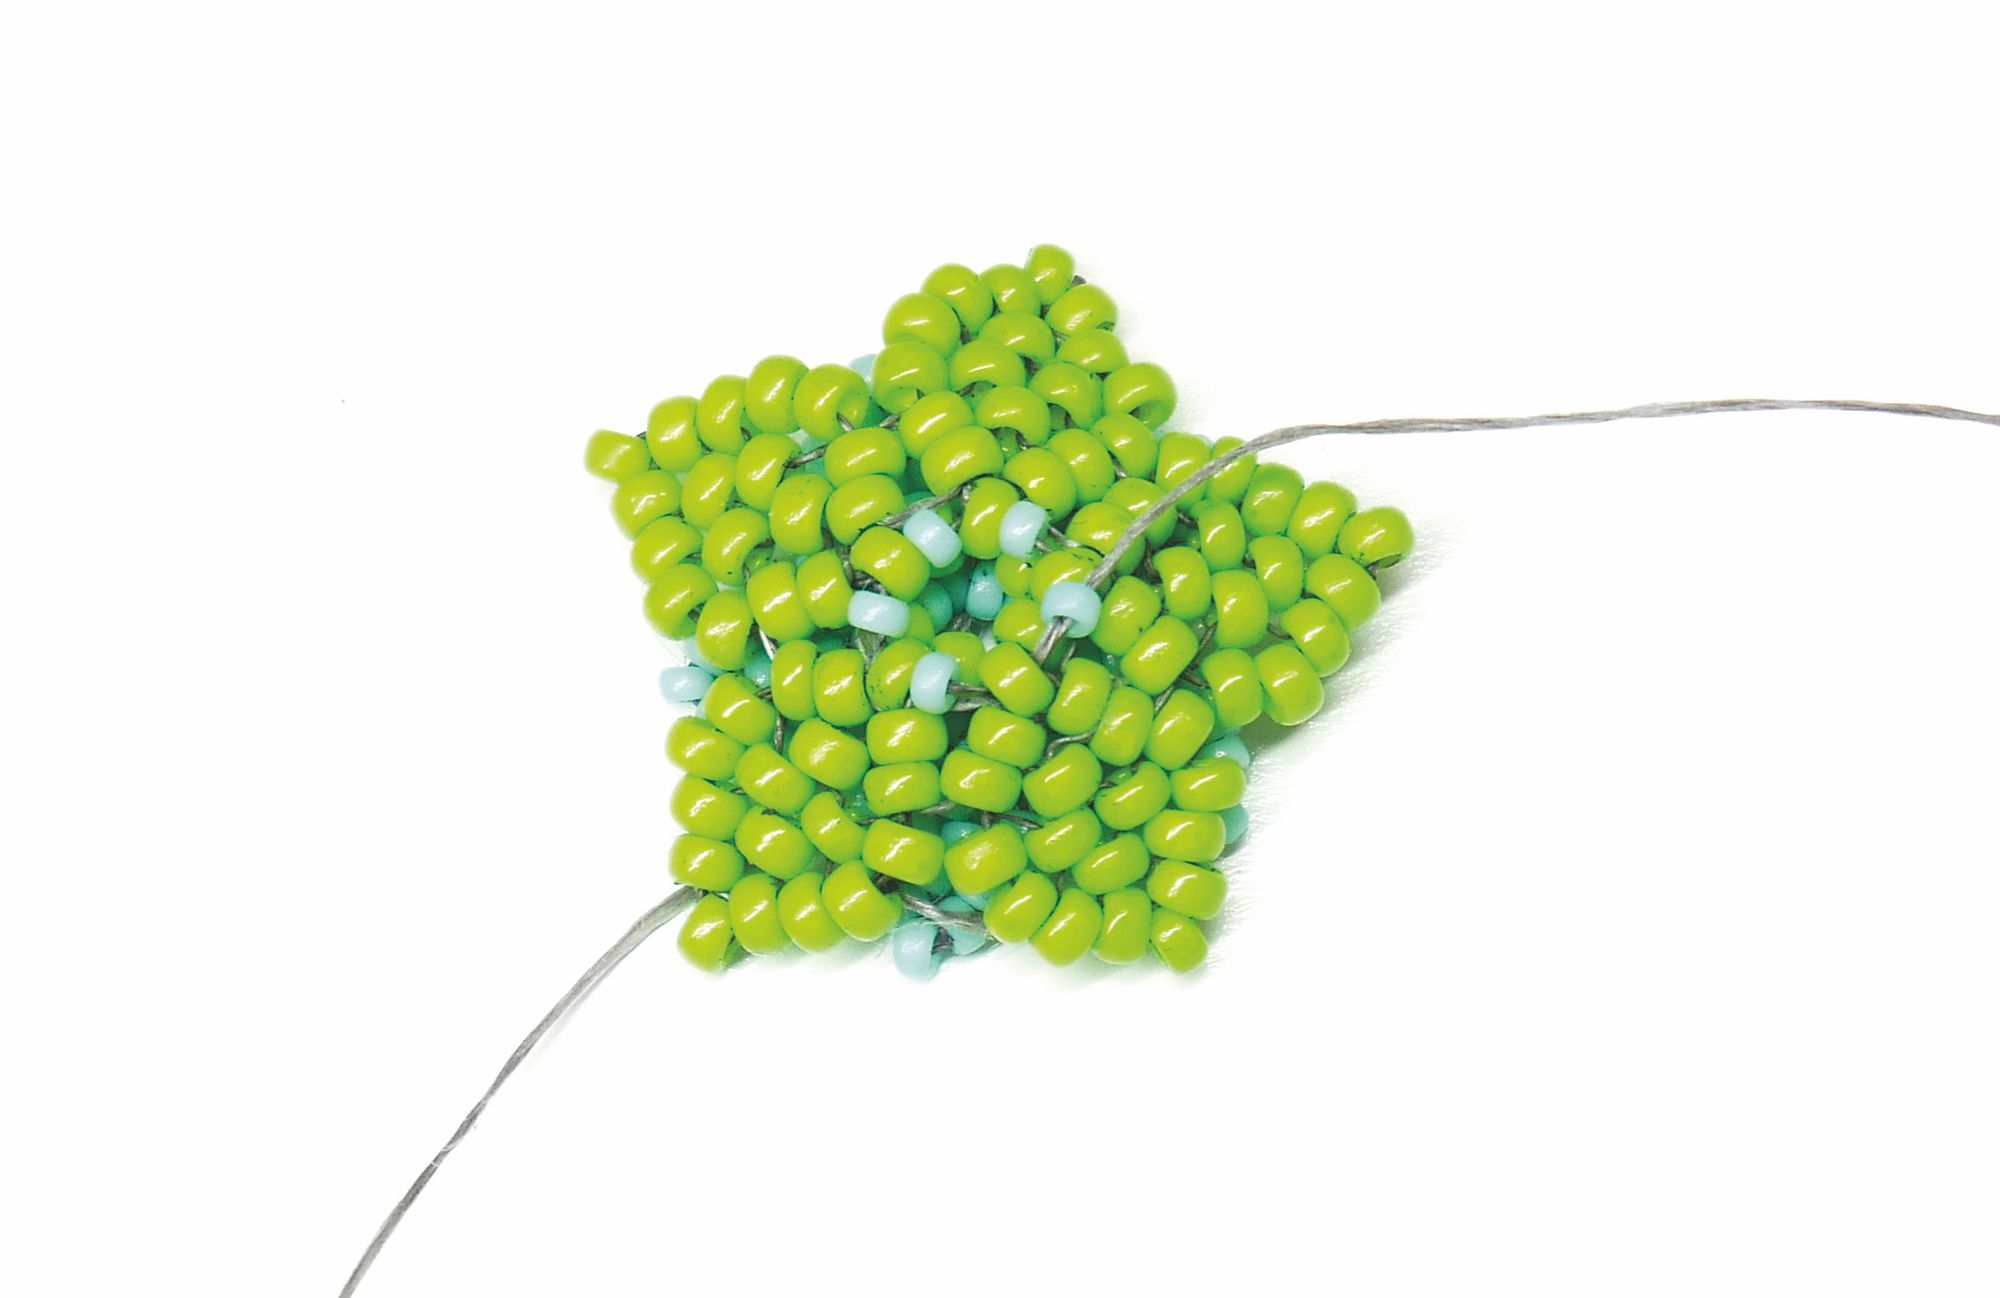
- We’re going start by making our petals. Pick up a stopper bead and 5(A).

2. Pick up 1(A) and coming back down the row of 5(A) you’ve just pick up go into the second to last one. This will cause the new (A) to sit on top of the last (A) you picked up.
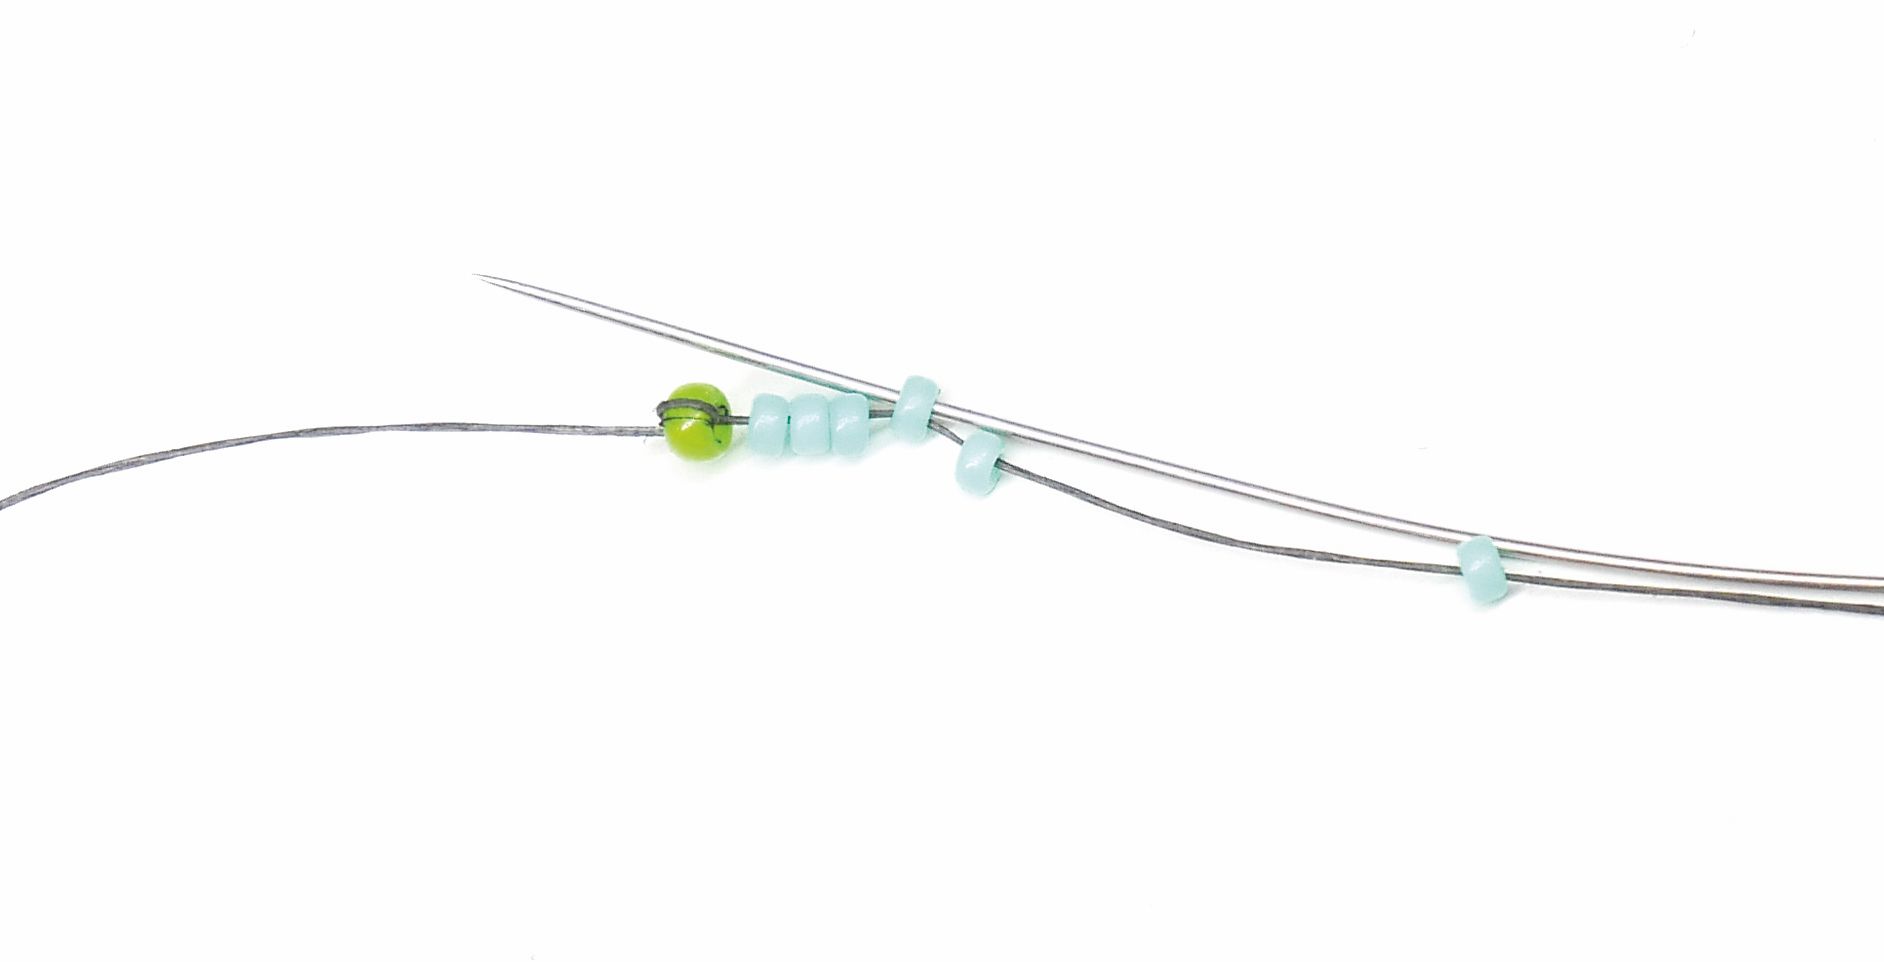
3. Pick up 1(A) and miss the next (A) on the row of five and go into the one after.
4. Pick up 1(A), and now we’re going to turn around by going into the last (A) from the row of five, but towards the new beads, you’ve just added.
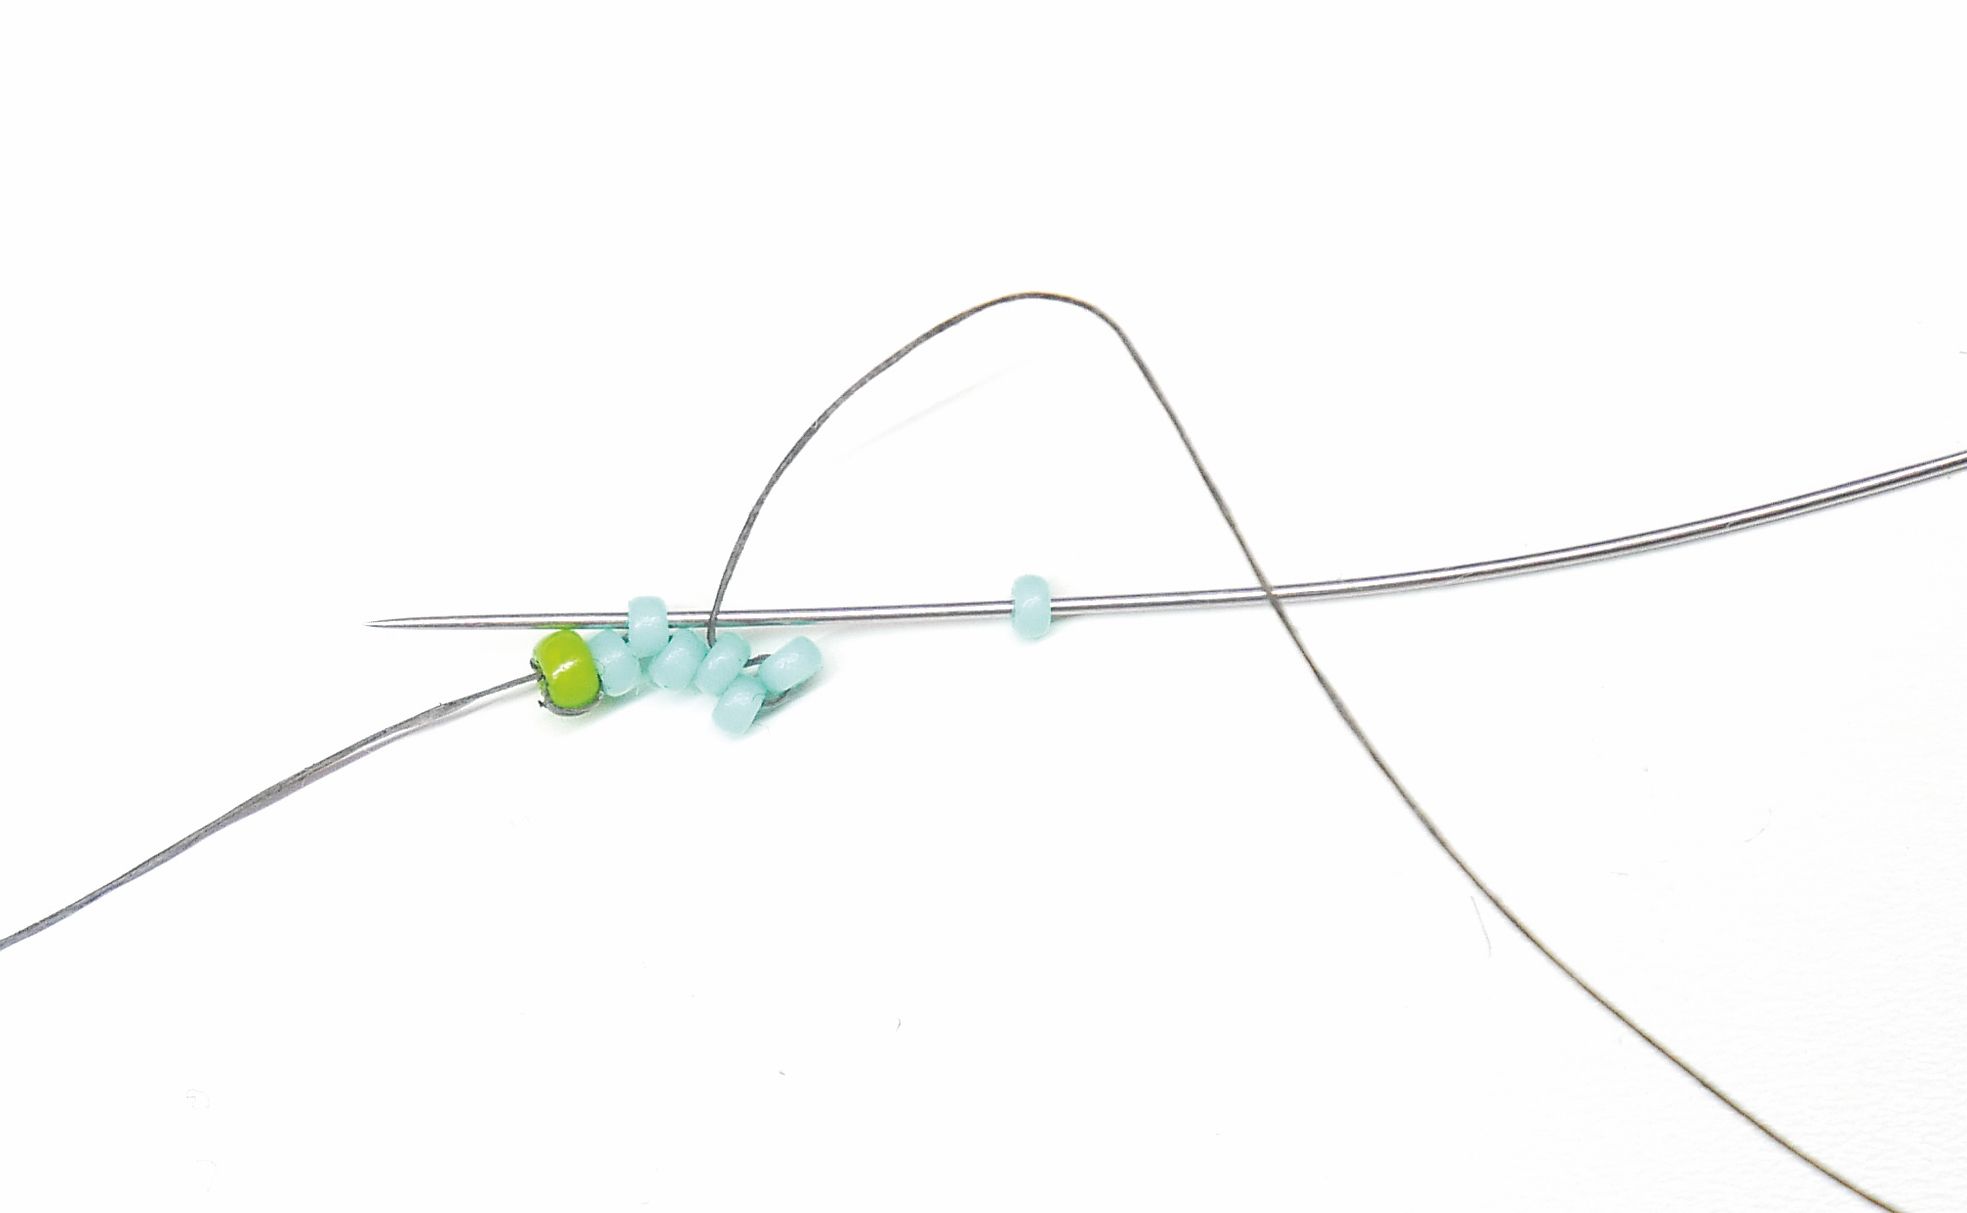
5. Coming back along the new row, pick up 1(A) and go into the next bead along and then pick up another (A) and go into the next (A) along. You’re essentially filling in the gaps here and should now be back at the other side of your peyote strip.
6. Pick up 1(A) and go into the (A) bead that is side-by-side to the one you’re coming out of.
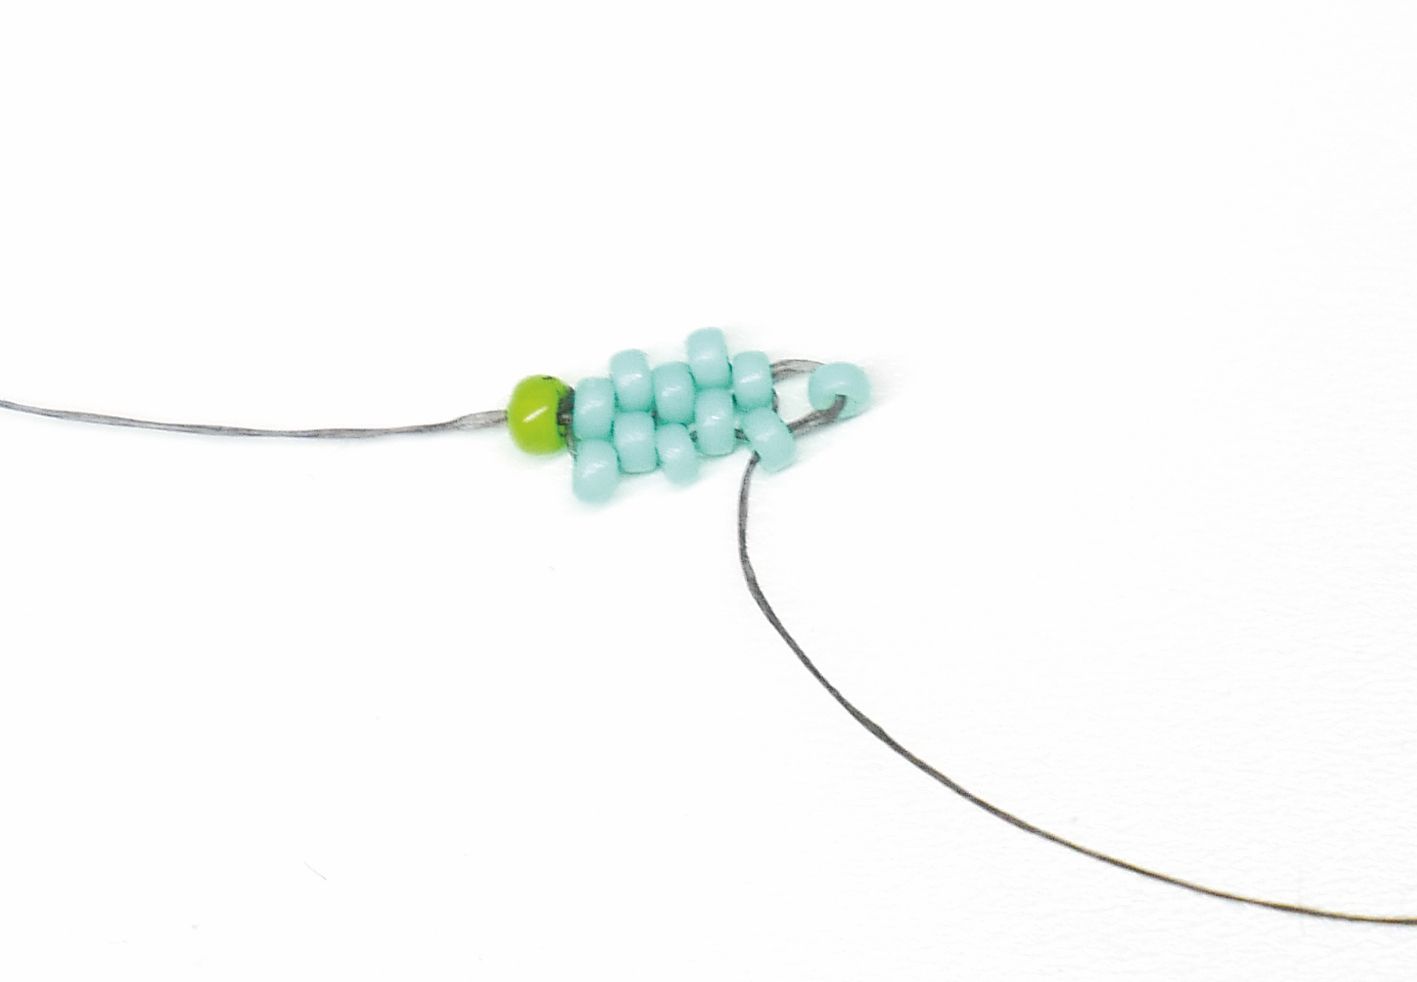
7. Repeat steps 5 and 6 on this side and then weave forward into the second (A) bead you added in this round.
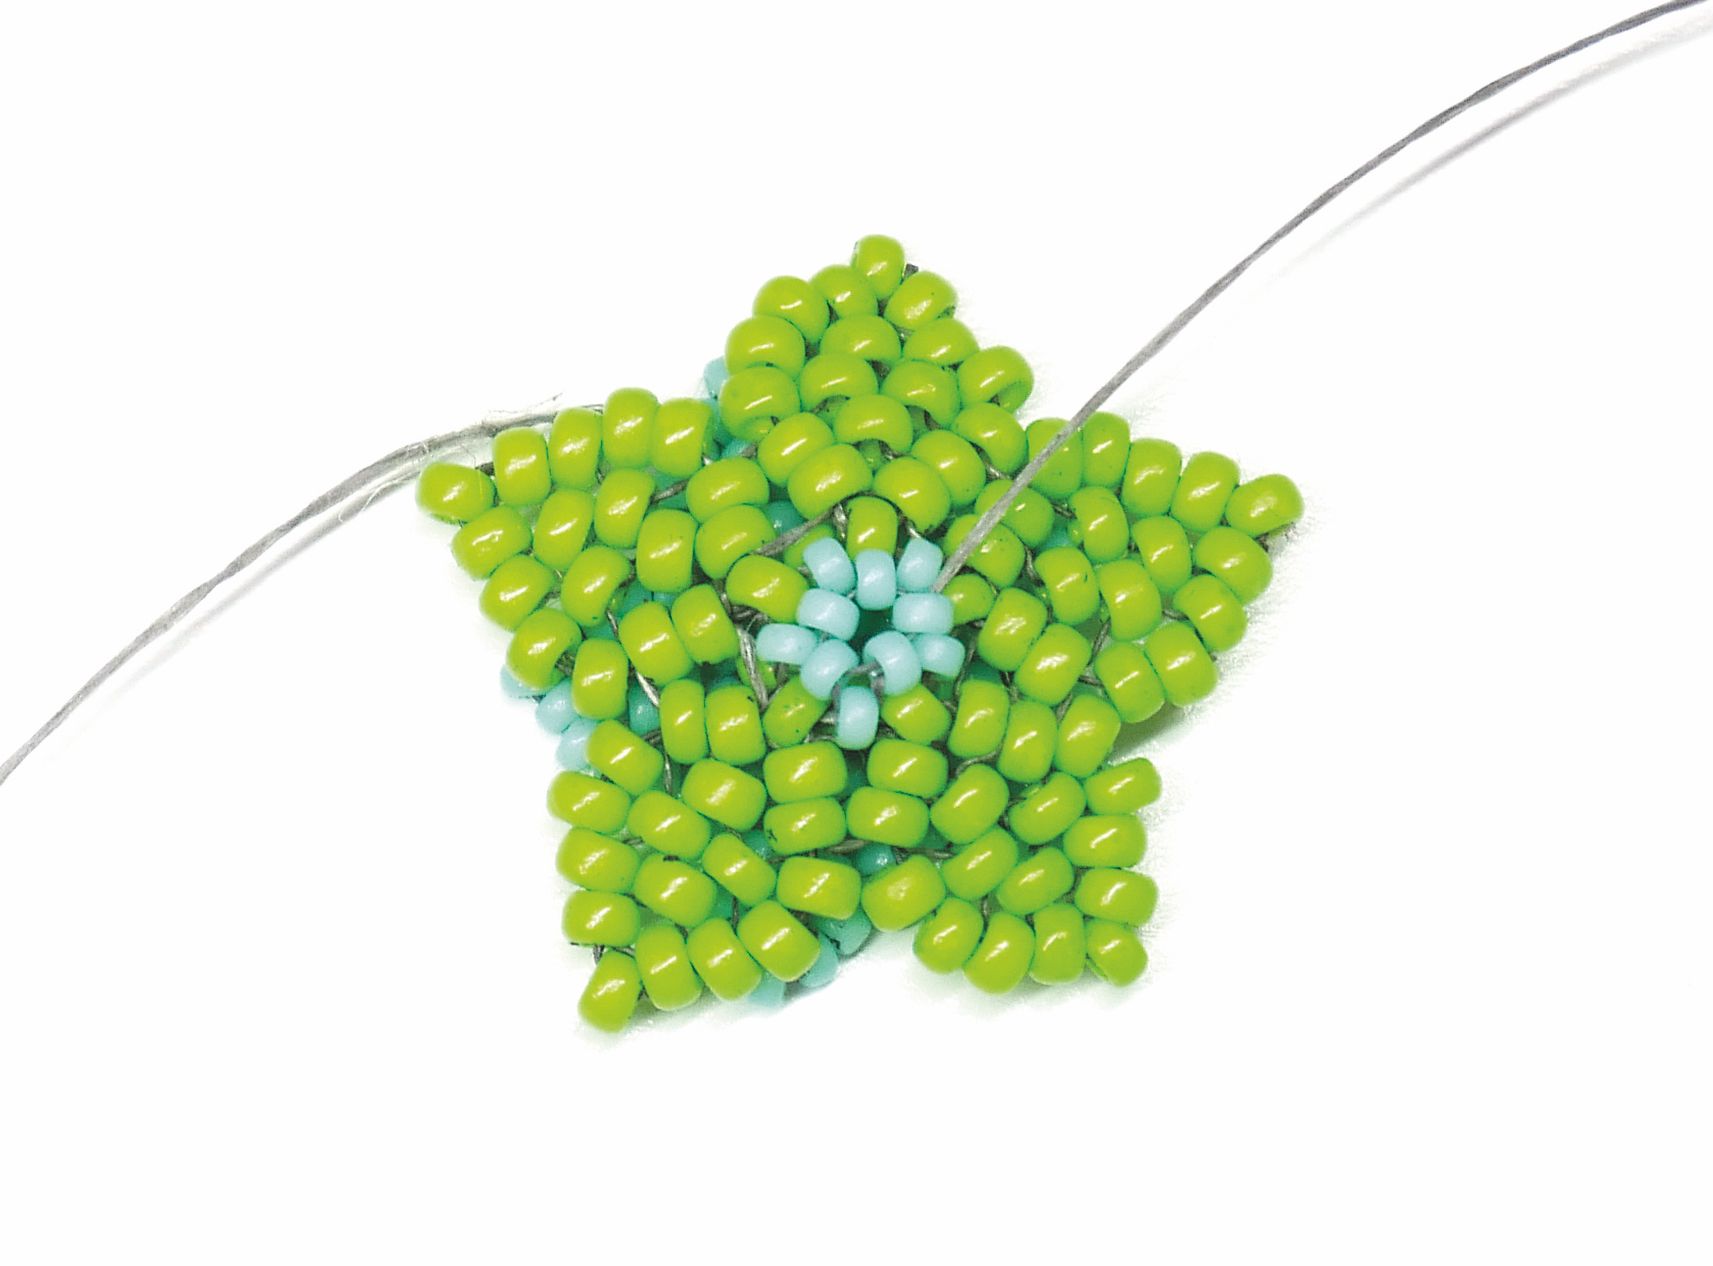
8. Pick up 2(A) and go into the next (A) along on this row. Now weave around to the other side.
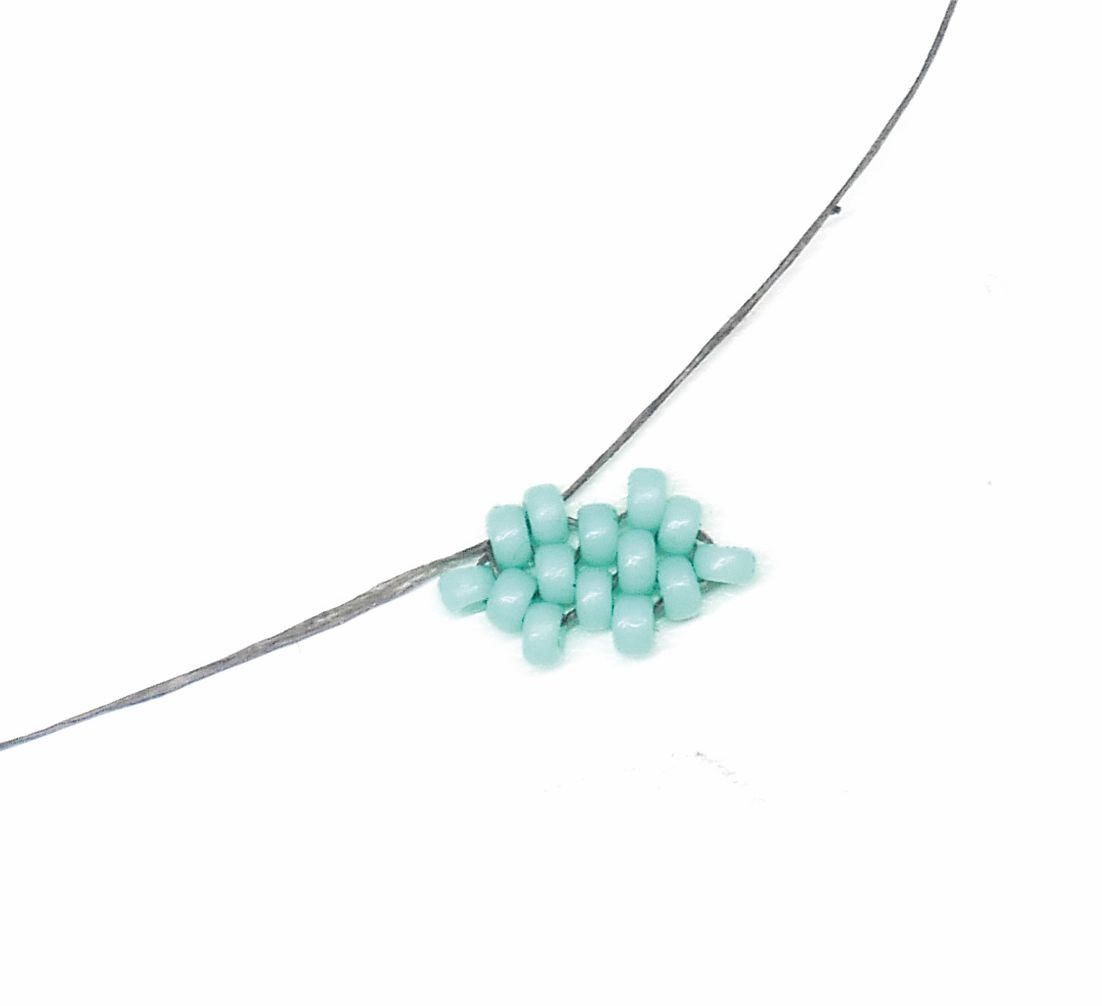
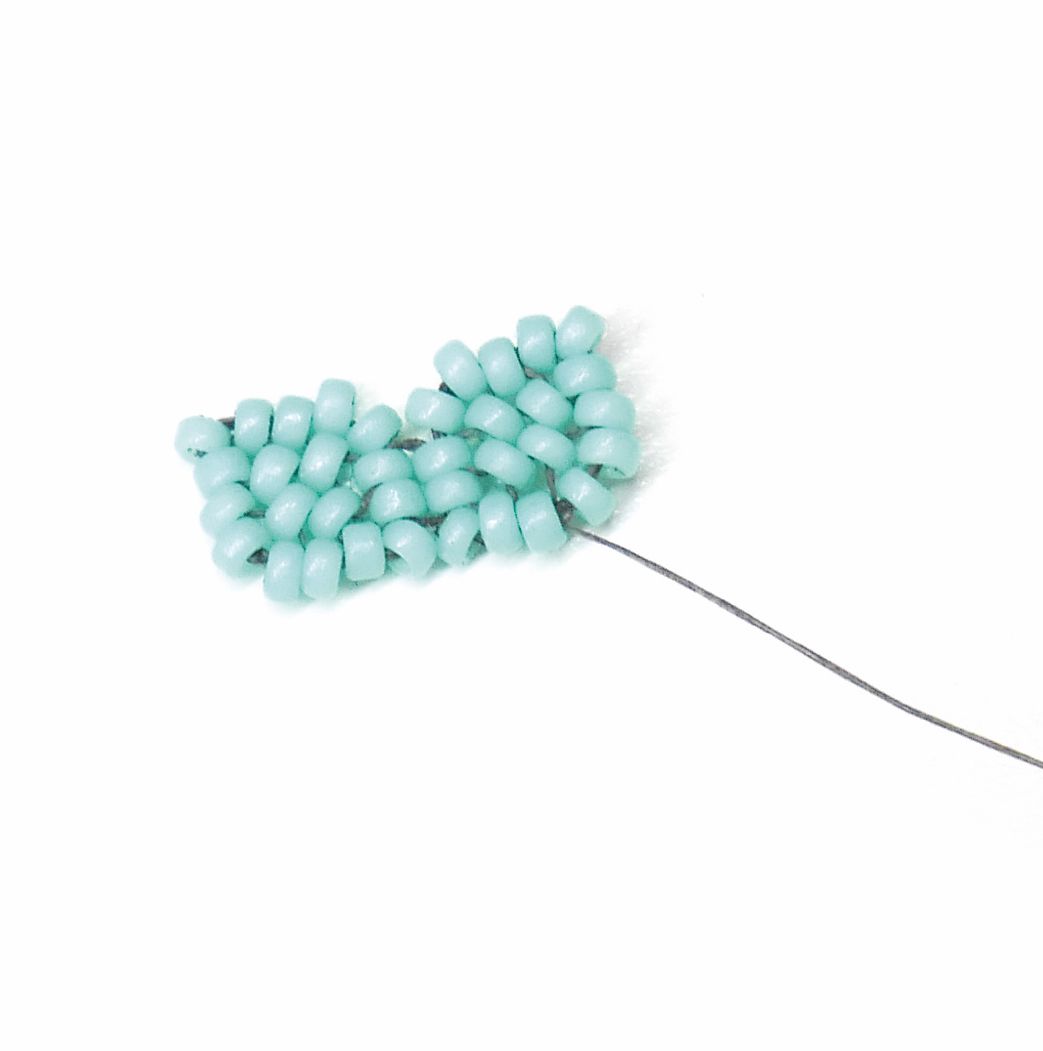
9. Add the 2(A) on this side the same as step 8 and then weave off you’re threads. Put to one side and make four more petals. On the last petal leave your thread attached.
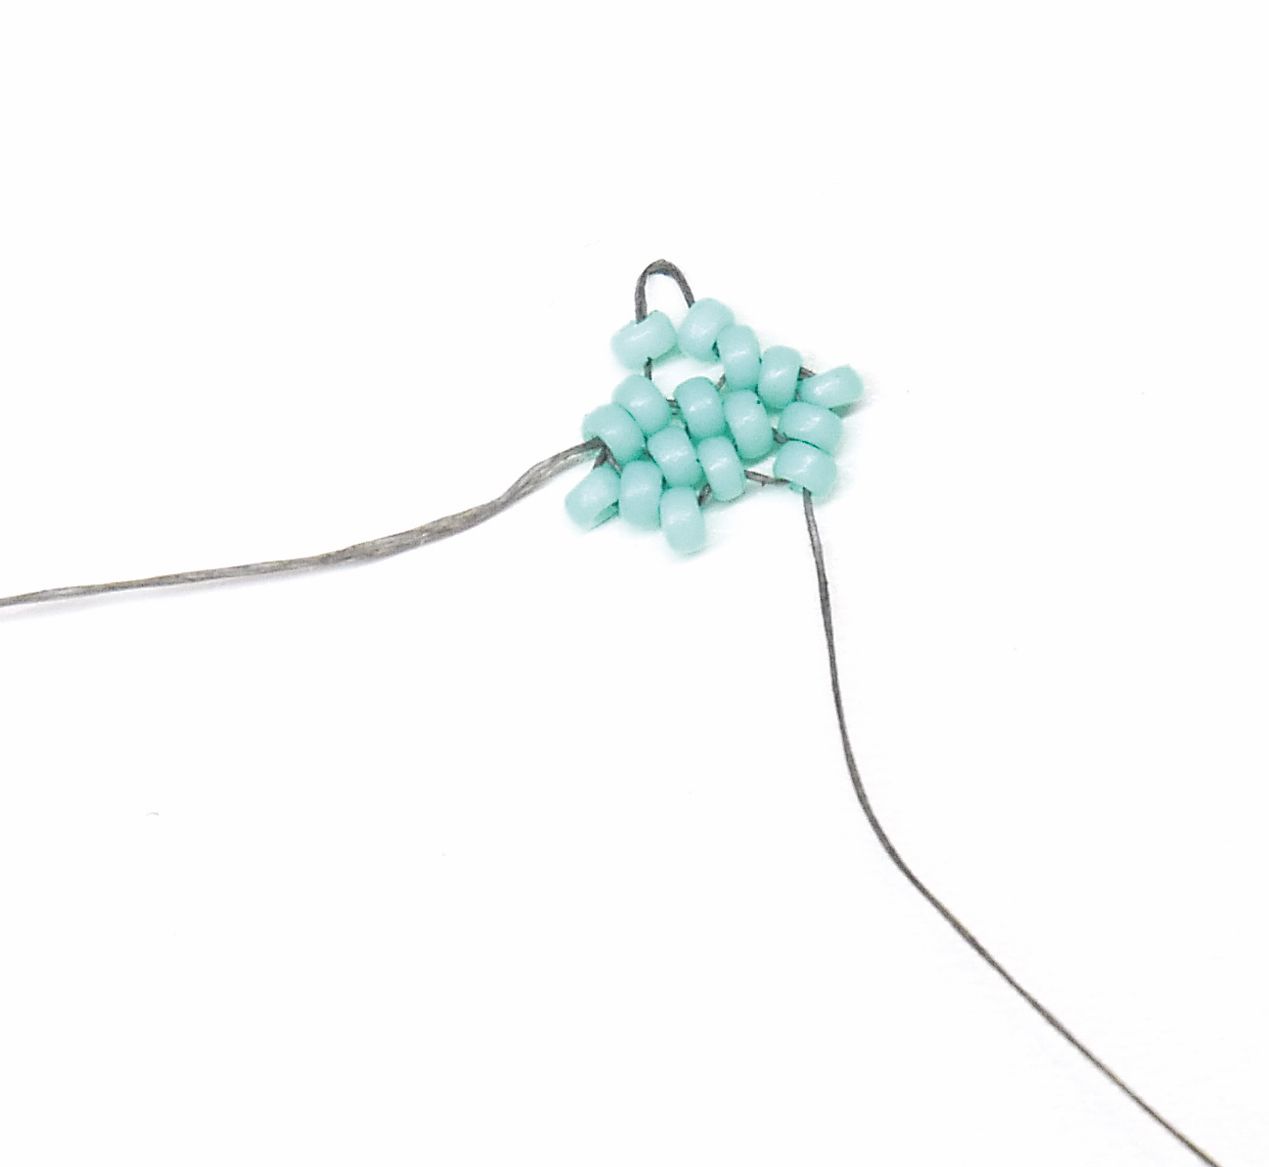
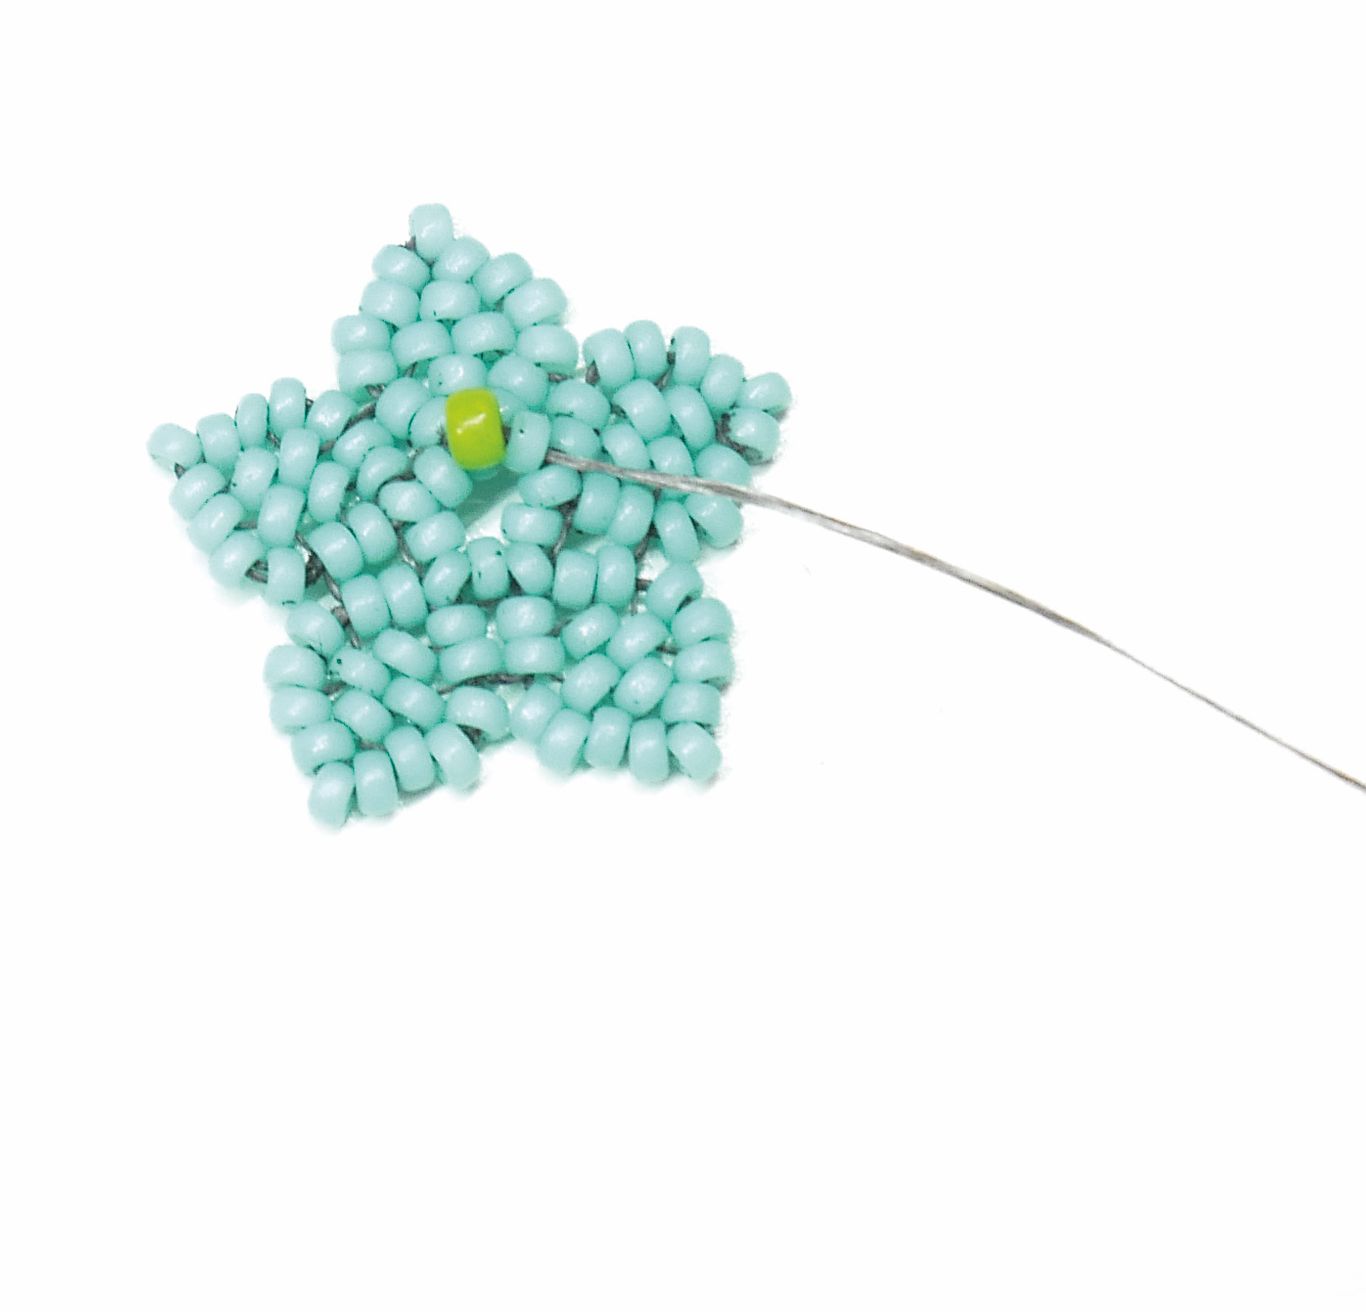
10. Line up two of your petals and bring your thread out of the first two side beads next to a tip bead.
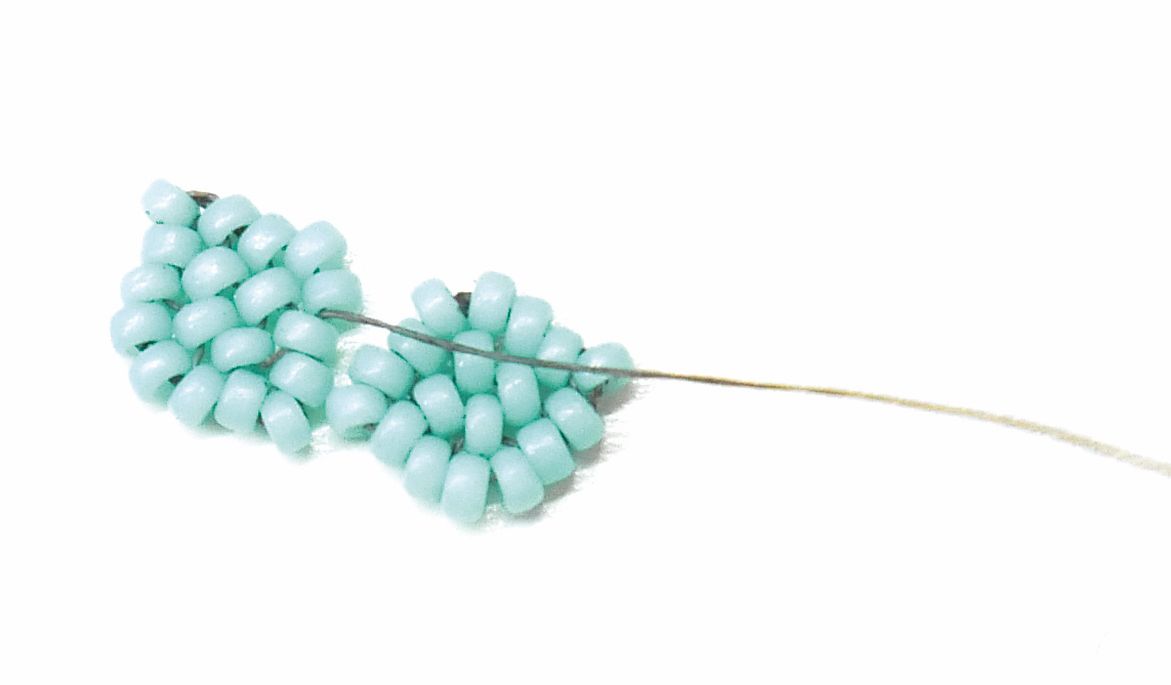
11. Go down into the adjacent two side beads on the next petal and then back up the two side beads on the original petal.
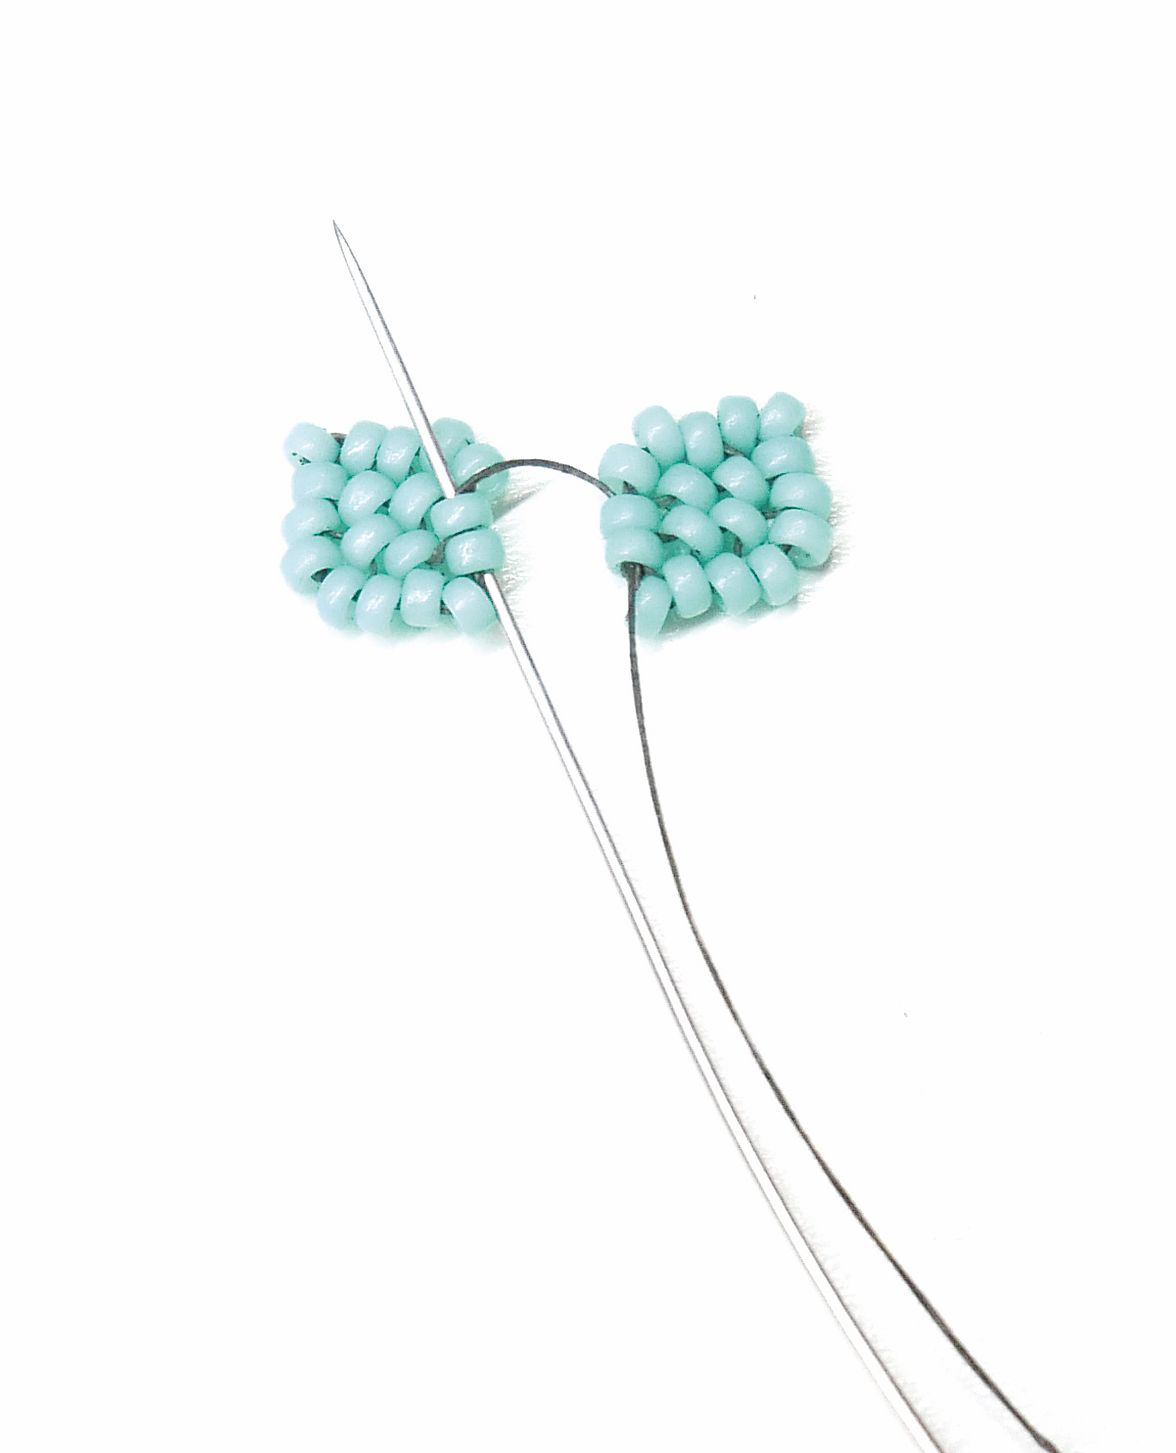
12. Go back into the two side beads on the second petal and weave around to the two side beads on the other side. Join the next three petals in the same way as the last two.
13. You should now have a little circle of tip beads in the middle of your petals. Go into the first one, pick up an (A) bead and go into the next tip bead on the next petal along. Repeat adding (A) beads between (A) beads all the way around.
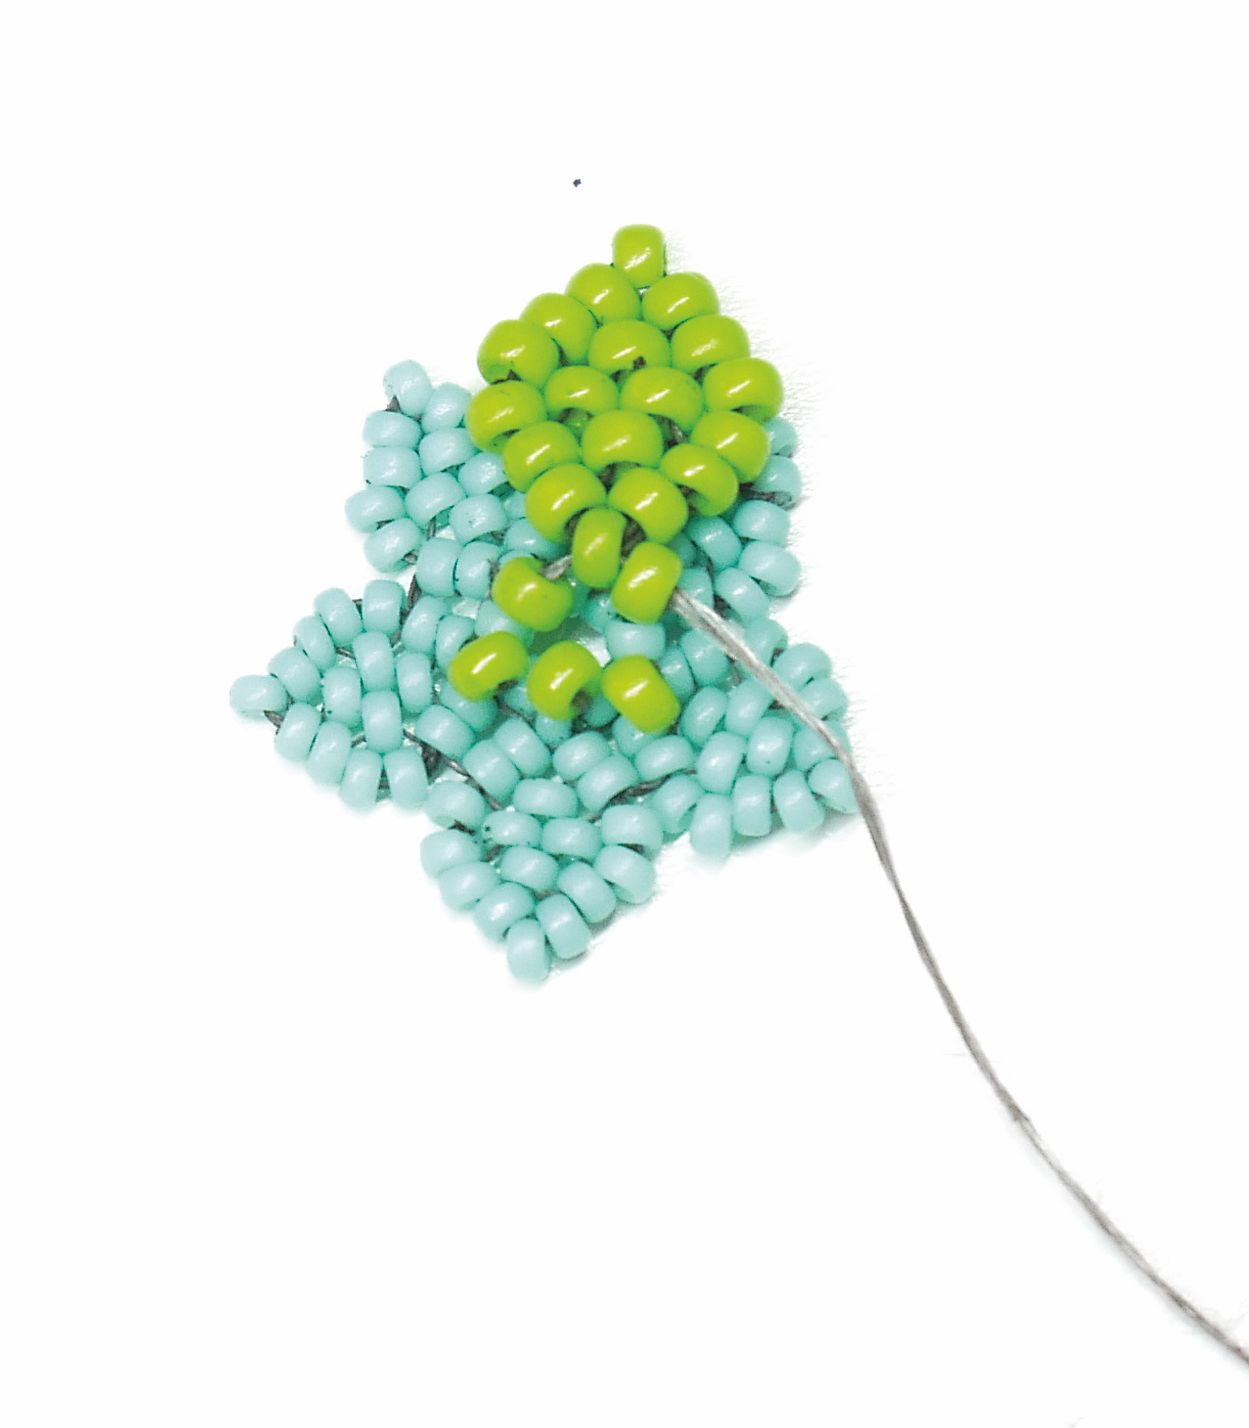
14. Come up out of a new (A) bead just add ed and pick up 1(B). Go into the next new (A) bead along on the circle, skipping the tip bead. Repeat all the way around for a total of 5(B) beads. Using steps 1-9 make five new petals in (B) beads, but do not join them together just yet.
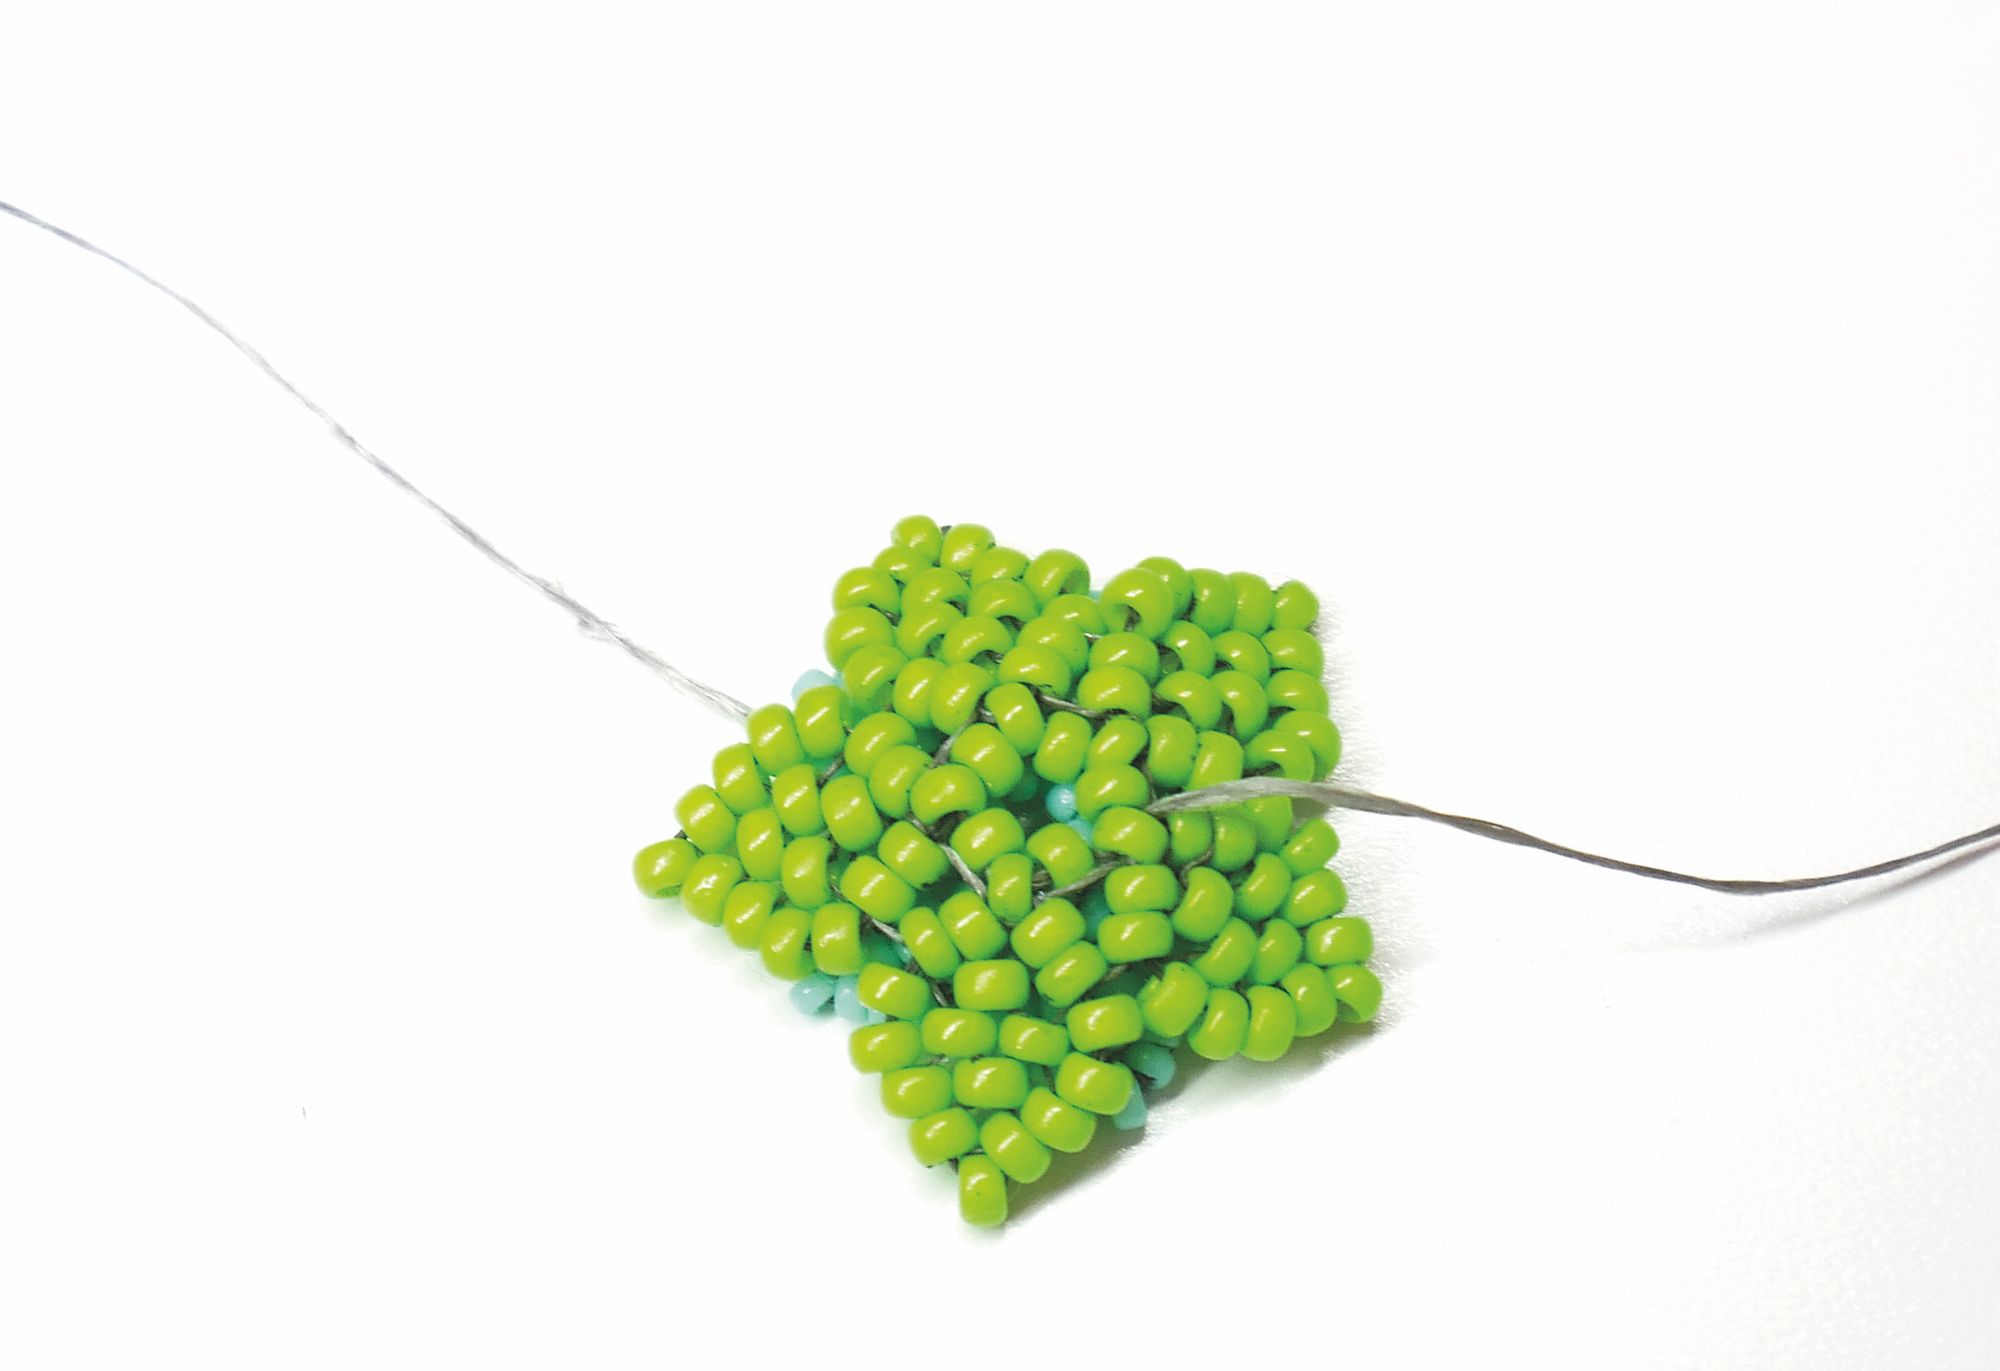
15. Coming out of (B) bead added in step 13, pick up a new petal using the tip bead and go into the next (B) along from step 13. Continue adding petals all the way around. Technically we’re working back- wards to the way we joined the smaller petals.
16. Join the (B) bead petals together as in steps 10-12.
17. Coming out of a tip bead from a (B) bead petal pick up 1(A) and go into the next tip bead. Repeat all the way around.
18. Go into a new (B) bead and add a (B) between each new (B) bead. Go through all the (B) beads again to tighten. This is the back of your flower.
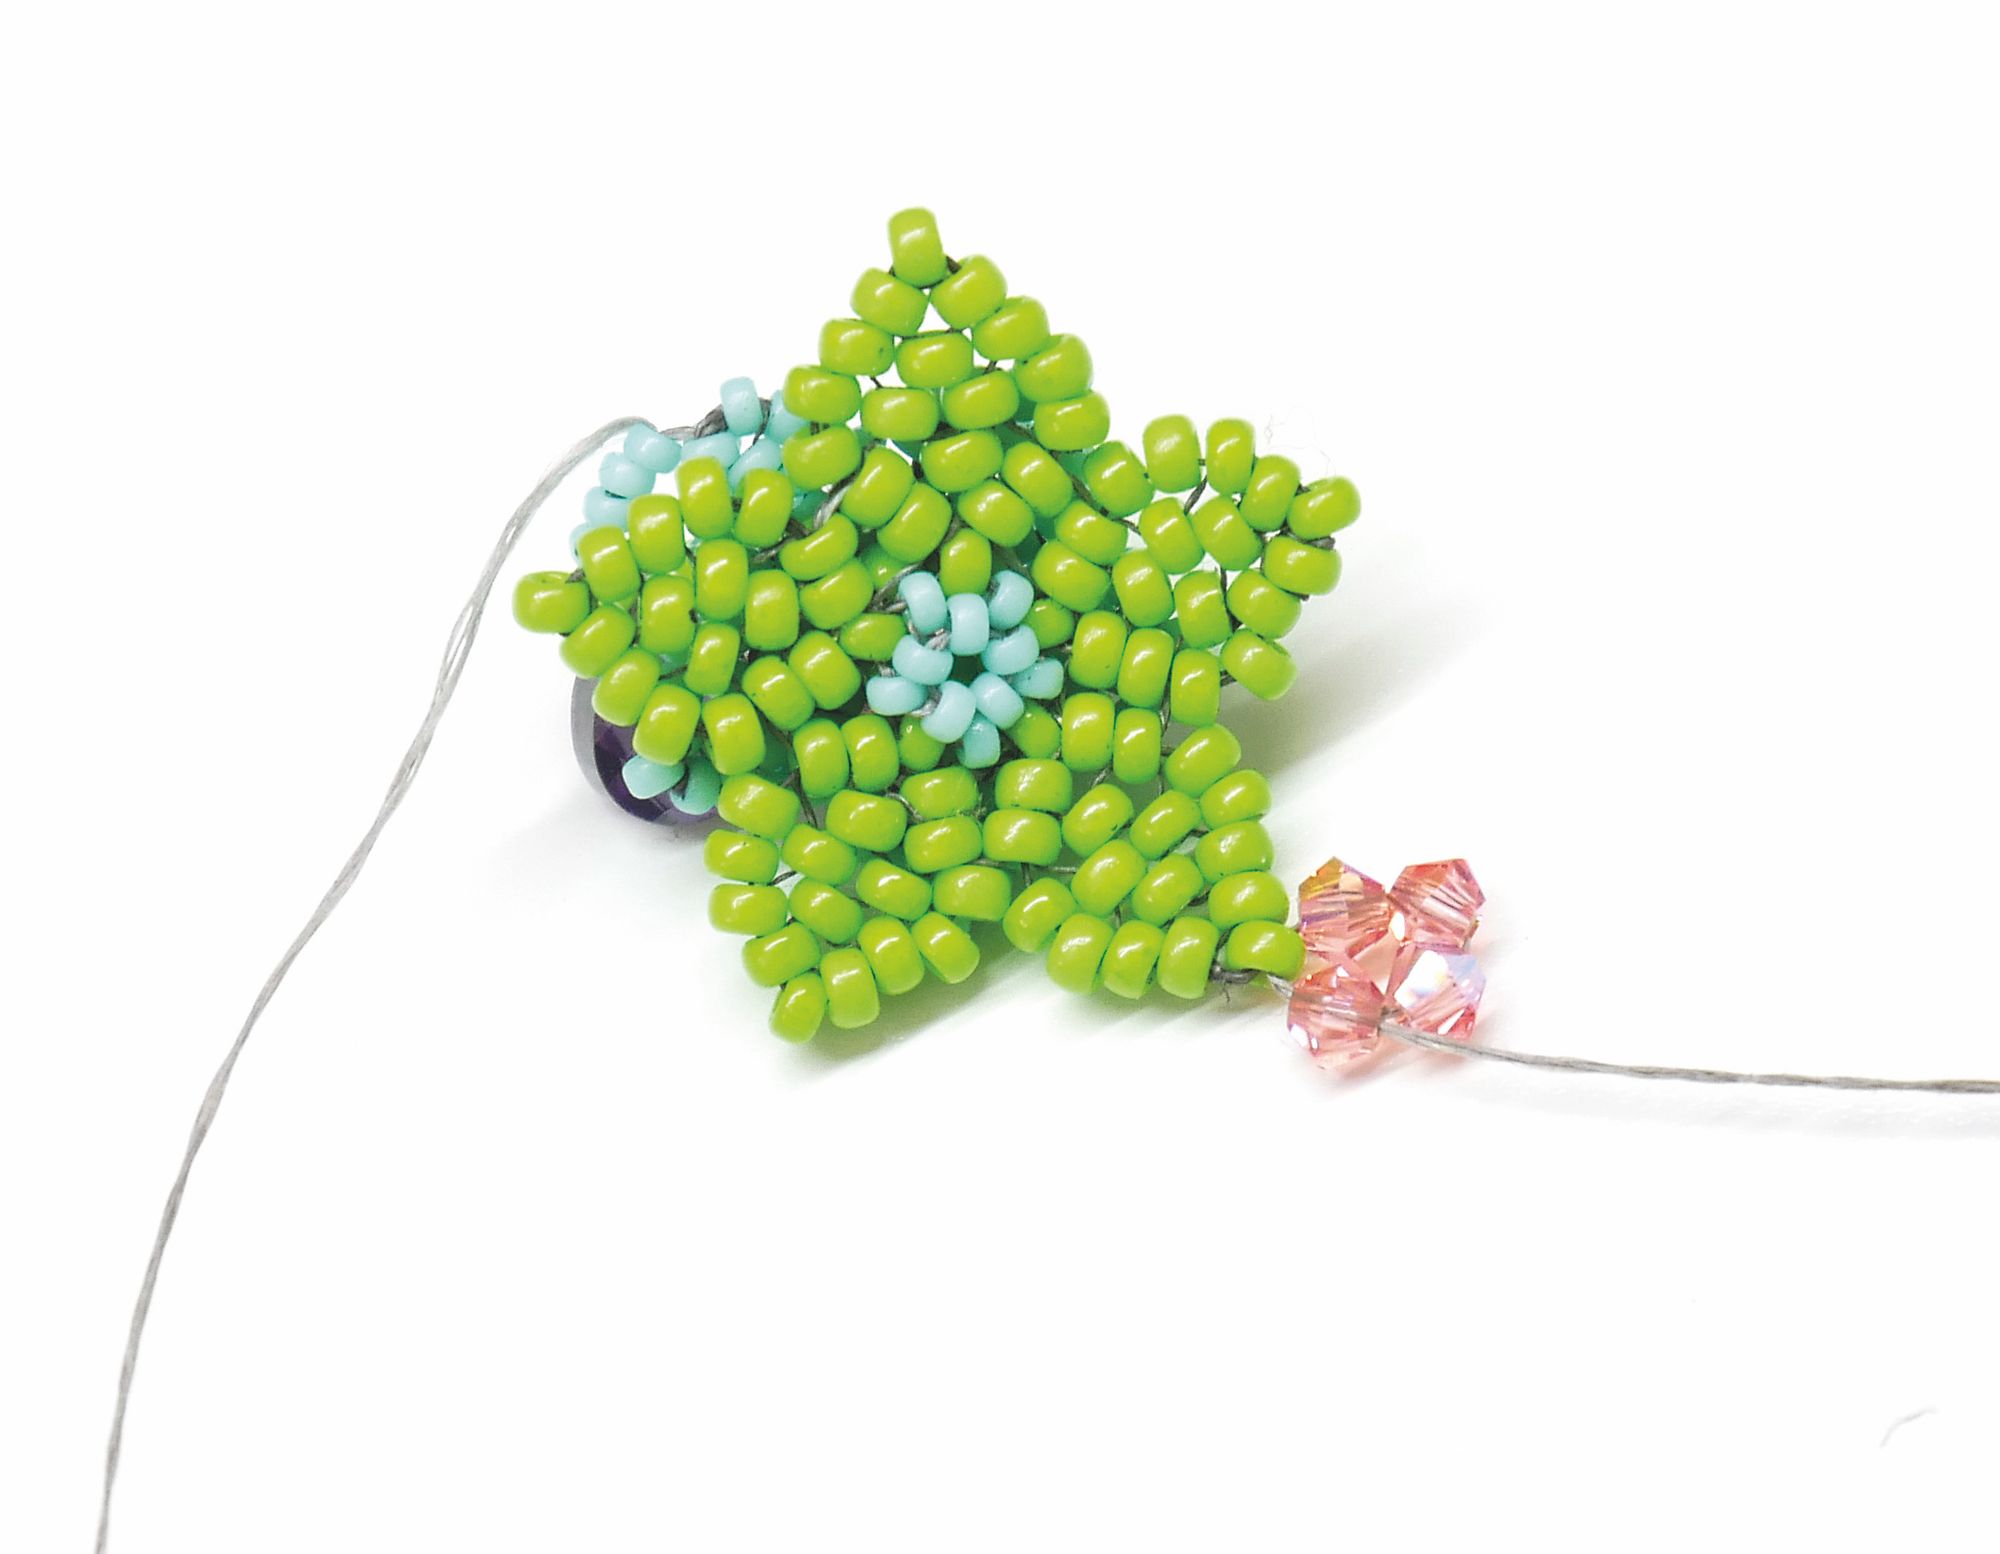
19. Weave around to come out of a tip bead of an (A) petal on the front. Pick up 1(C) and 1(A).
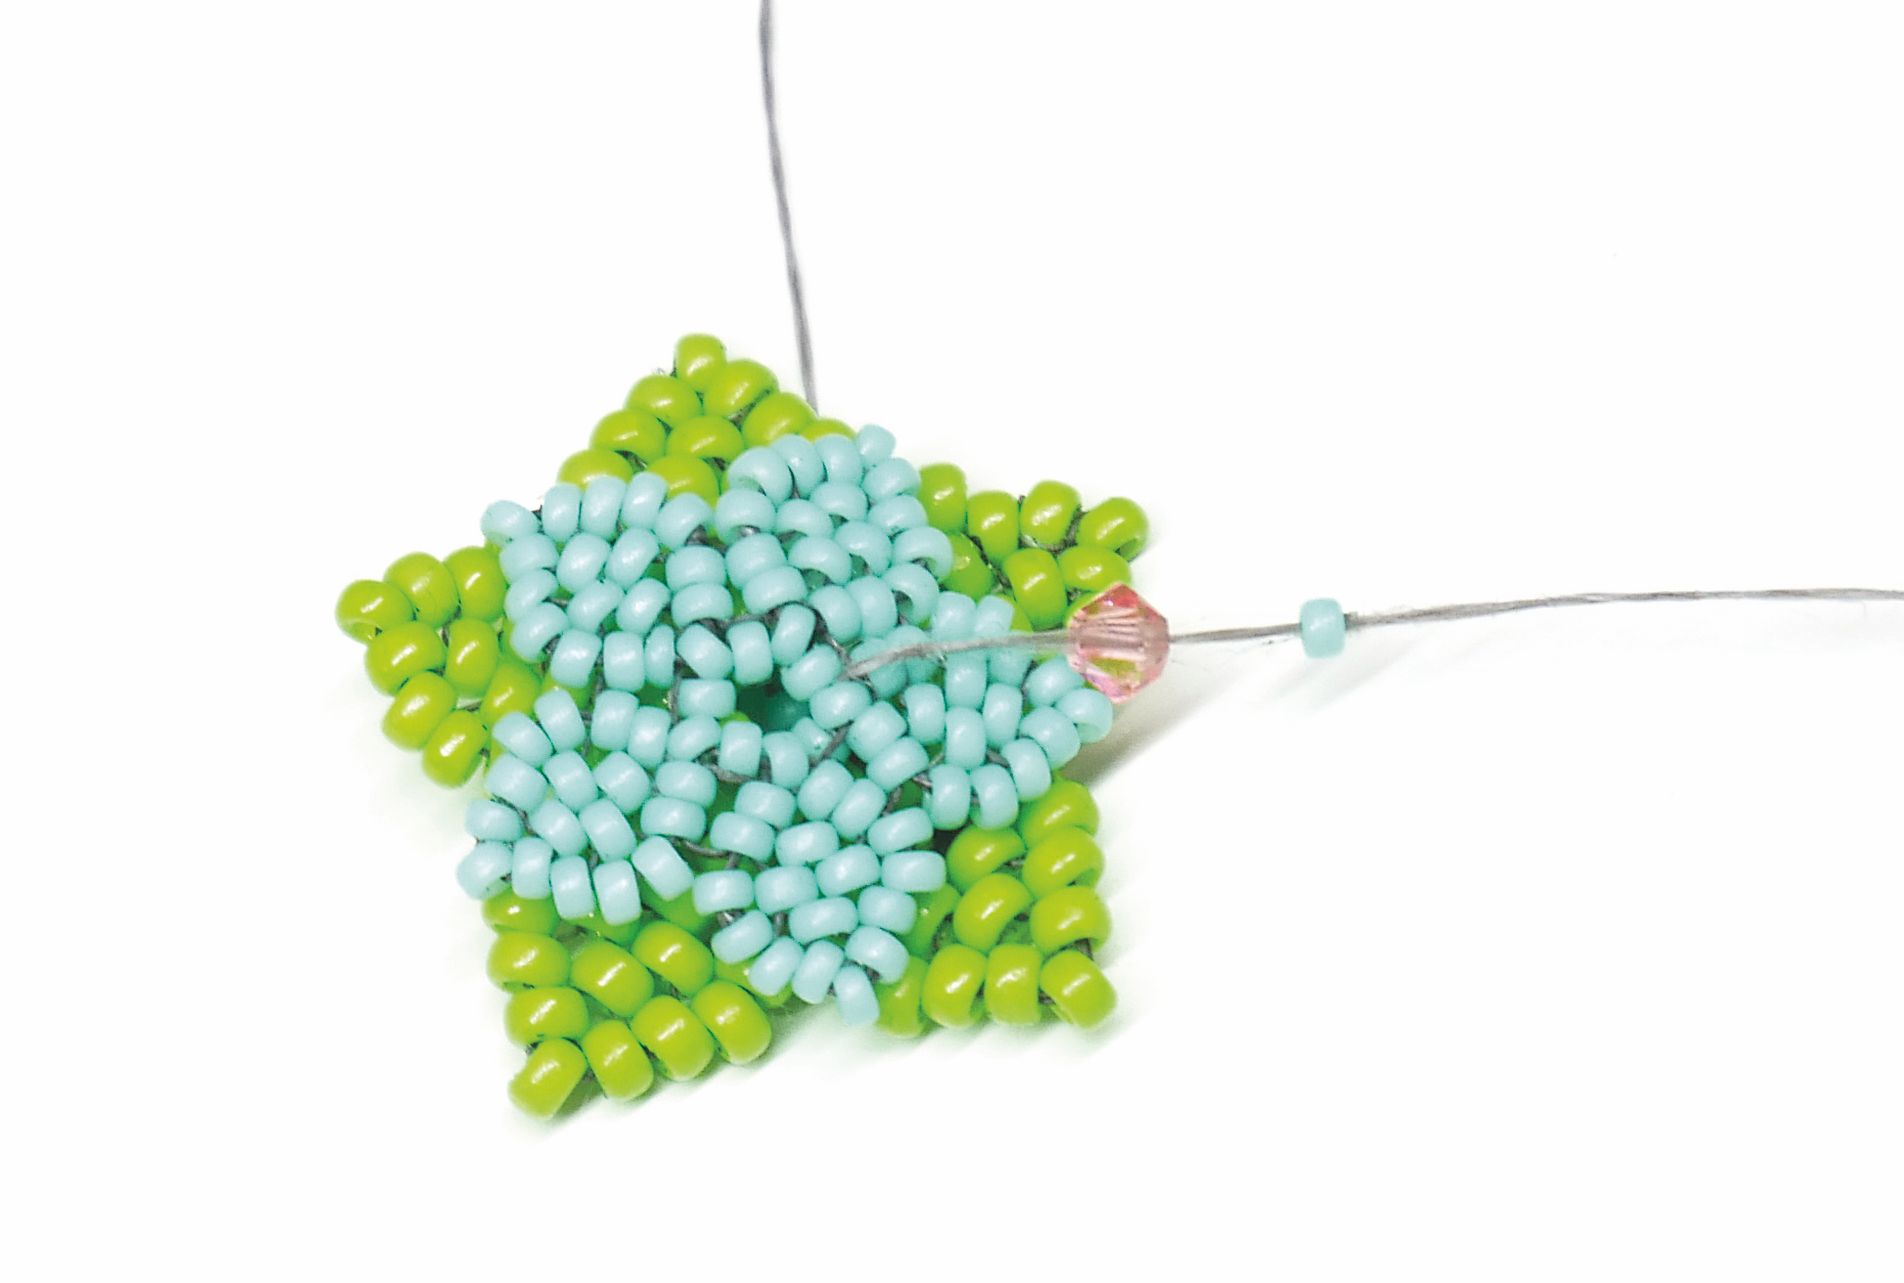
20. Miss the (A) and go back down the (C) and then go into the next tip bead.
21. Repeat step 20 all the way around. Step up into a new (A) and then join all five (A) beads together by just taking your thread through them.

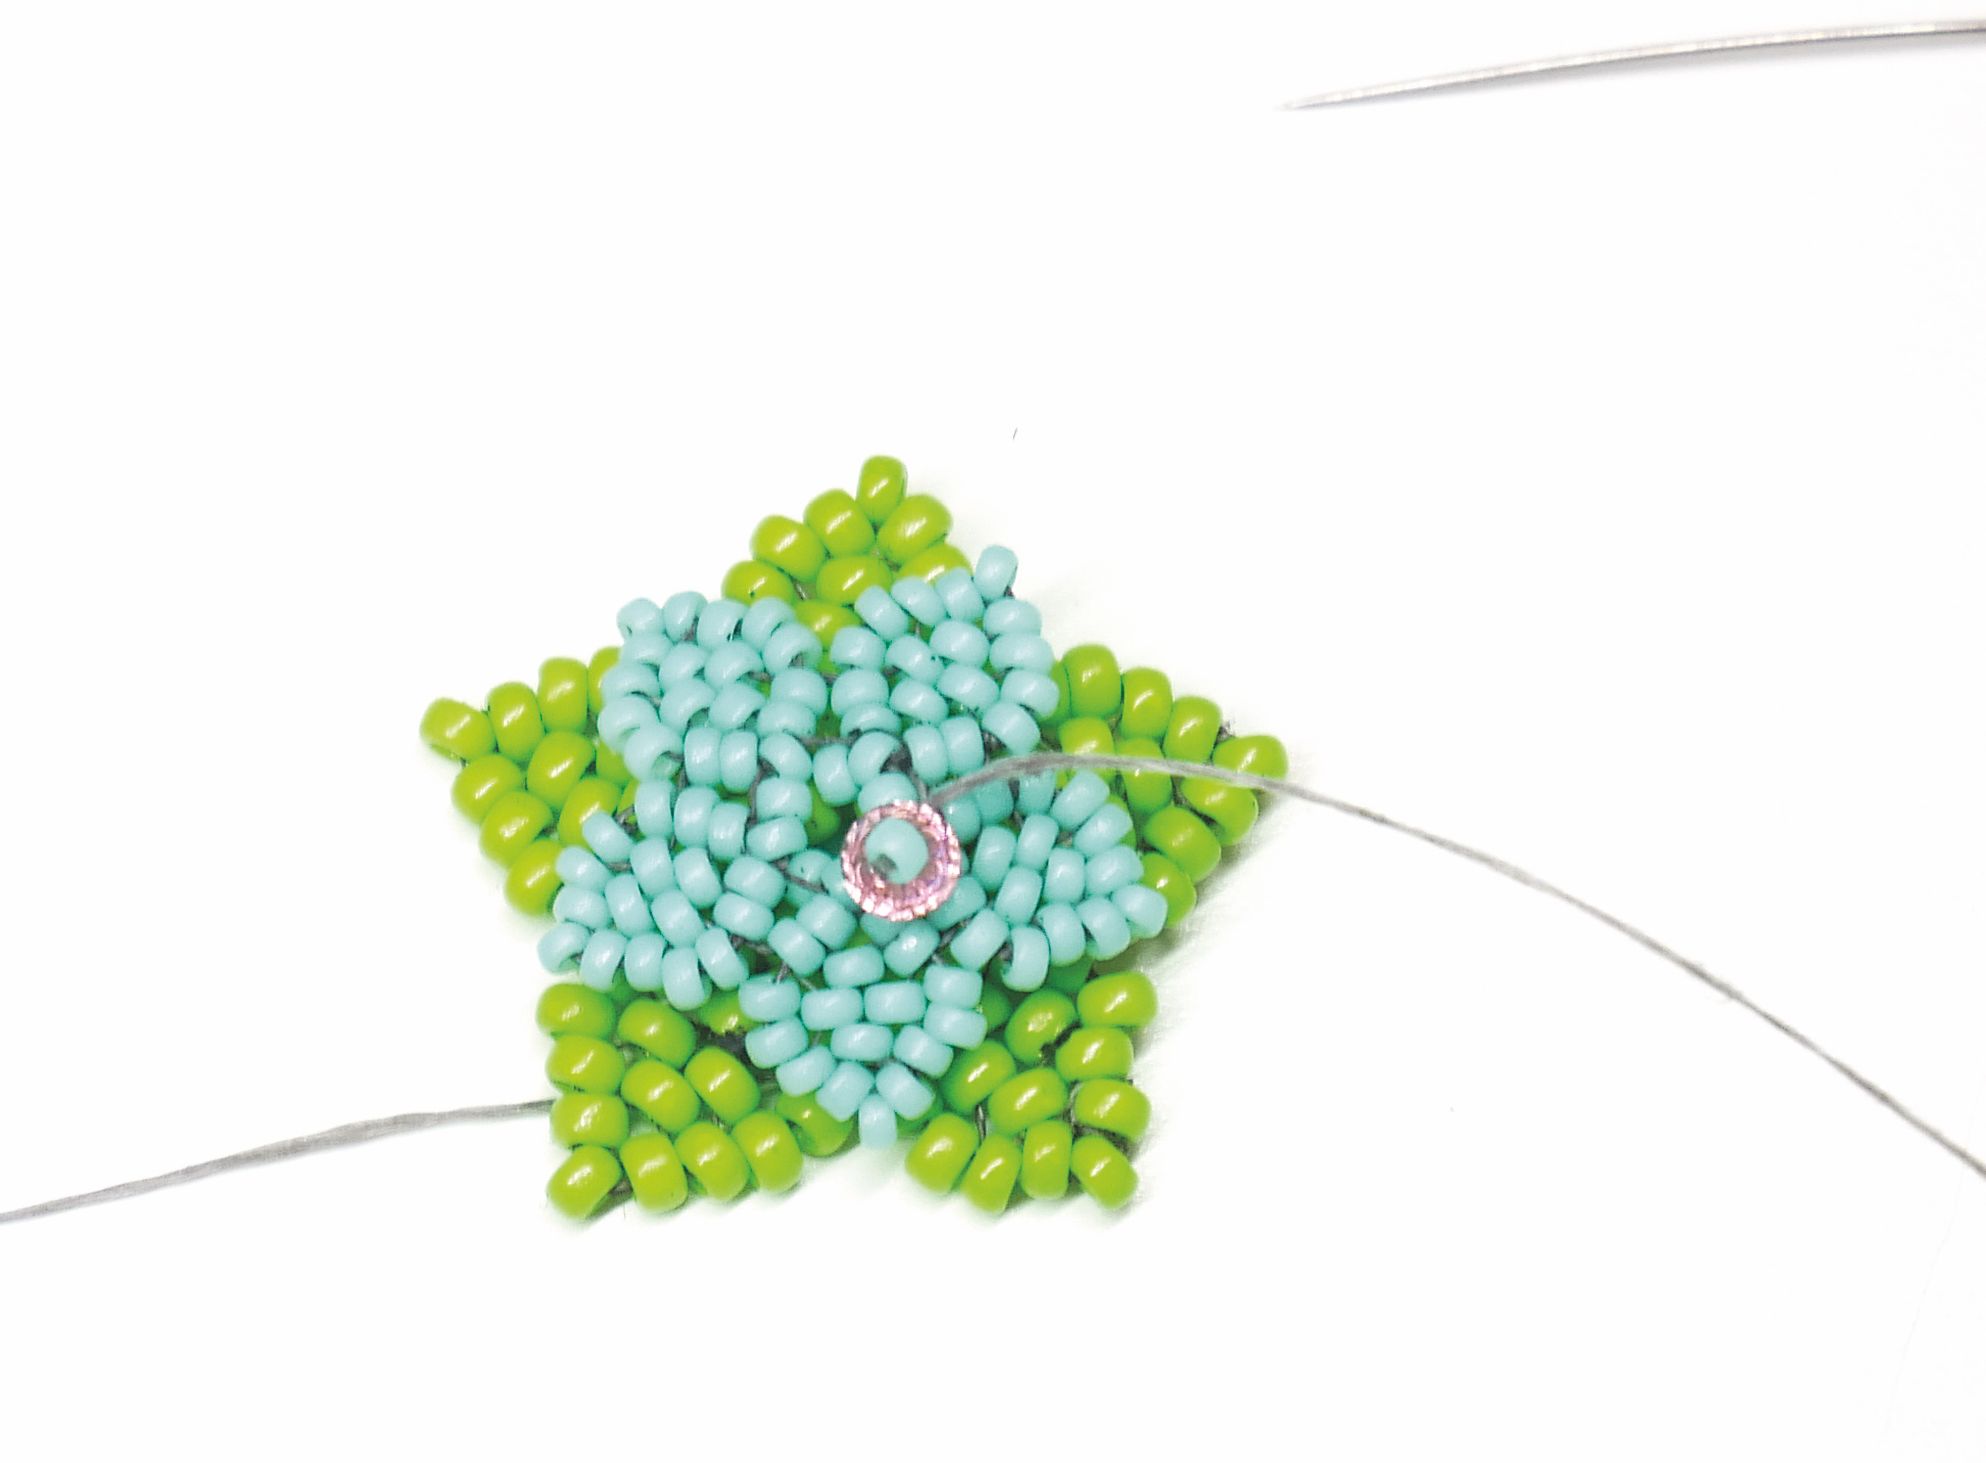
22. Weave around until you’re coming out of a tip bead on a (A) petal. The other tip from the one you’ve already used. Pick up 4(A), 1(B), 1(D), 1(B), 4(A). Go back into the tip (A) bead from the opposite side to that which you were coming out of.

23. Weave around to the tip (B) bead of the petal facing the one you’ve just used to add the drop. Pick up 4(C) and go back into the (B) you’re coming out of from the opposite side. Go forward into the first (C).
24. Add a (B) bead between each (C) except for the one that already uses the tip of the petal. Weave around to the top (B).
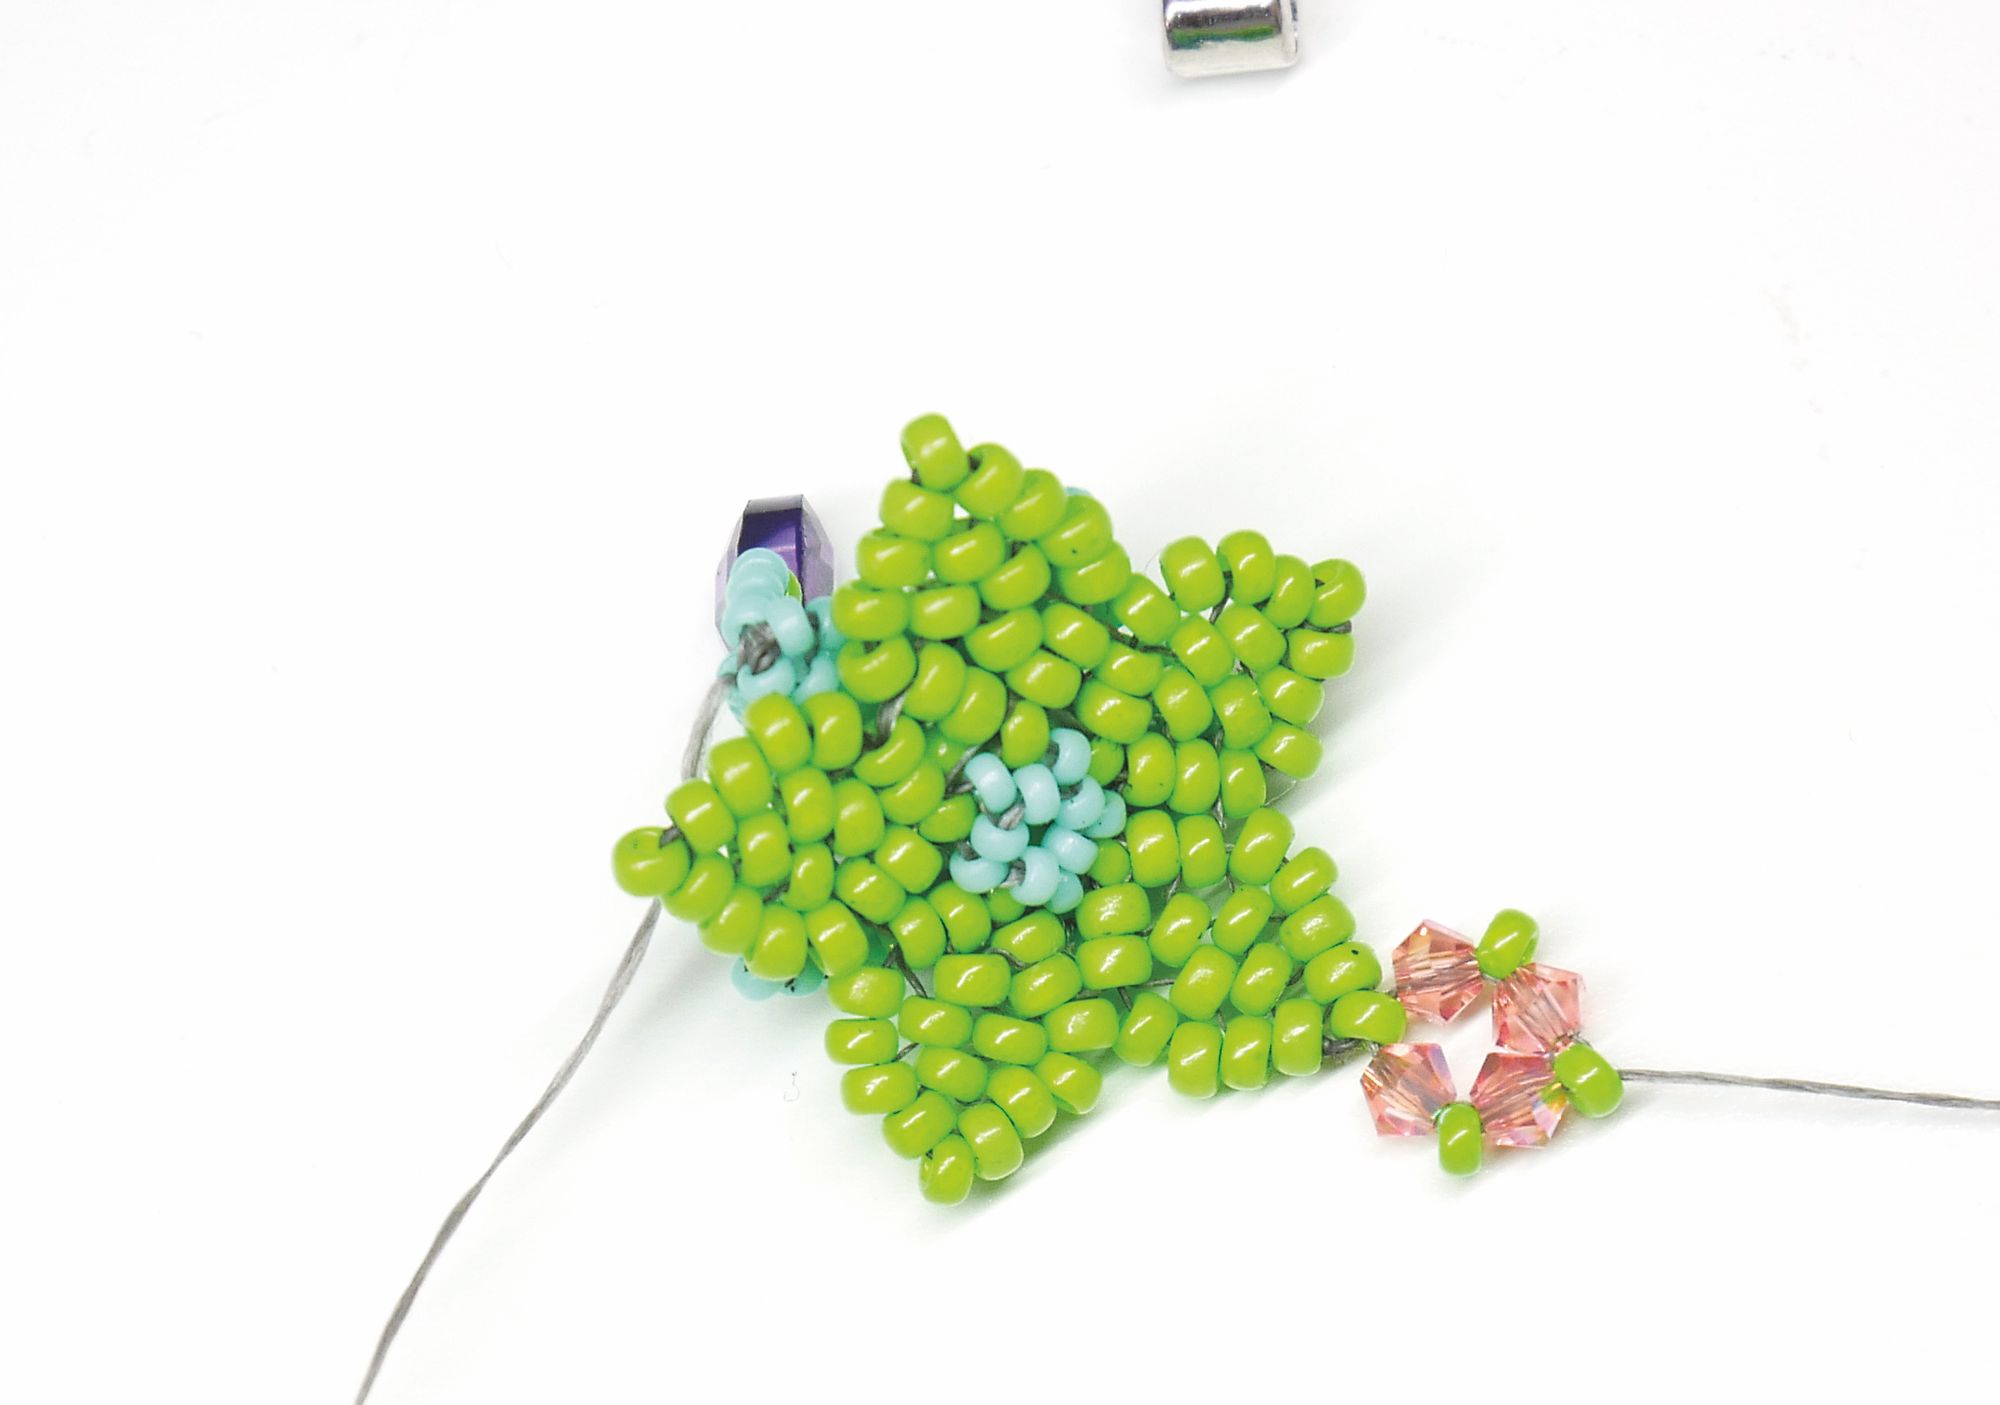
25. Pick up 5(B) and go back into the (B) you’re coming our of from the opposite side. Go forward into the first (B) added.
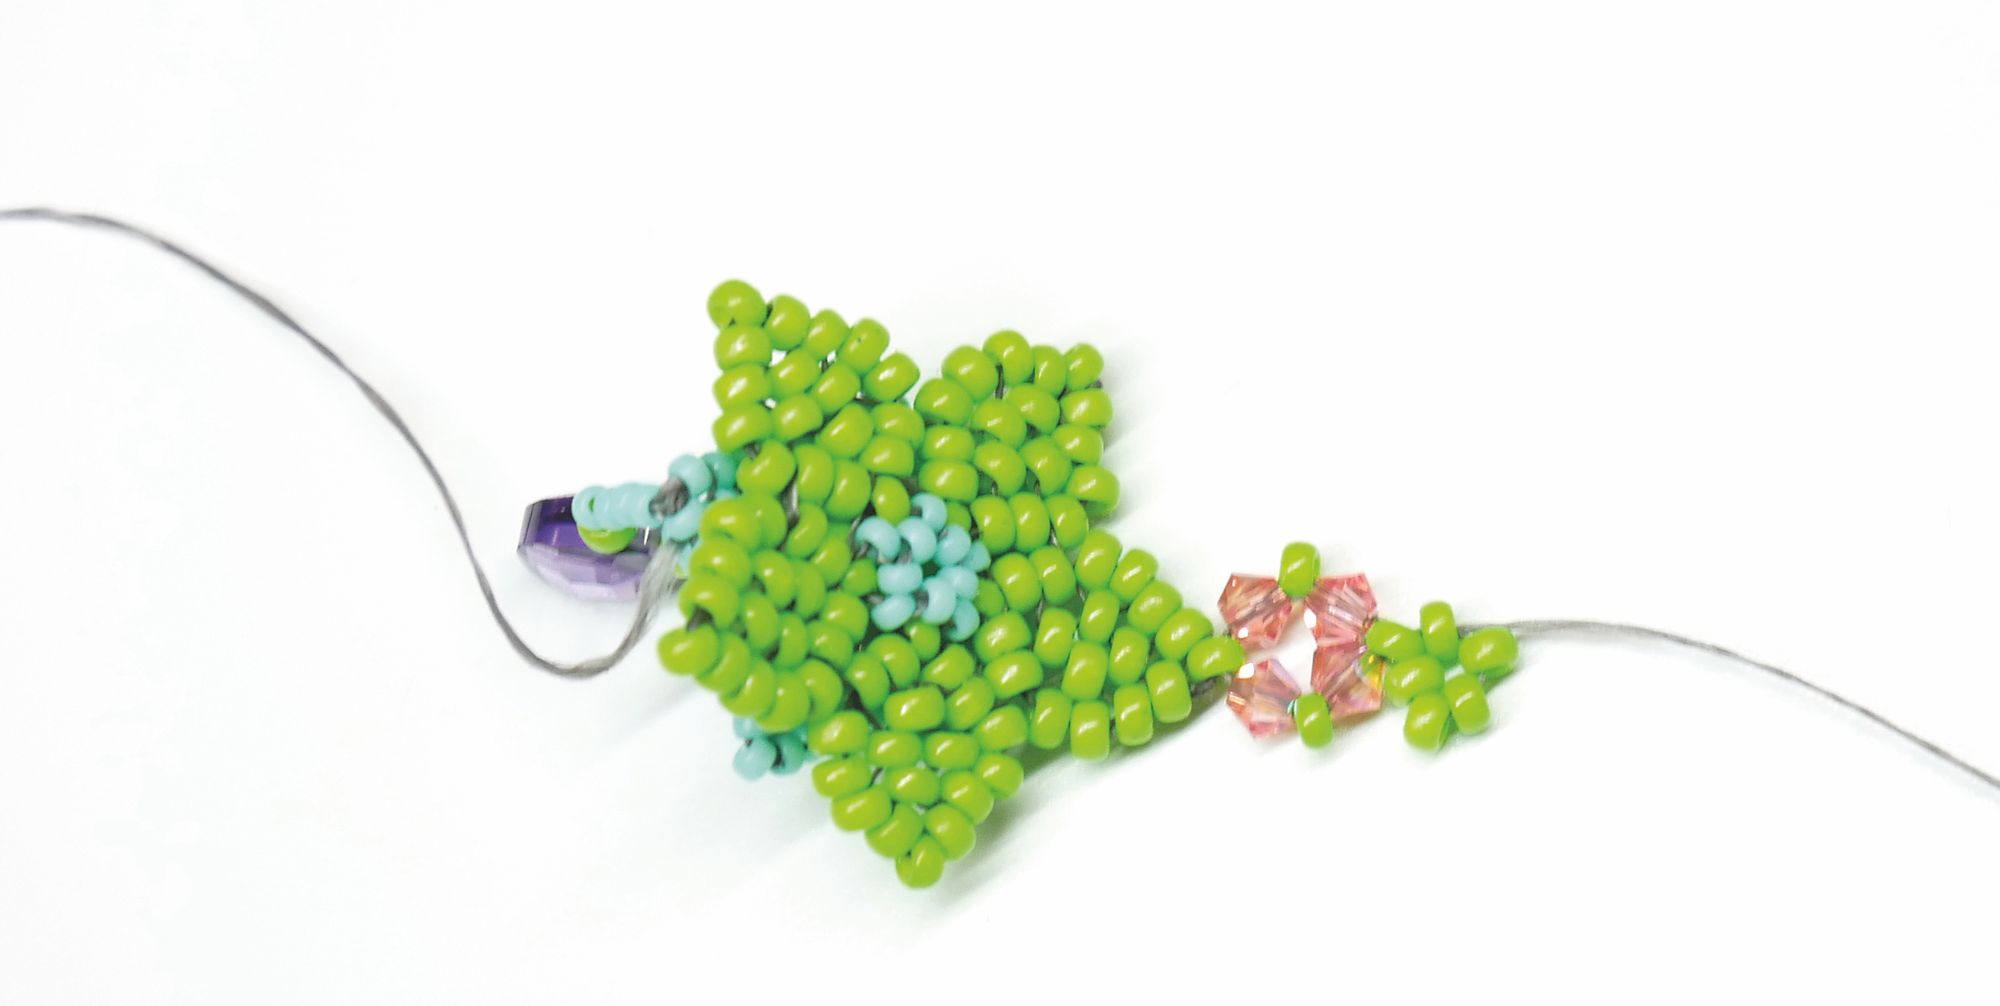
26. Add a (A) bead between your (B) beads for a total of four (A) beads.
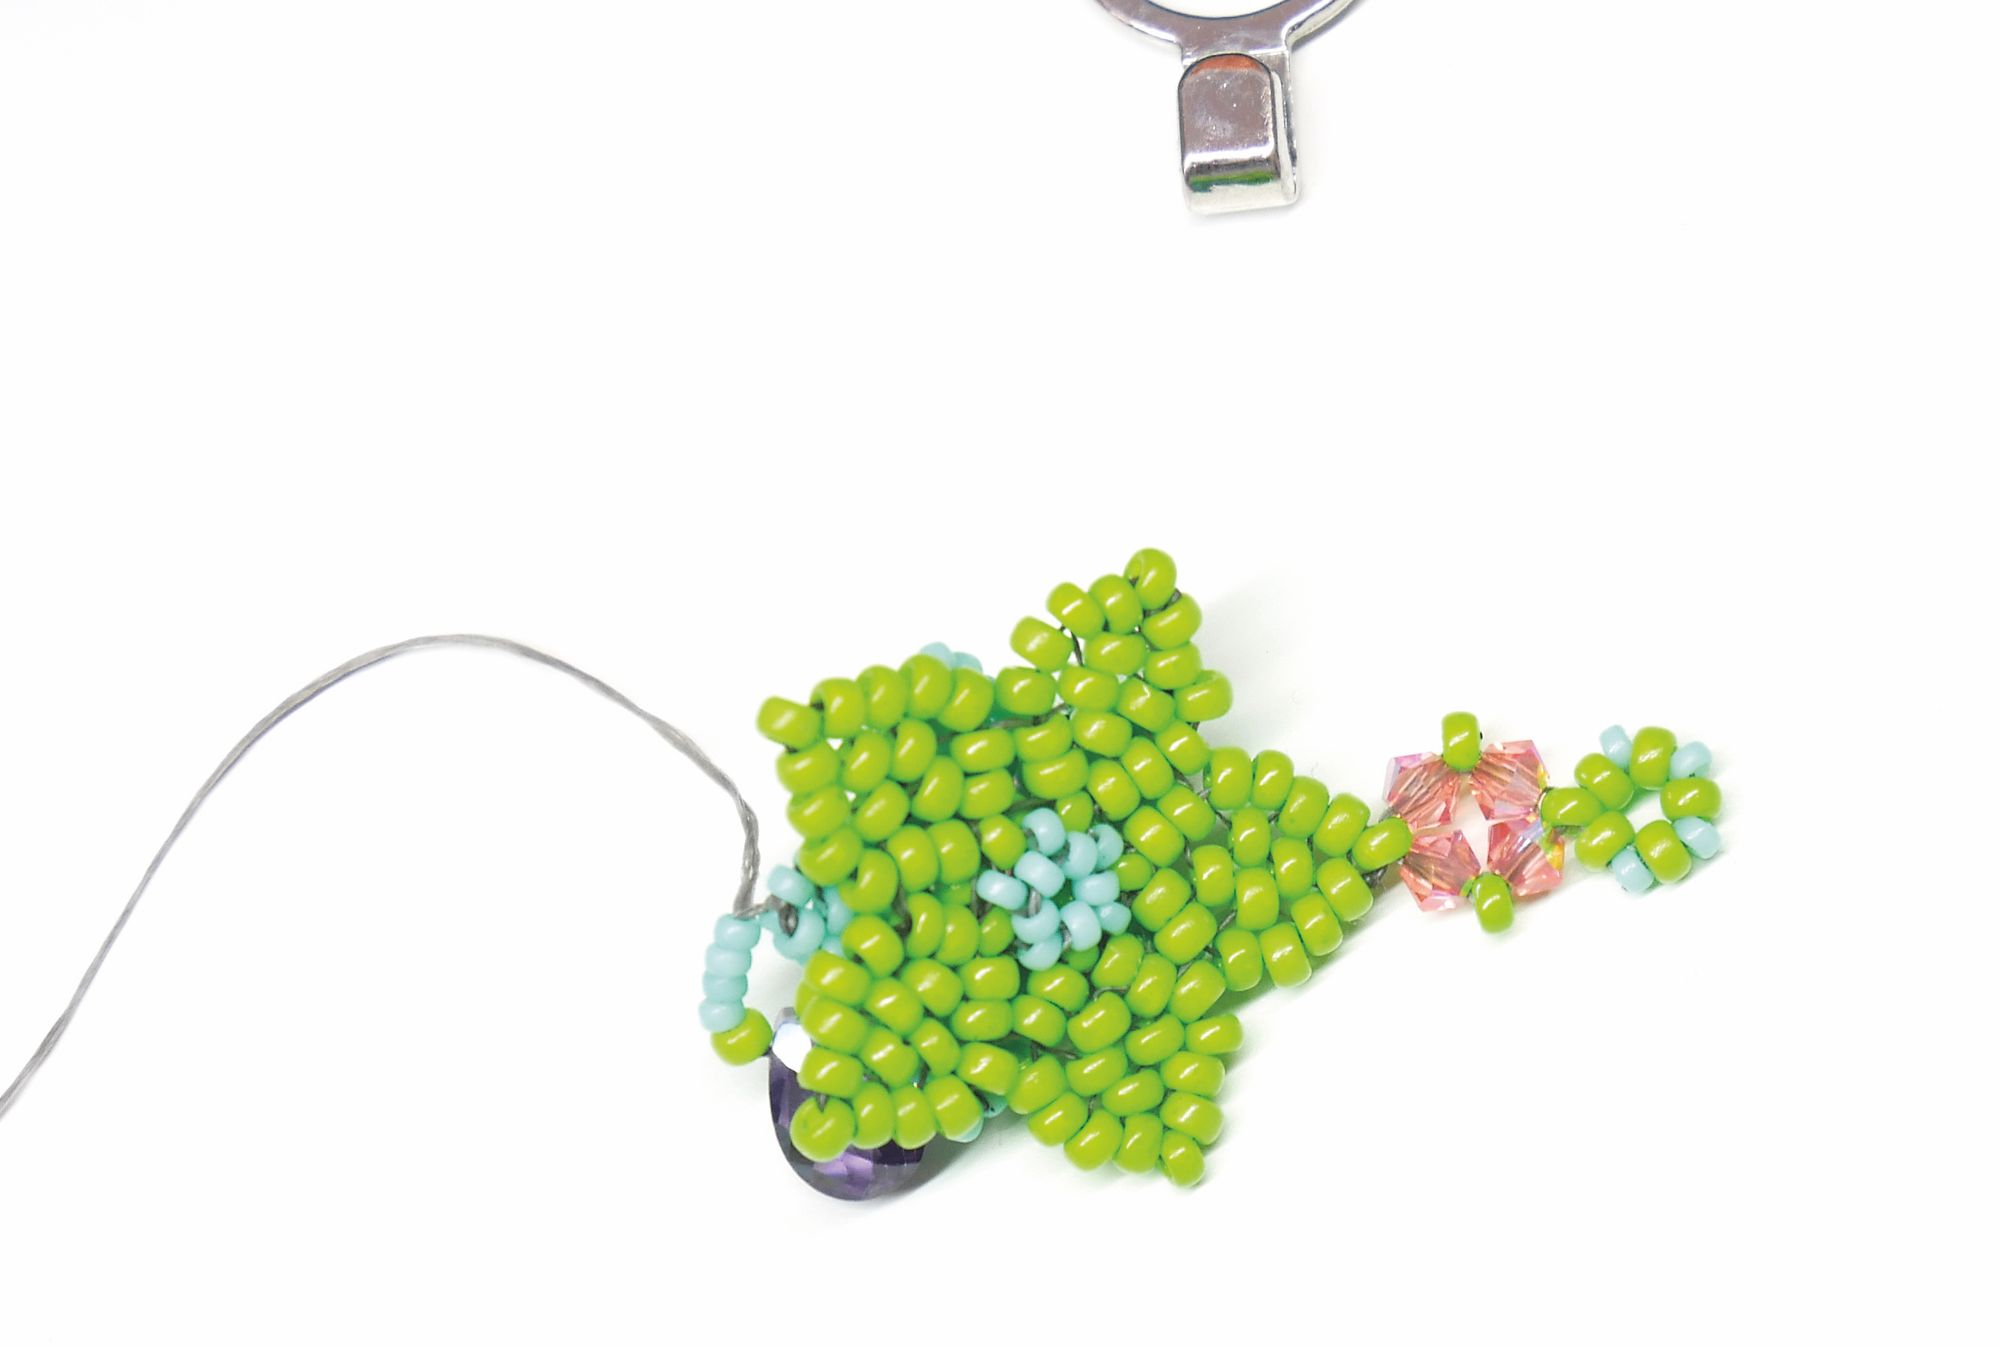
27. Attach an ear wire to the loop you have just made and add three pieces of chain approx 26 links long to the (A) beads that you added in step 17. These pieces of chain should fall behind your drop. Re- peat all steps again to make your second earring.