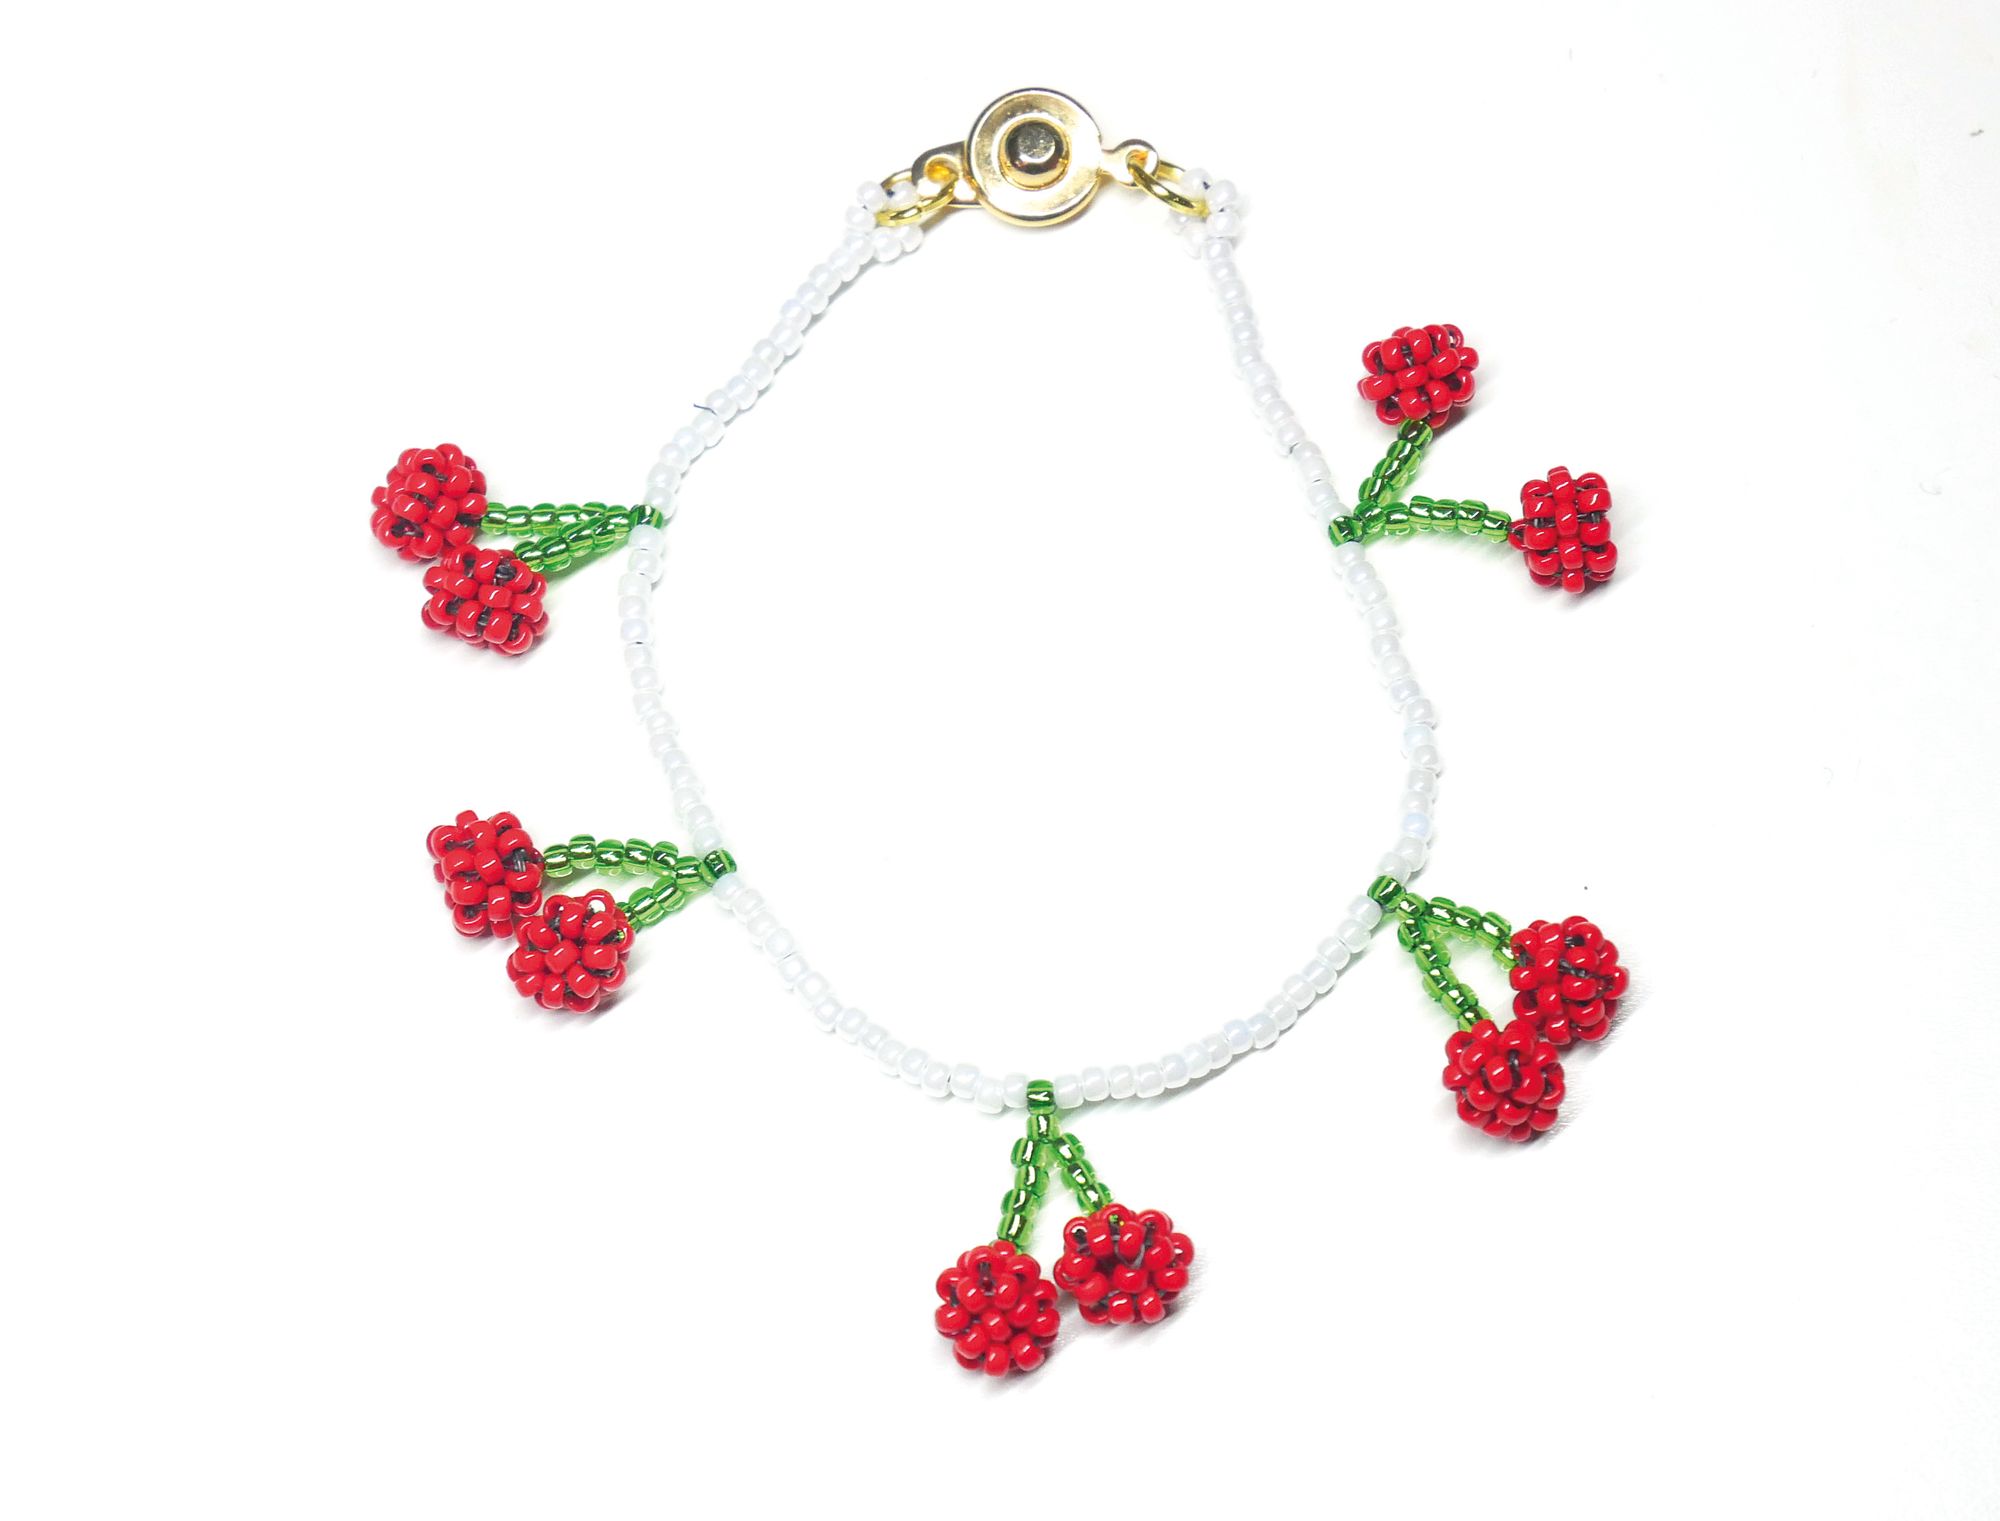
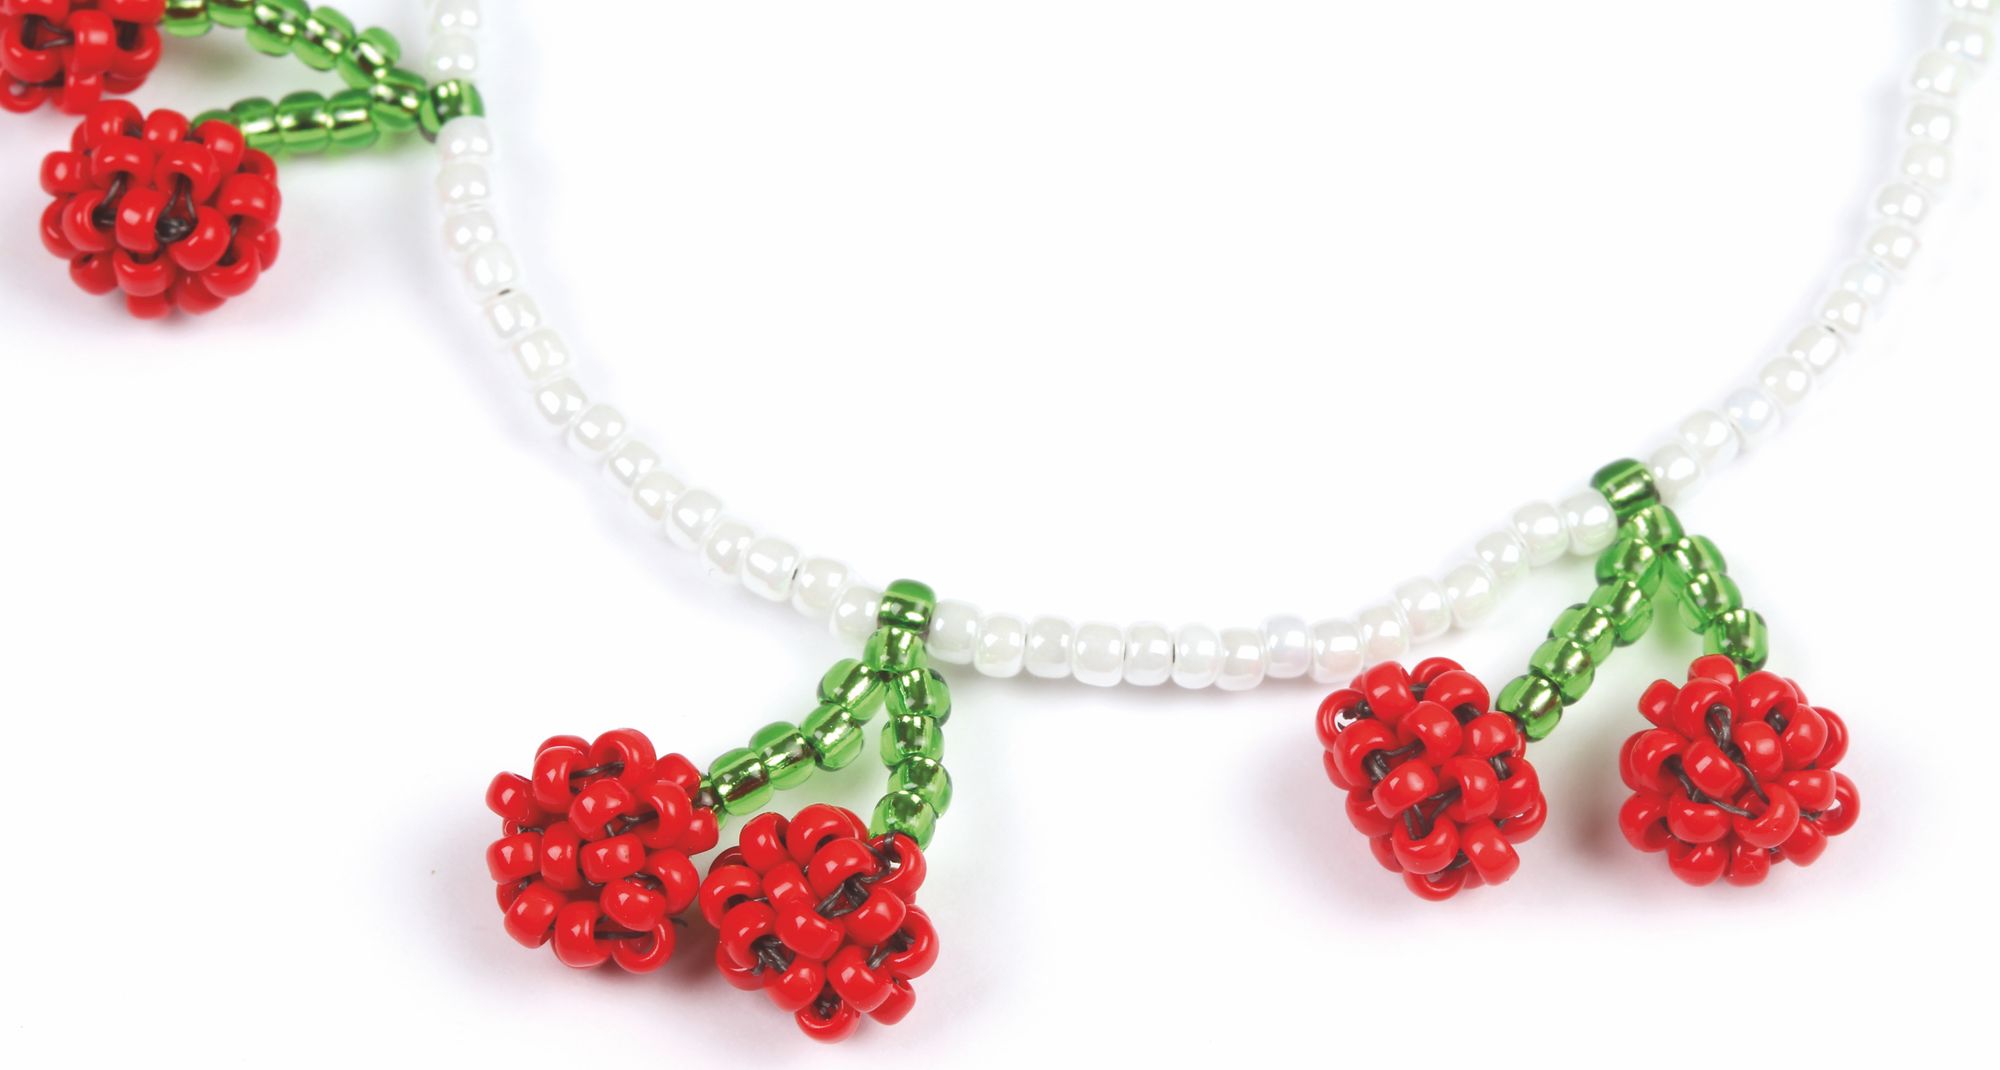
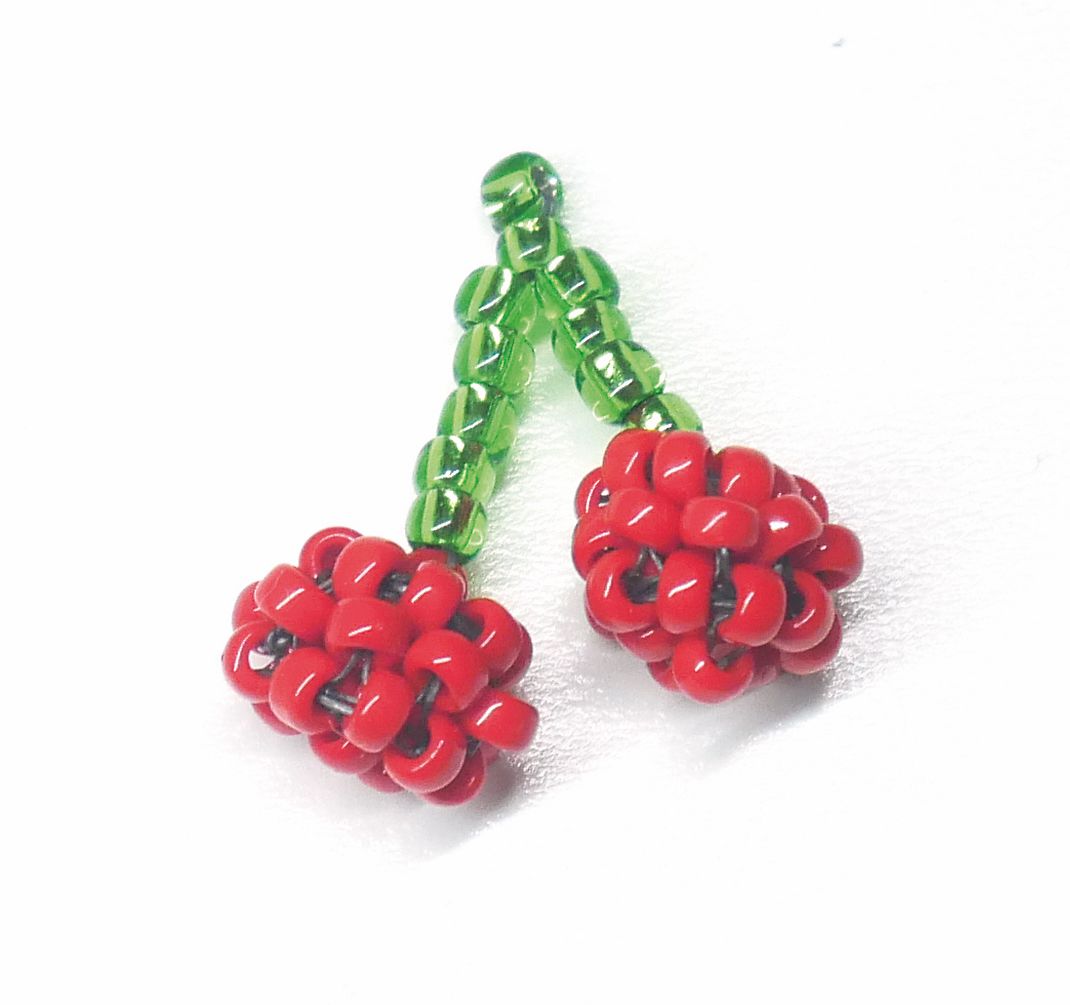
On a recent shopping trip, I just happened to notice how fruit jewellery is everywhere. I couldn’t have been more excited! I love cute, but wearable pieces and fruit seem to be the next big trend to follow on from the cactus, llama’s and flamingos that have dominated the high street for the last couple of years. I saw everything from lemon slice earrings to cherry necklaces to pineapple charm bracelets, and my mind quickly went to how I could recre- ate my version of these fabulous little pieces.
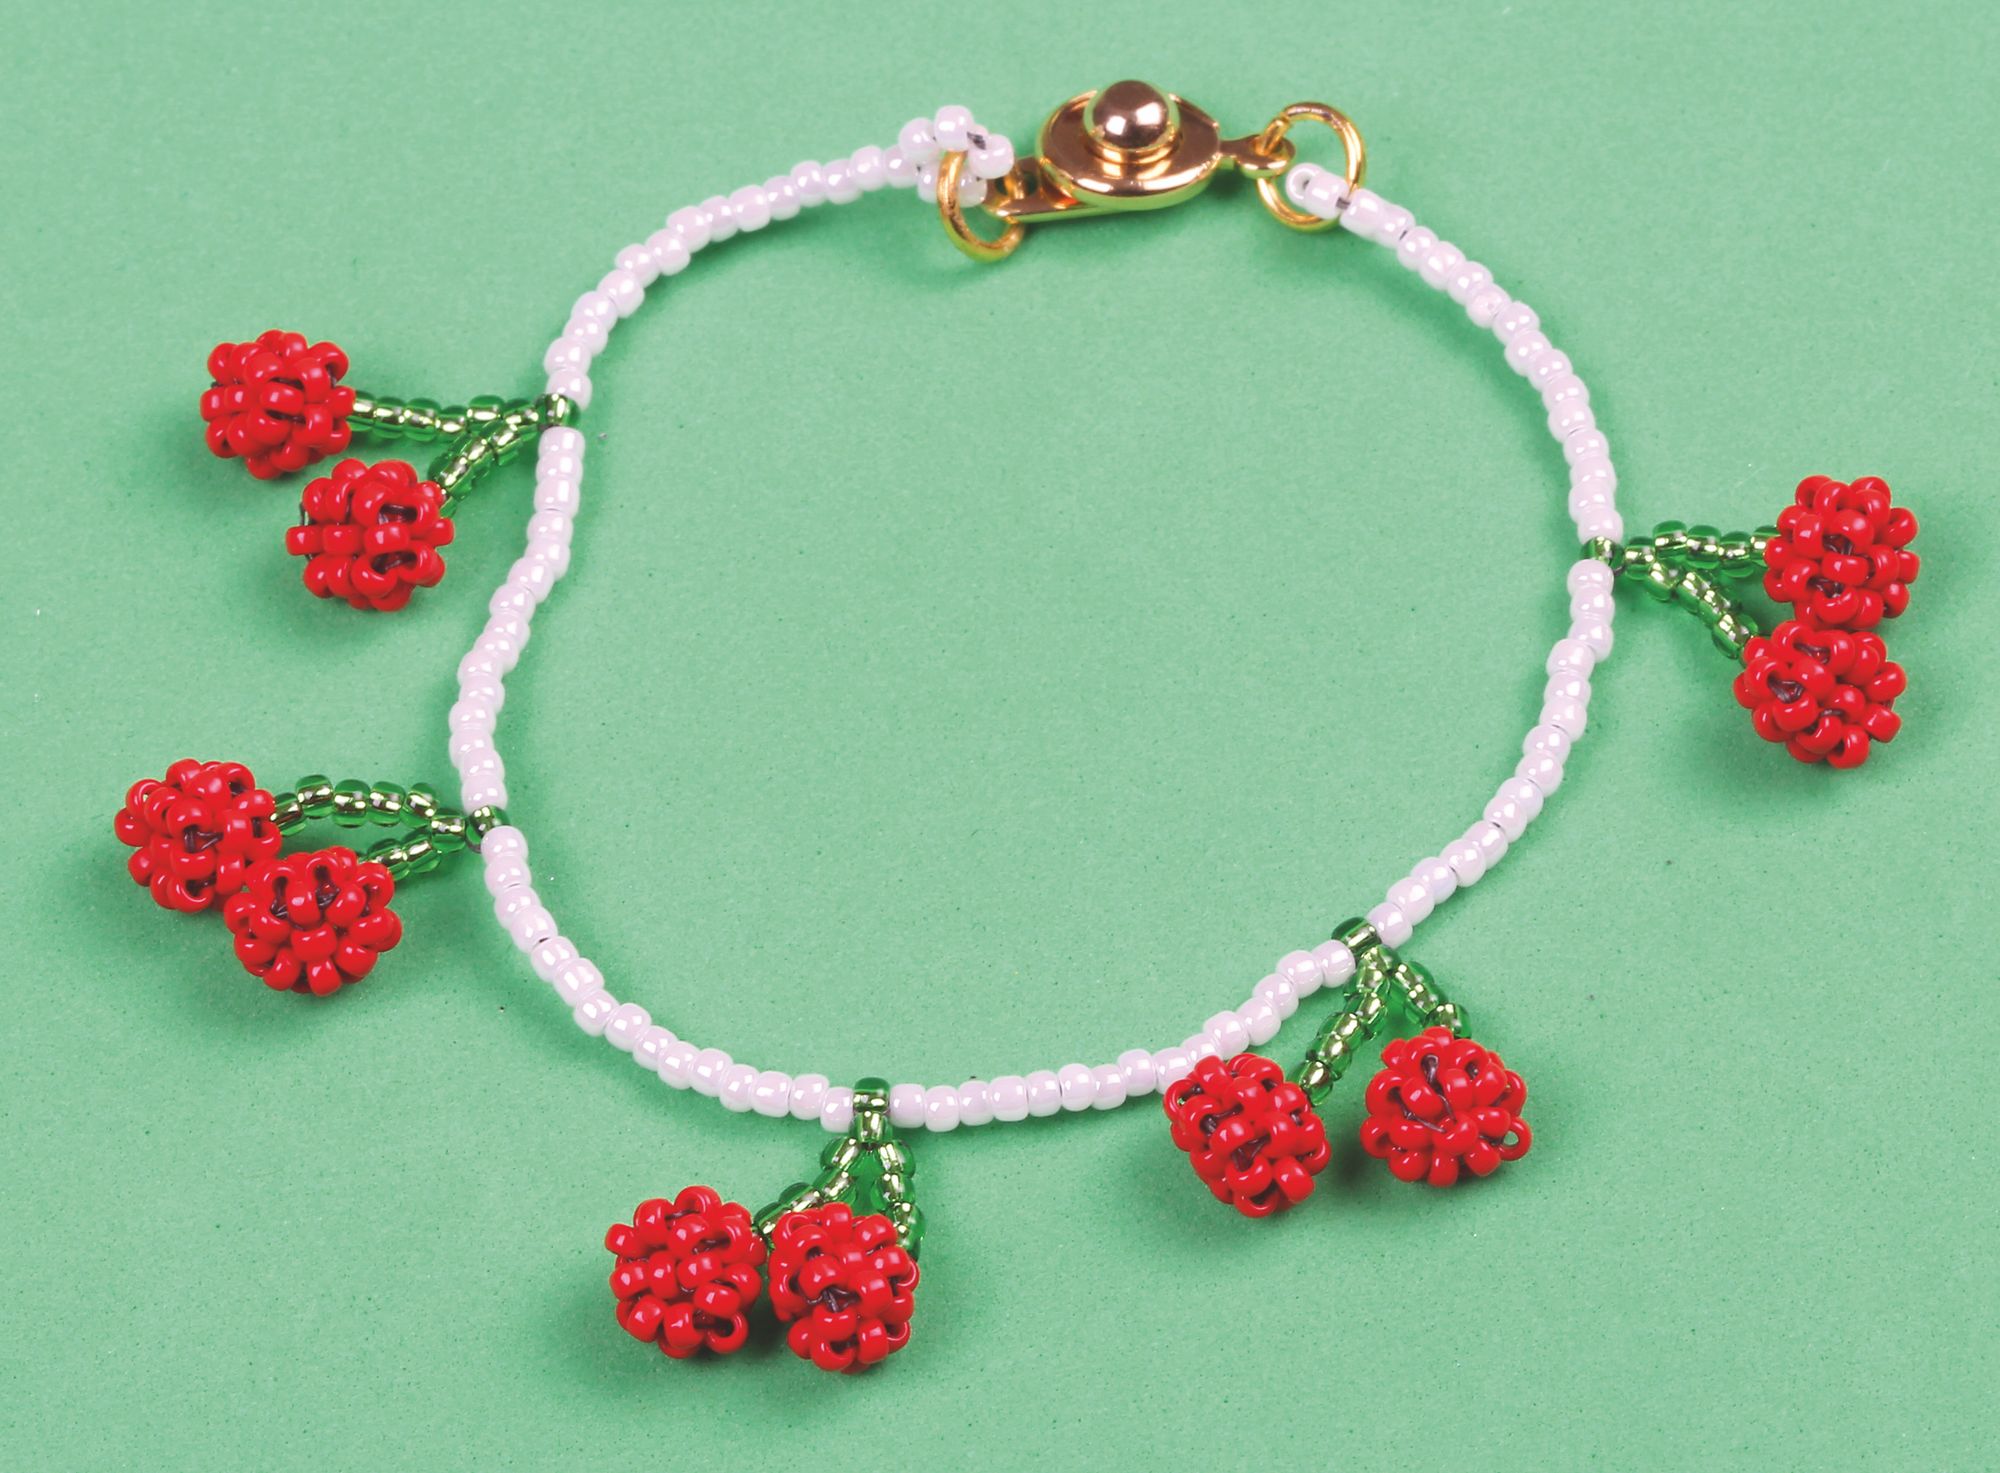
I decided to go with cherries as I’ve seen a cute cherry t-shirt I want and figured this would go perfectly. Using PRAW (Pris- matic Right Angle Weave), I quickly made up my first red ball, added on a couple of silver lined green stems and then made a separate red ball to attach. I think a single cherry took me about 10 minutes and I made the whole bracelet in around an hour. Addicted wasn’t the word. How many cherries can one person wear before it becomes weird? If like me you’re thinking more than a bracelet, why not try earrings, a necklace or even a sweet little anklet. Whatever you choose to use your cherries on we hope we’ve inspired you. Enjoy!
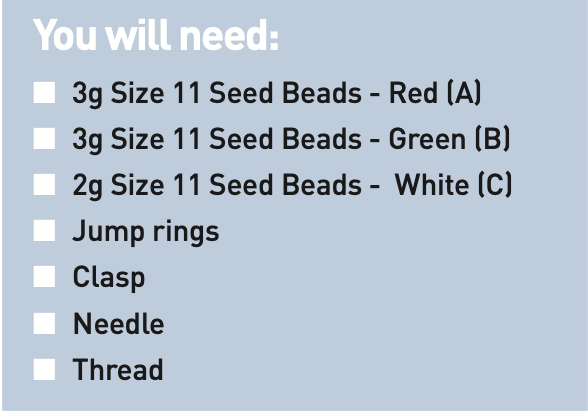
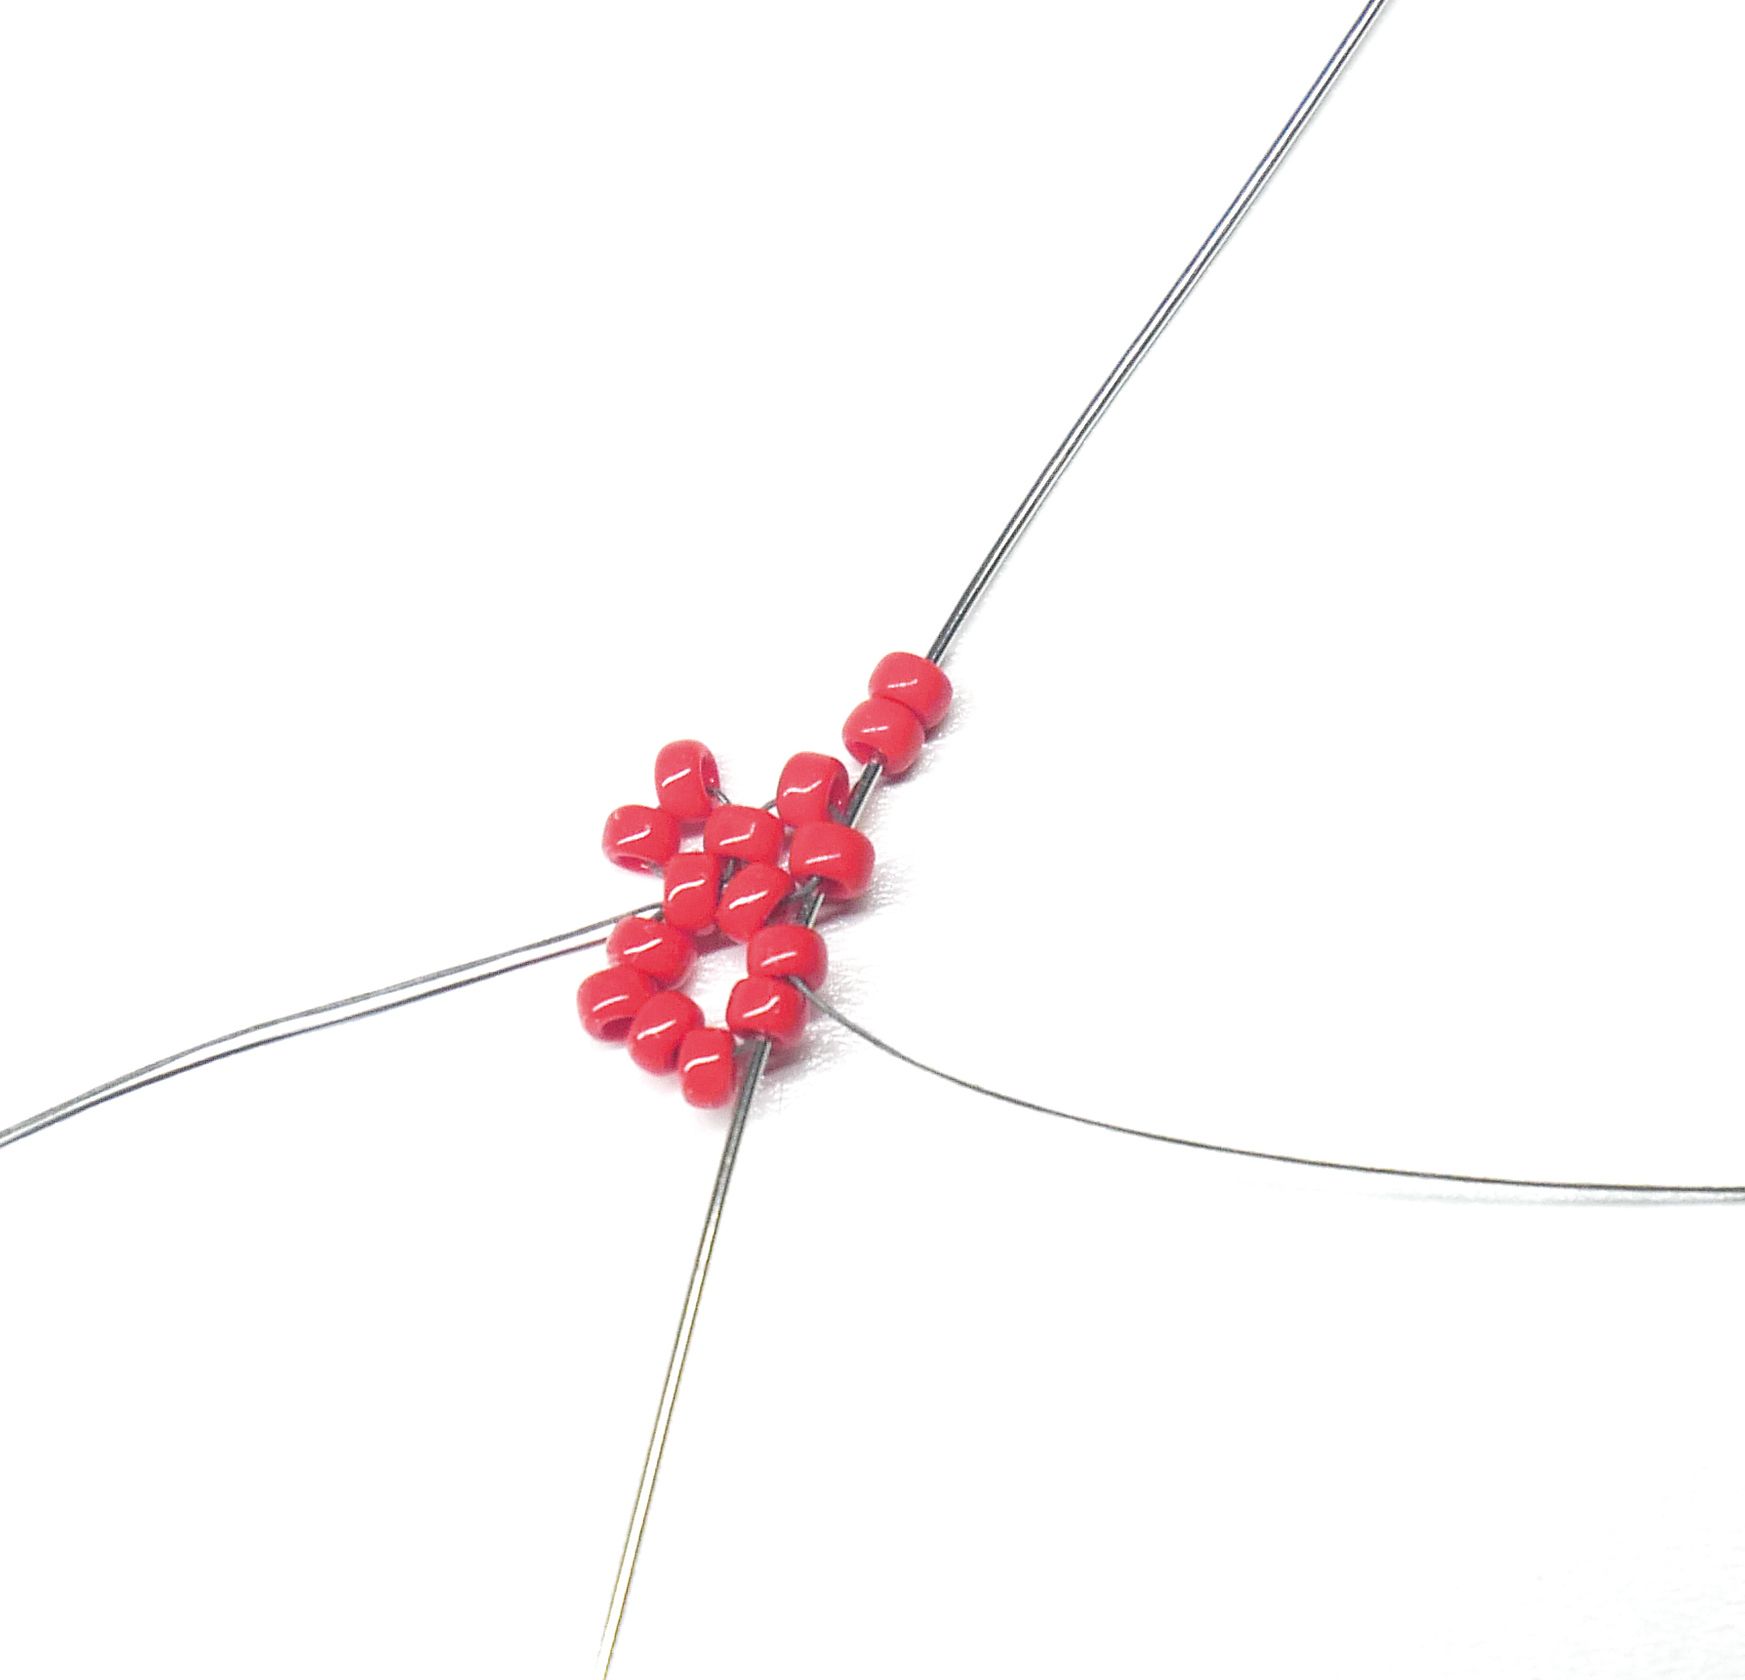
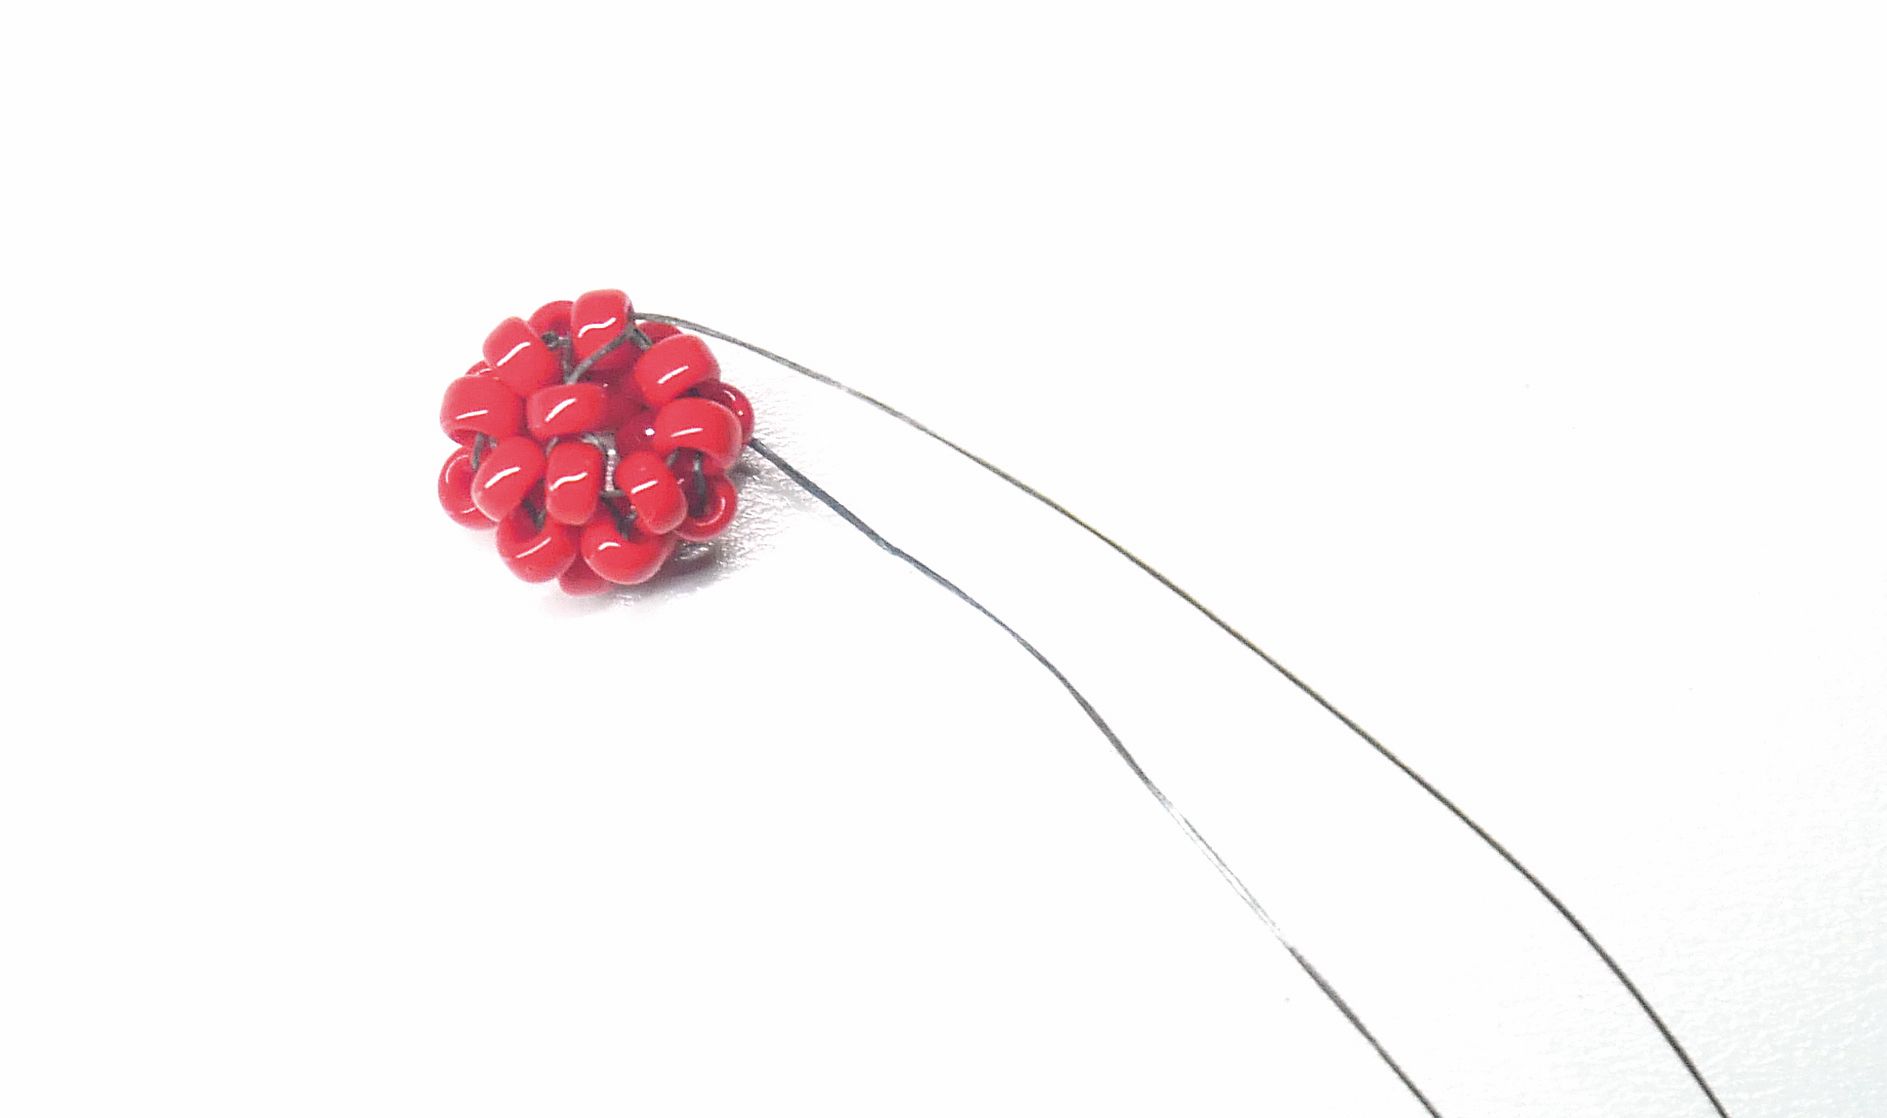
1. Pick up 8(A) and go through them all again to create a ring. This is your base row.
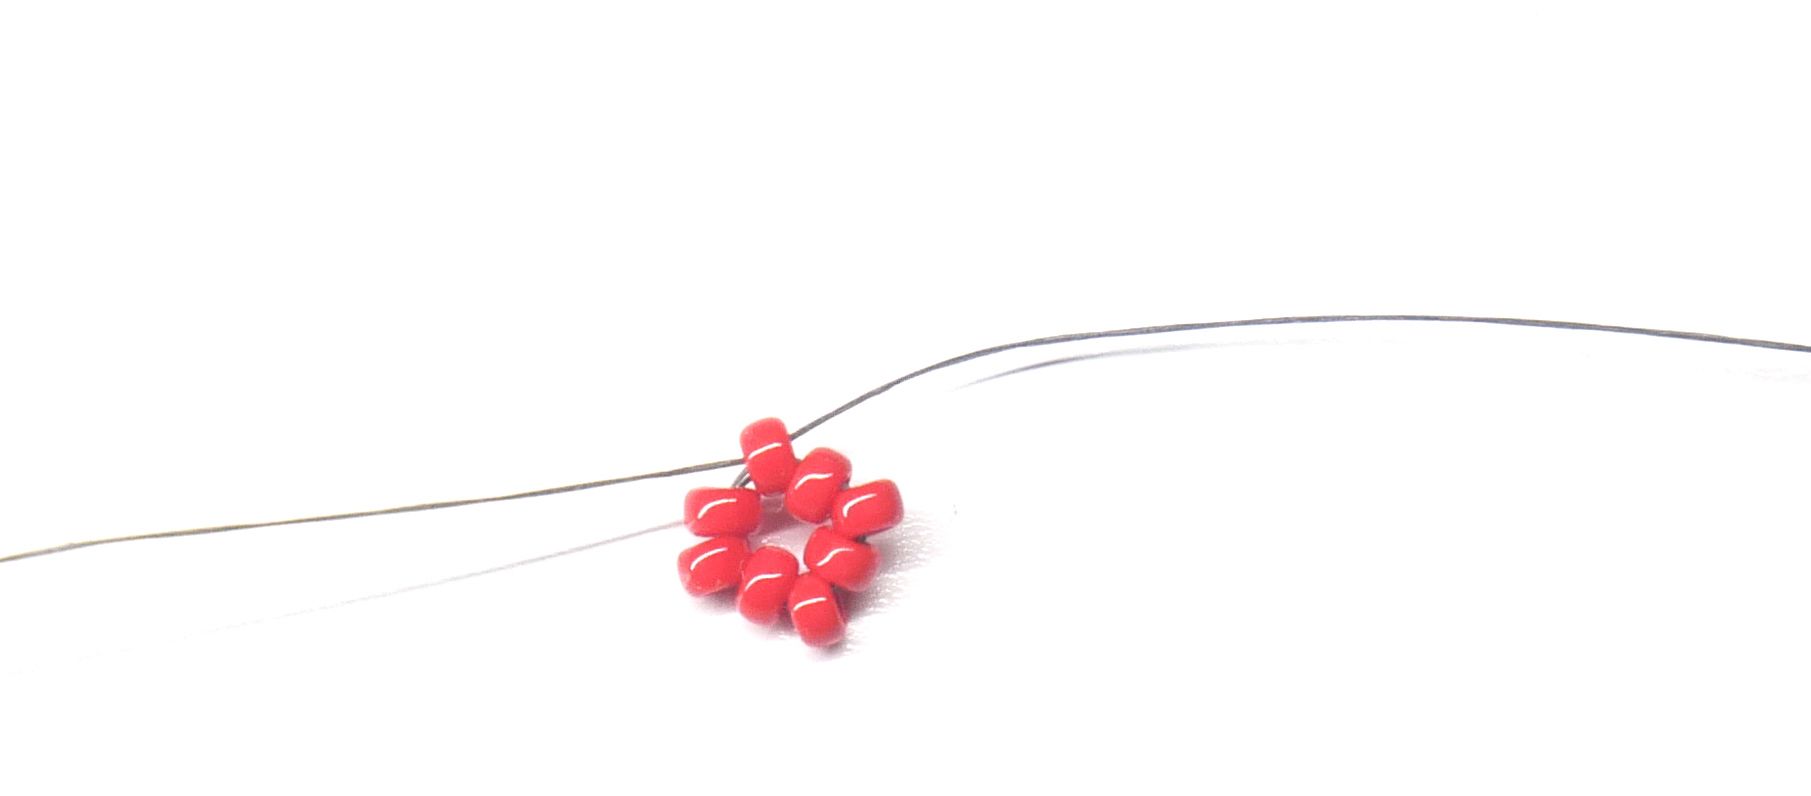
2. Pick up 3(A) and go back into (A) you’re coming out of from the opposite side. Move forward into the next (A) on your base row.
3. Pick up 2(A) and come down the first (A) of the set of 3(A) you just added in previ- ous round and the one you’re coming out of on the base row. Weave forward to the next (A) on the base row.
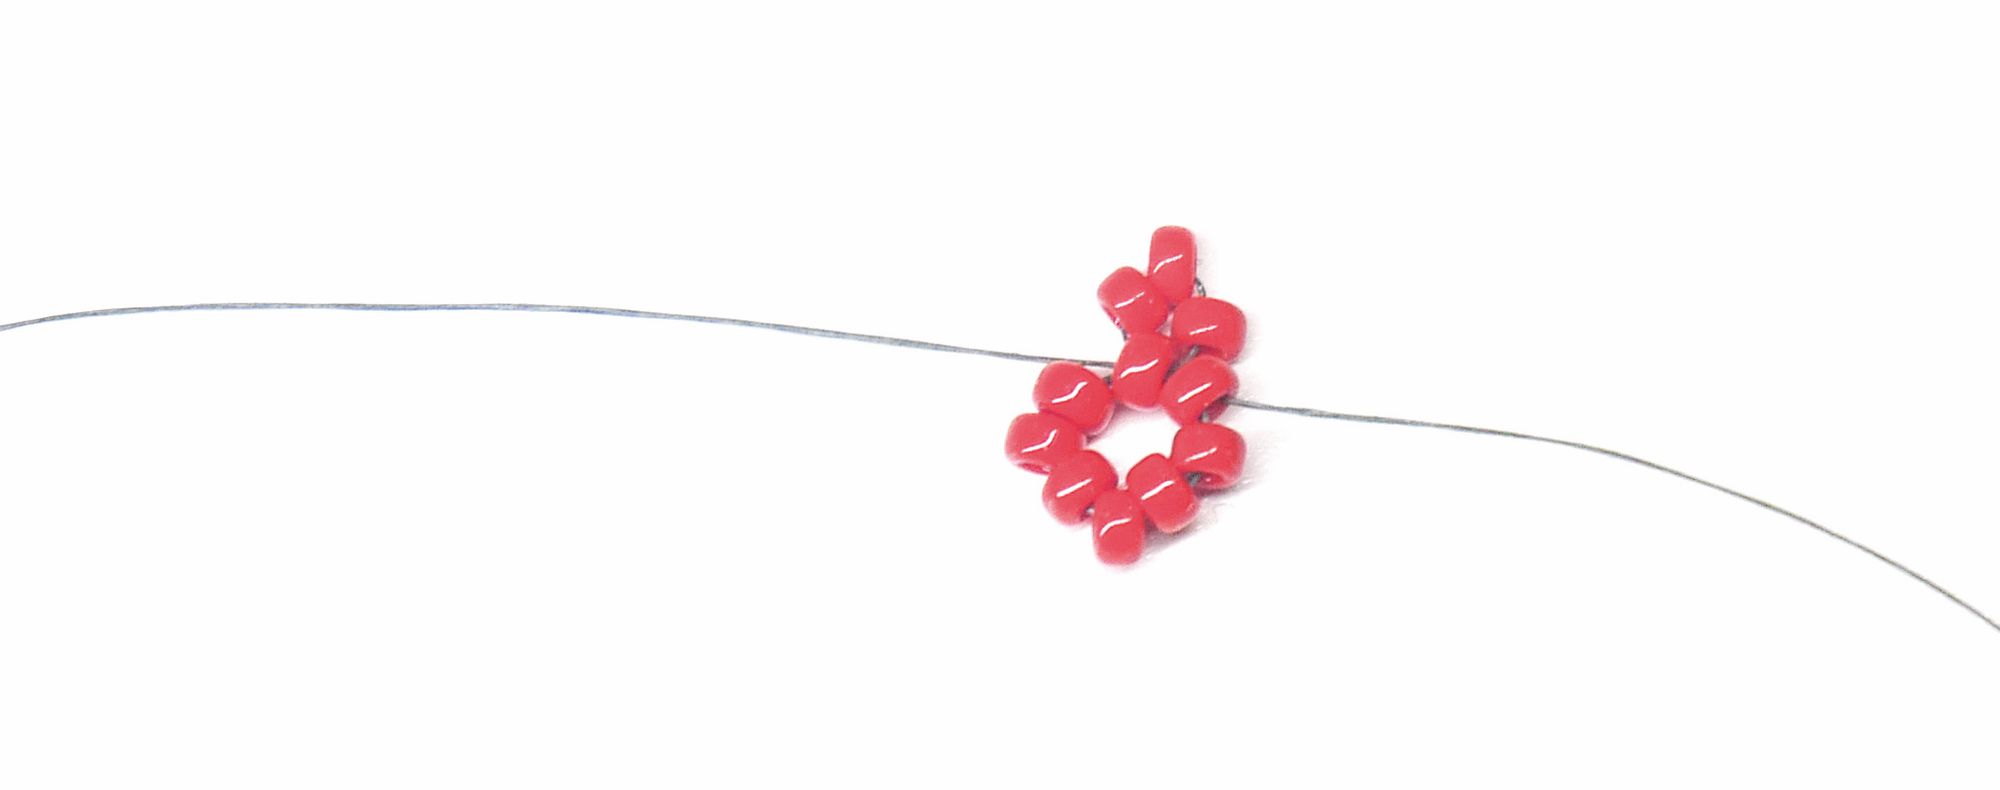
4. Pick up 2(A) and come down the first (A) of the set of 2(A) you just added in previ- ous round and the one you’re coming out of on the base row.
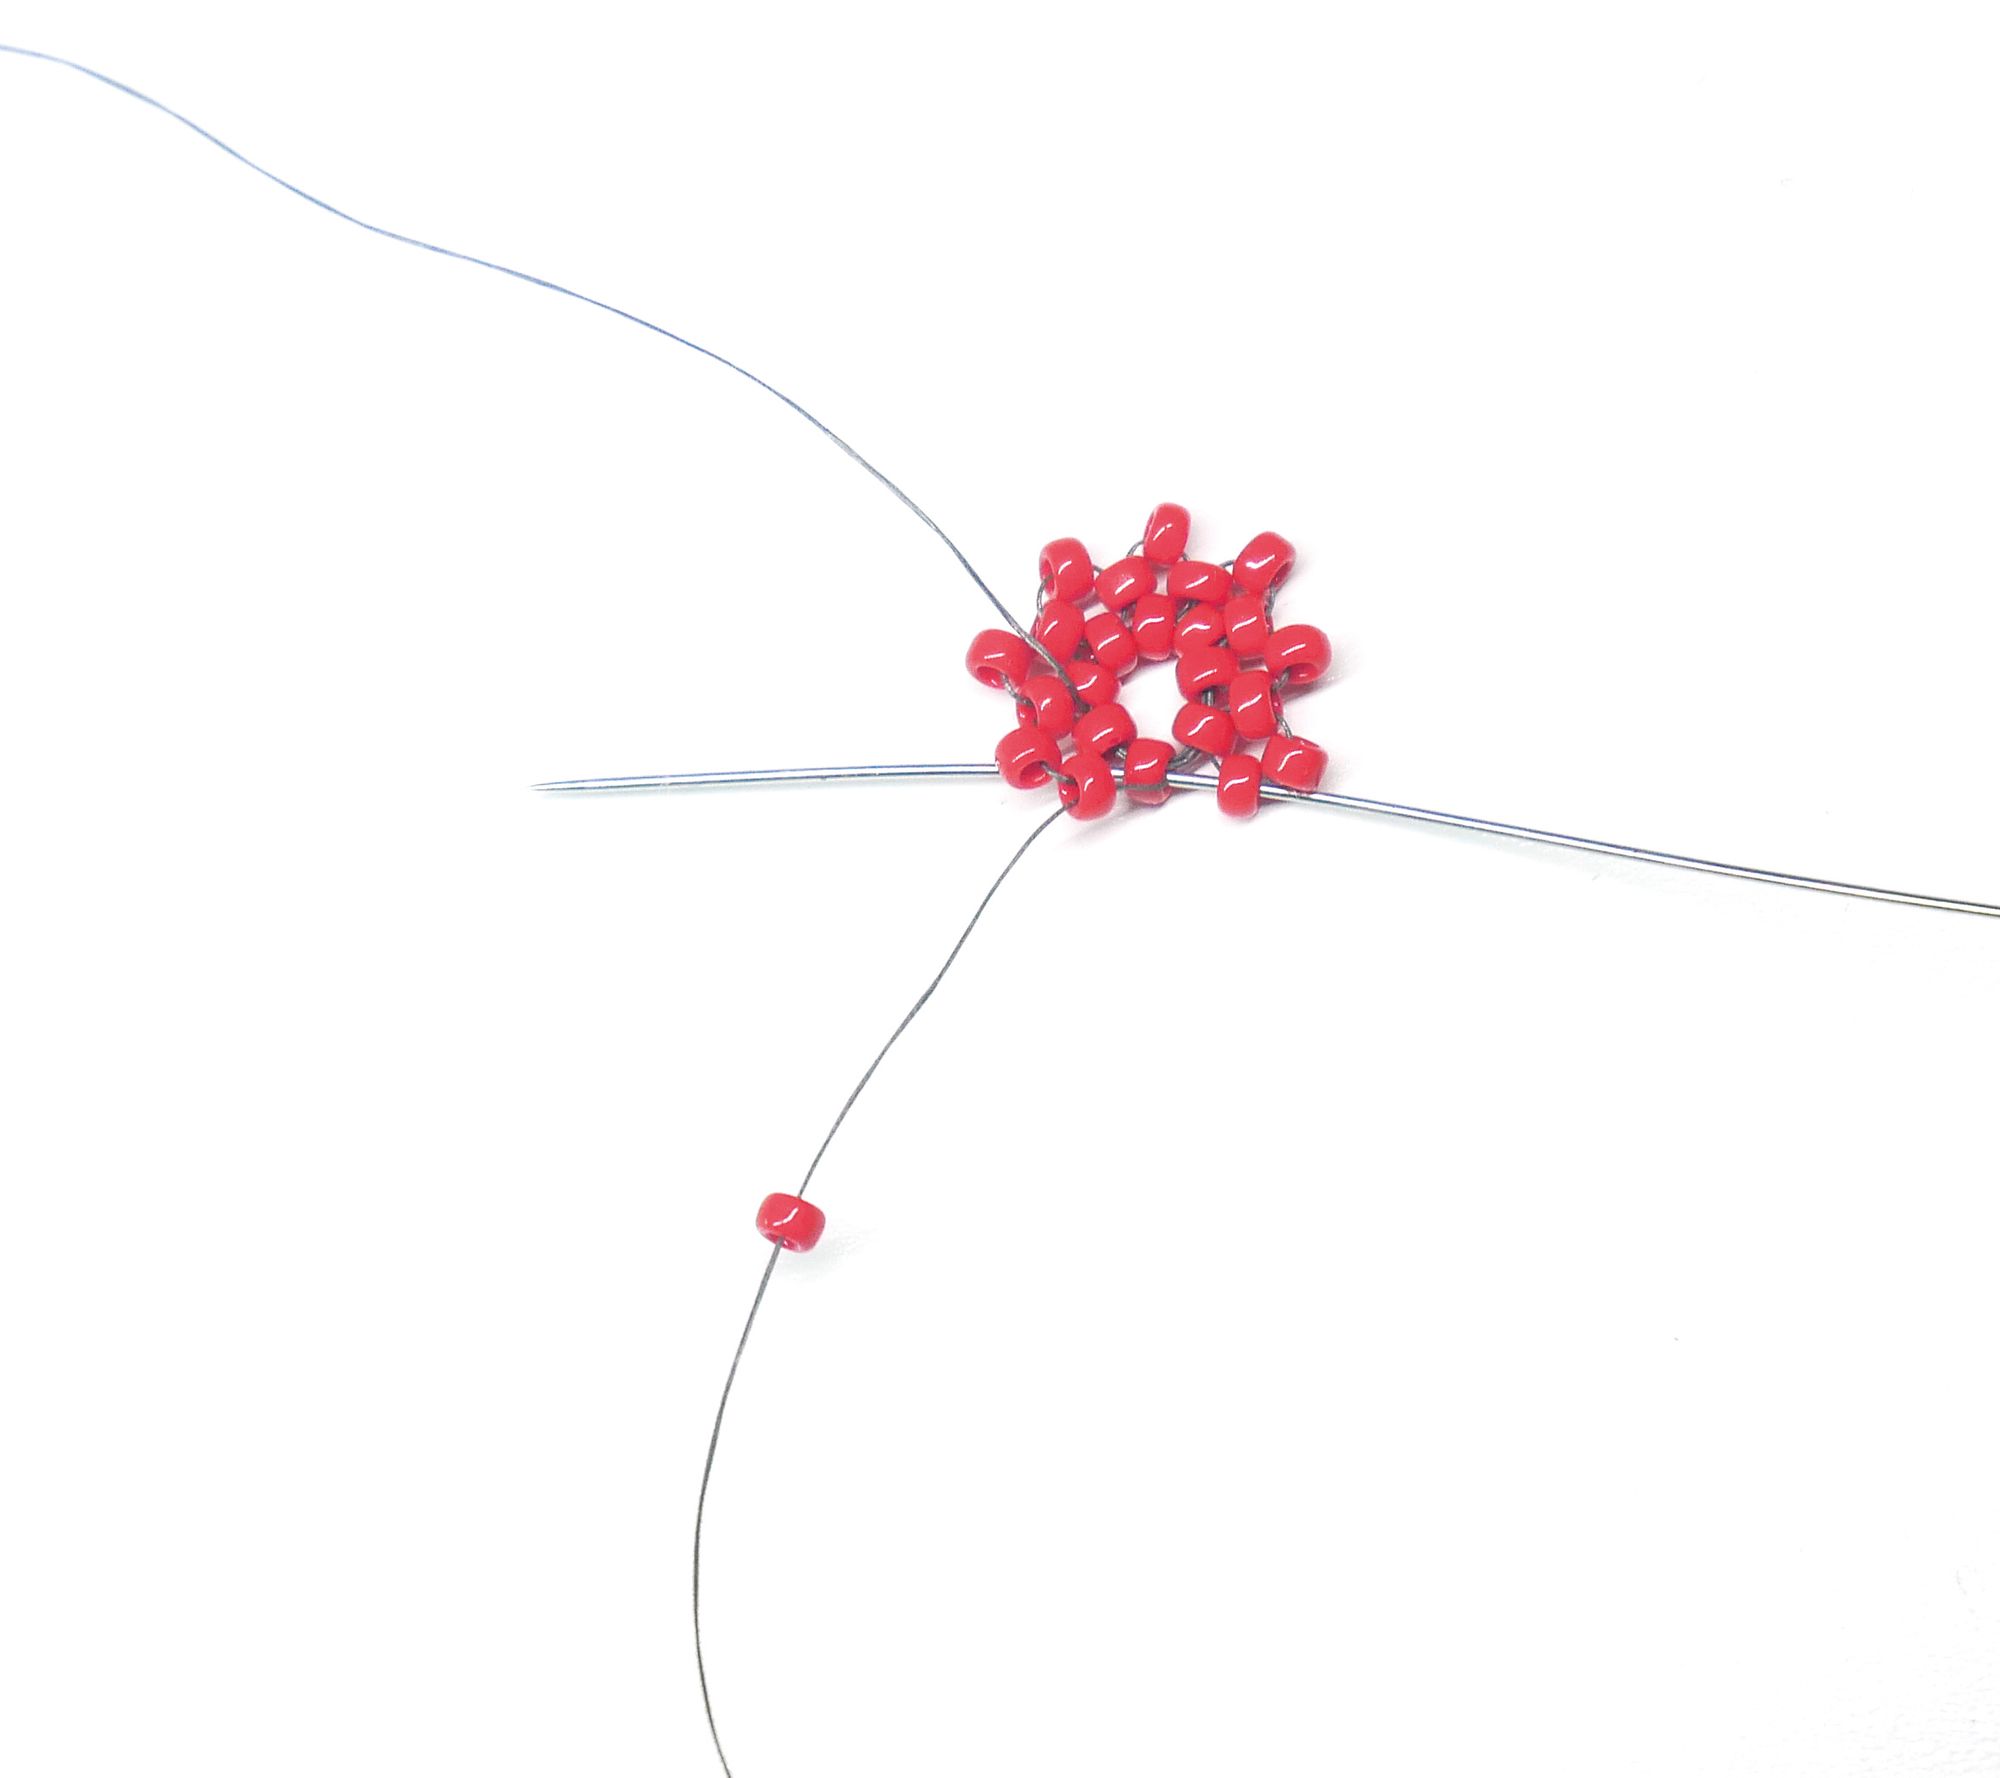
5. Repeat step 4 four more times. Weave forward into the last (A) on your base row.

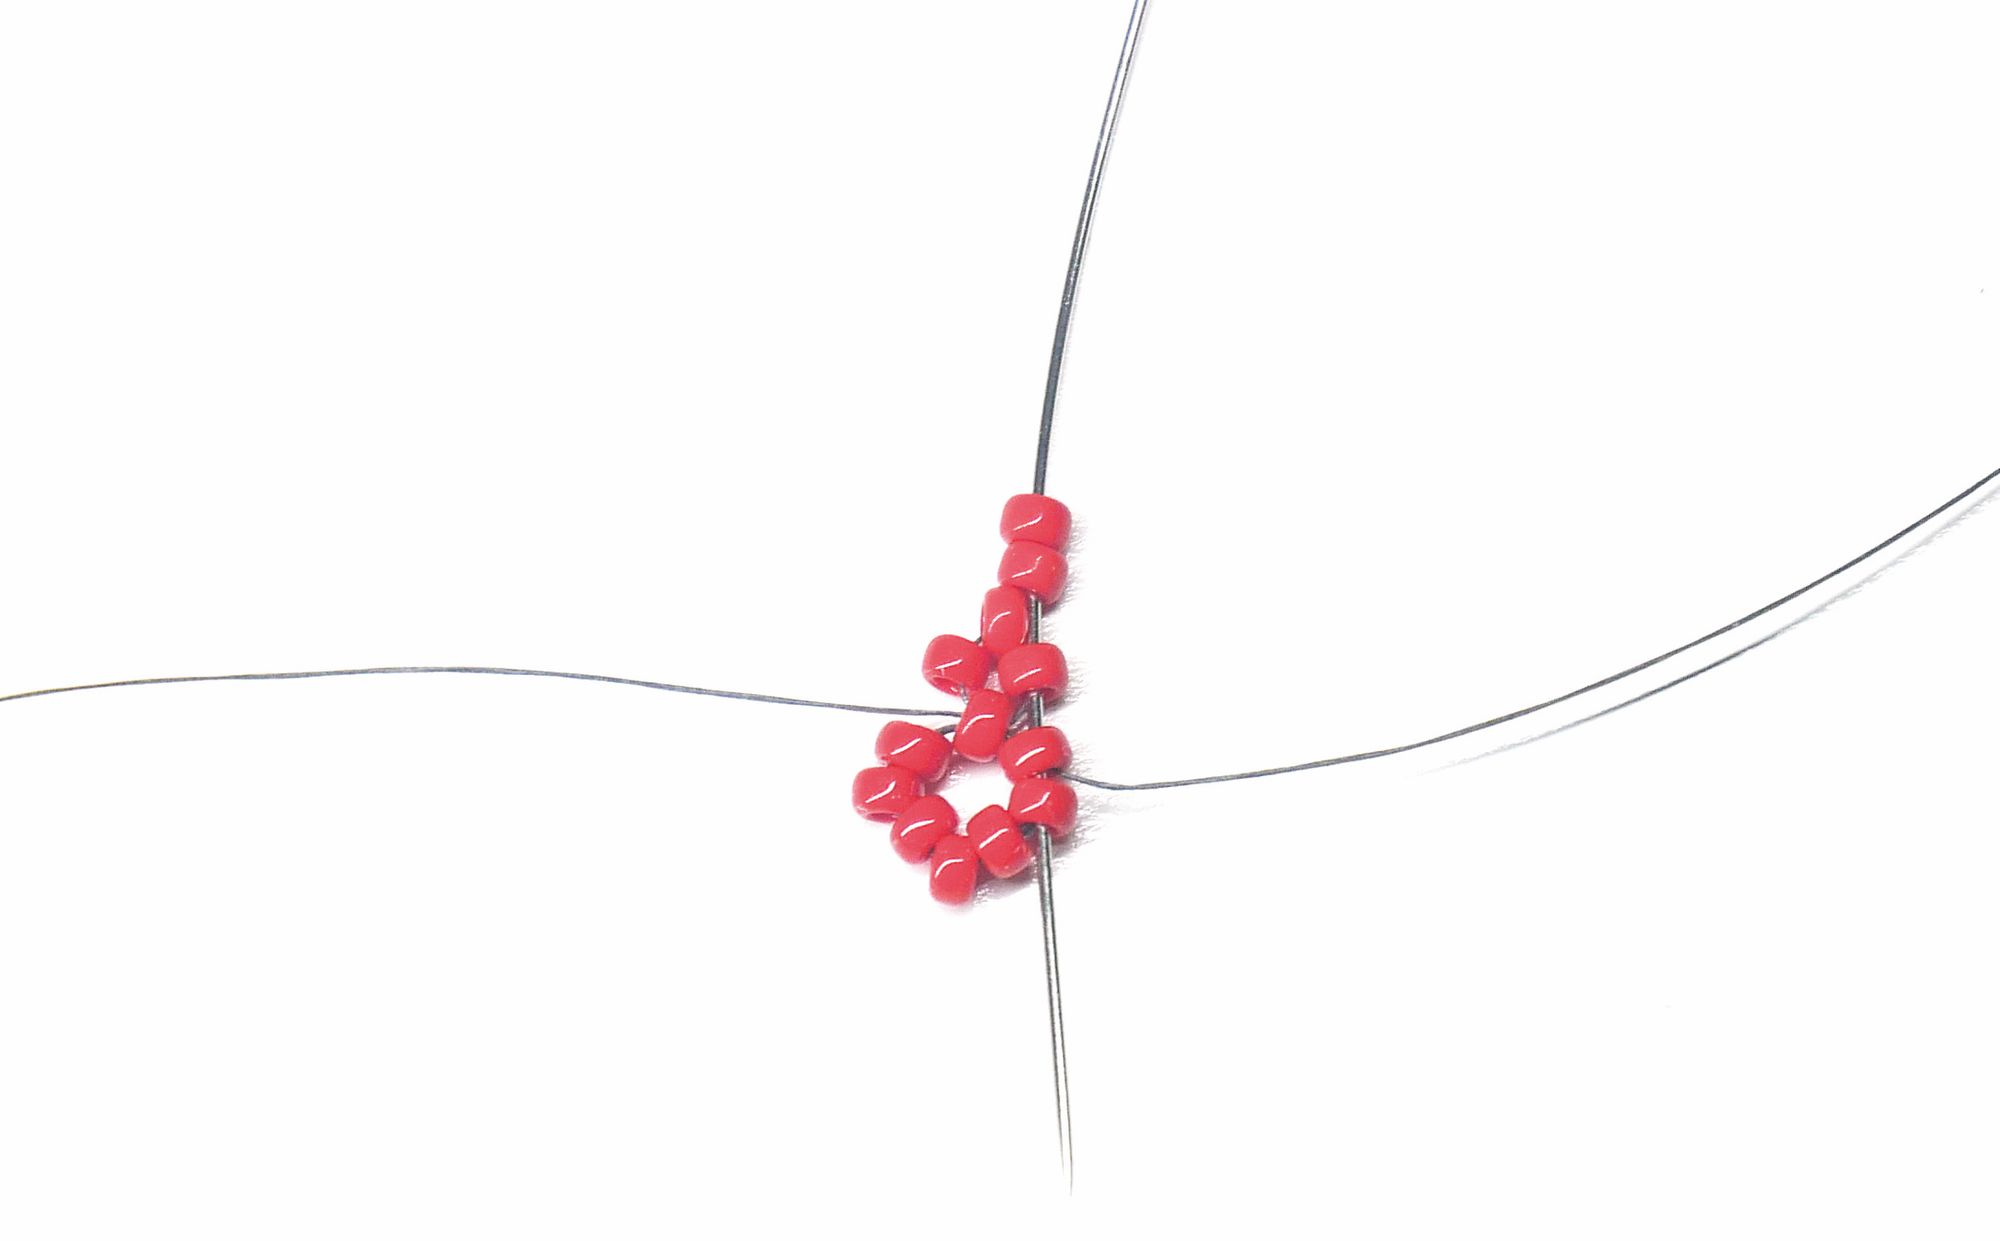
6. Go up the (A) that would have been the first one of the set of 3(A) from step 2, pick up 1(A) and go down the first (A) from the last set of 2(A) you added
7. Weave back up the (A) from the set of 3(A) you’ve just gone up in the last step and through the eight (A) beads that are loose on the top of your cube.
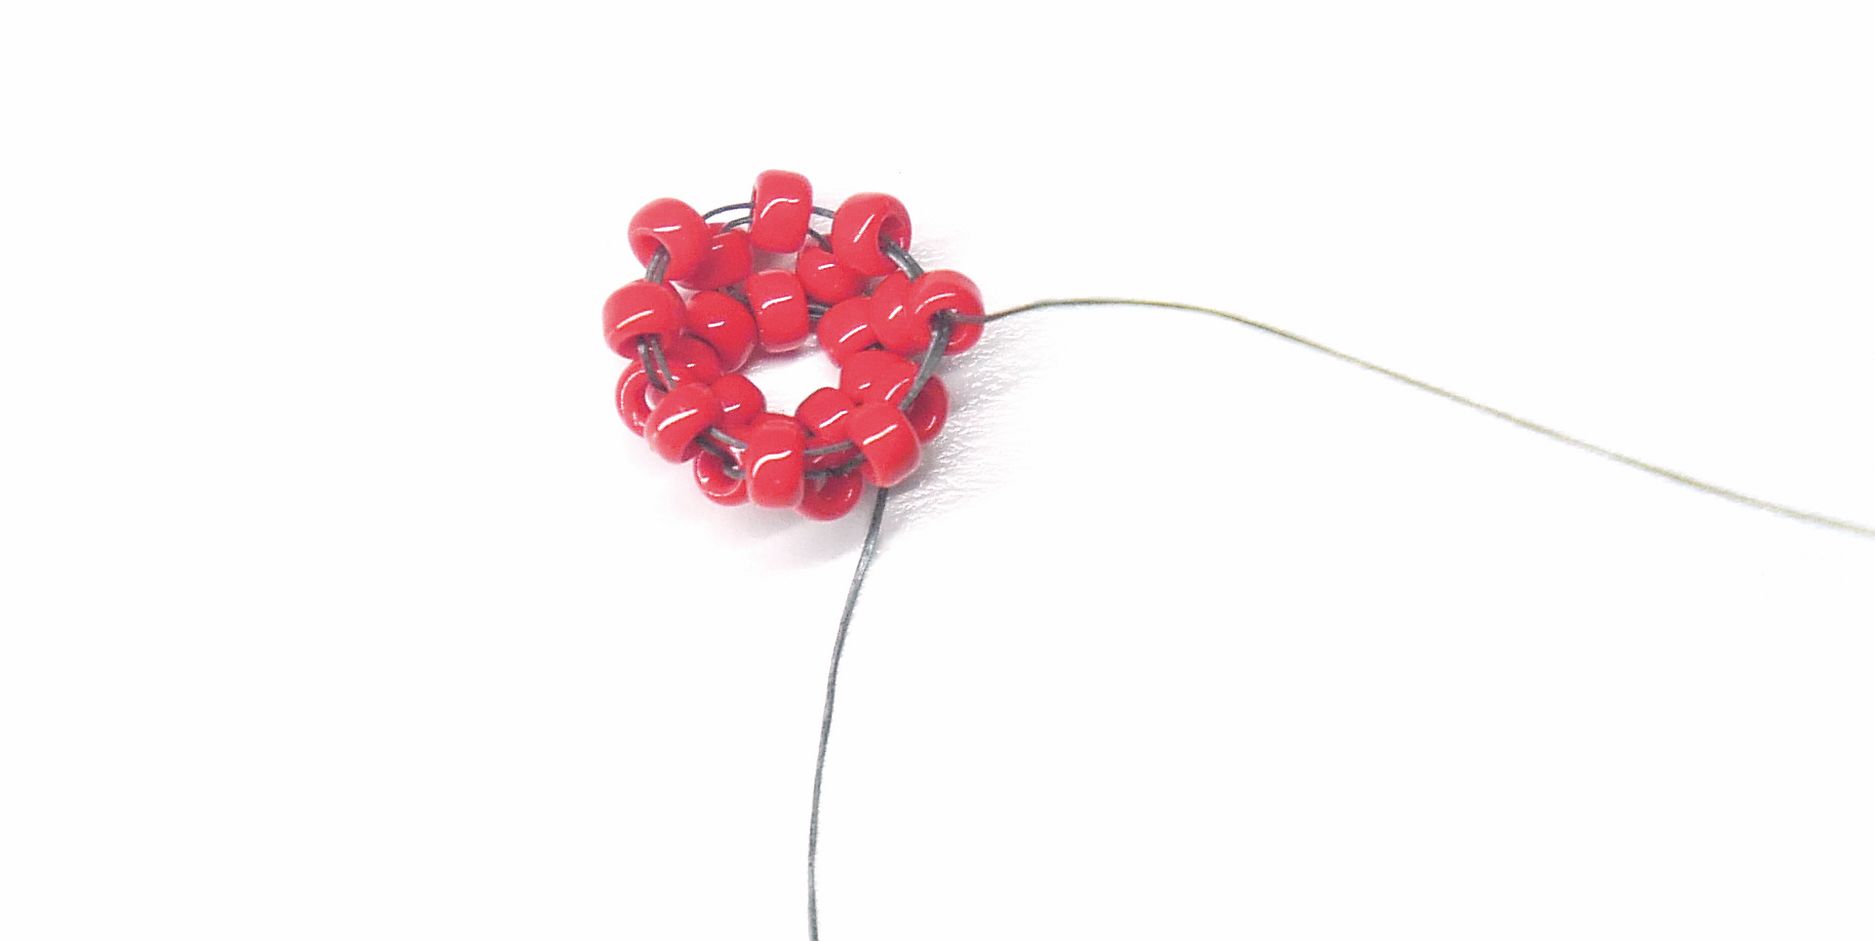
8. Coming out of an (A) on the top (the (A) beads you just joined together) pick up 1(A) and go into the (A) opposite the one you’re coming out of into the same side.
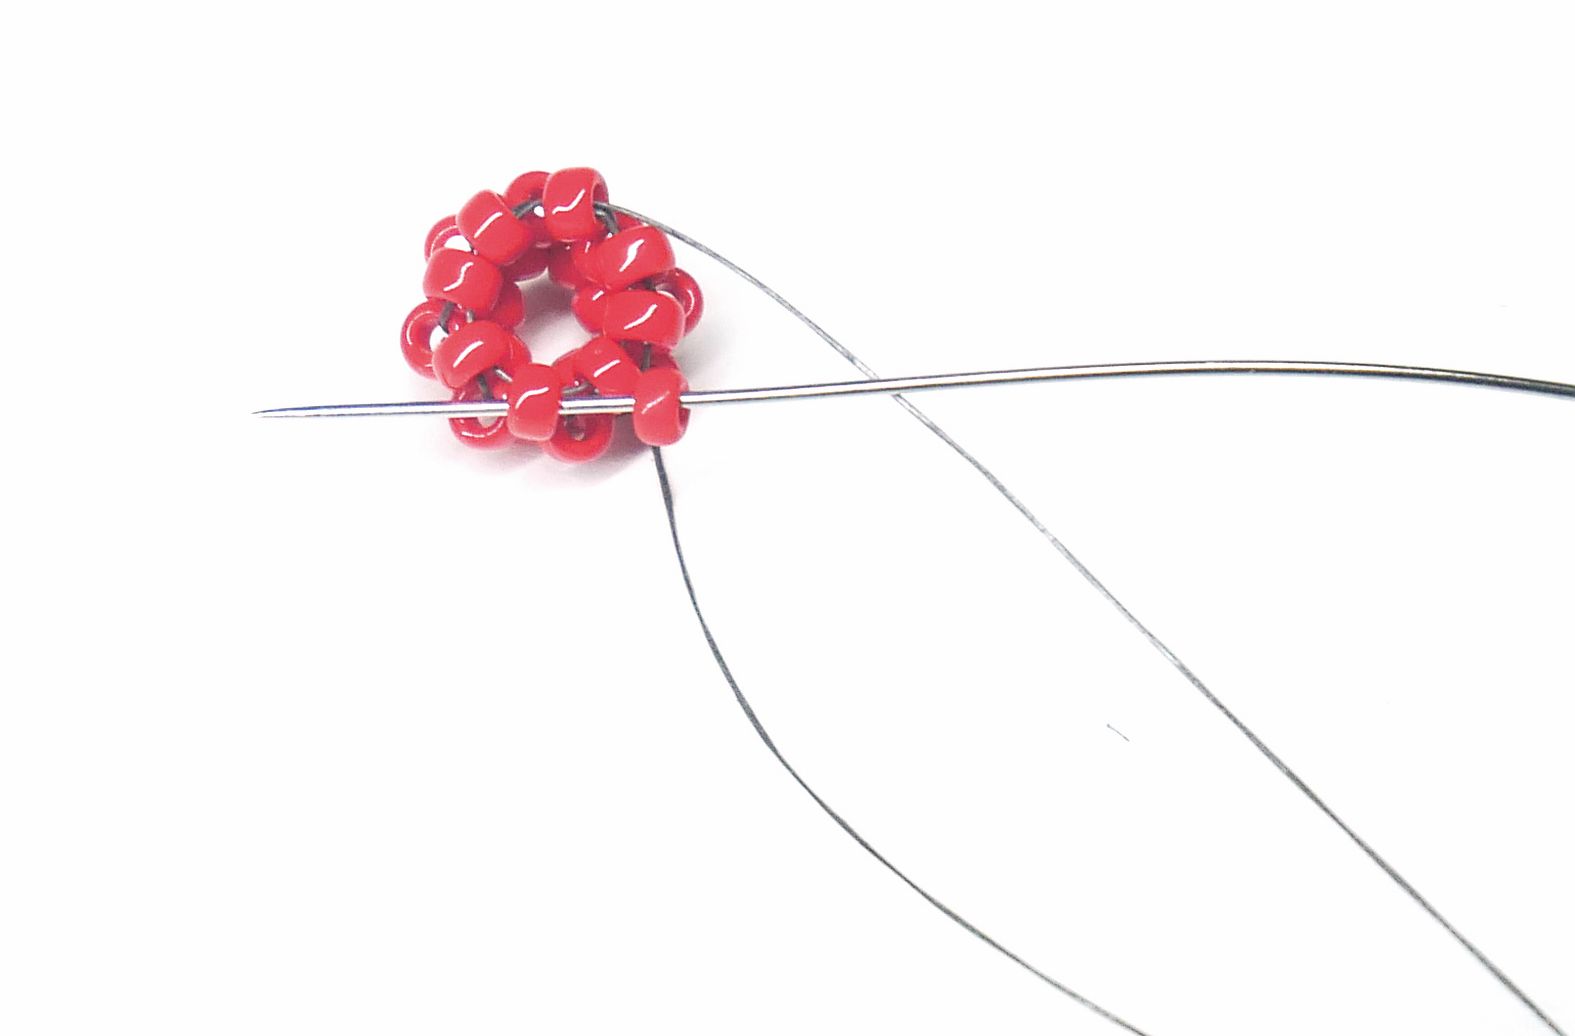
9. Go back through the new (A) you just added in the previous step and back into the (A) you originally came out of from the opposite side. Go back into the new (A).
10. Pick up 7(B) and come back down the second to last (B) you picked up.
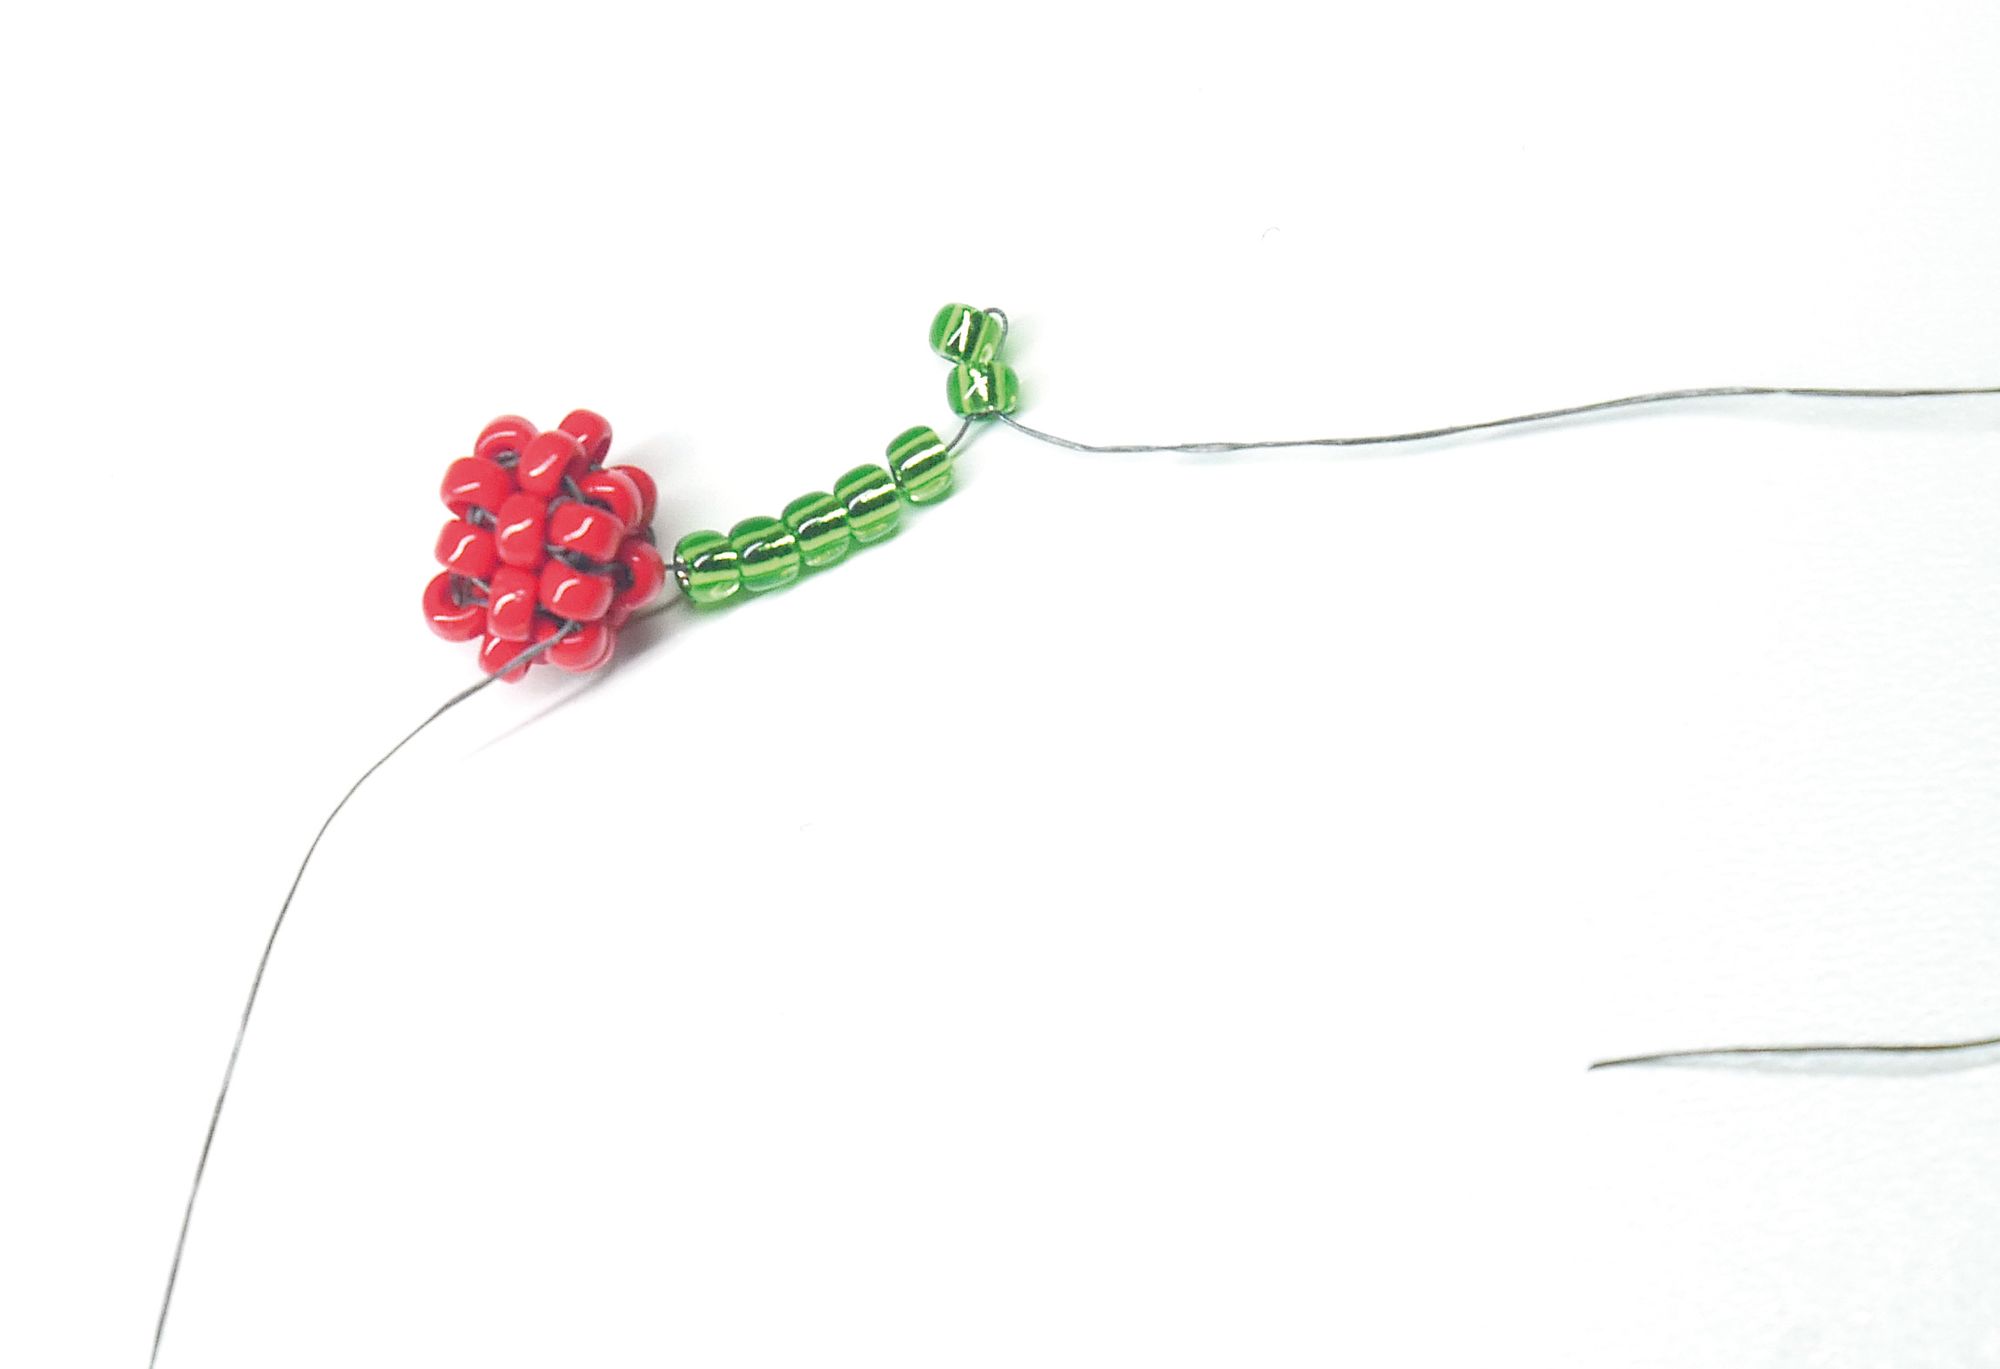
11. Pick up 4(B) and put this to one side leaving thread available to use.
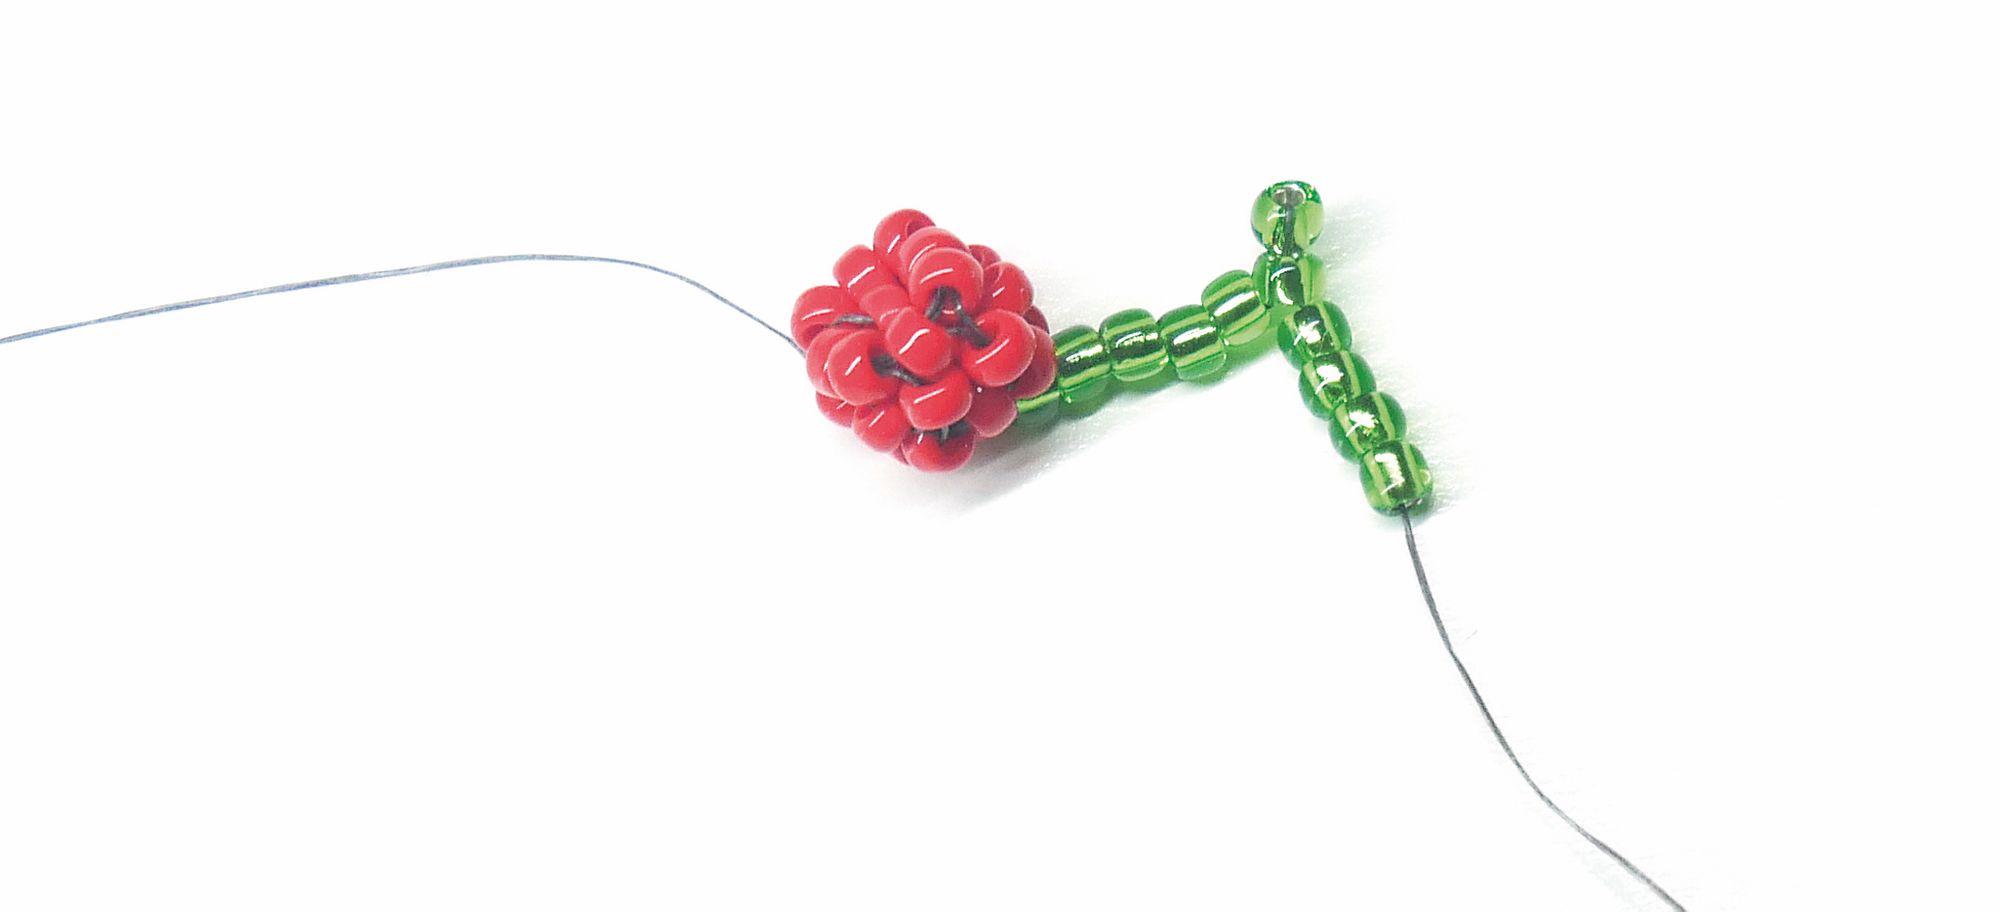
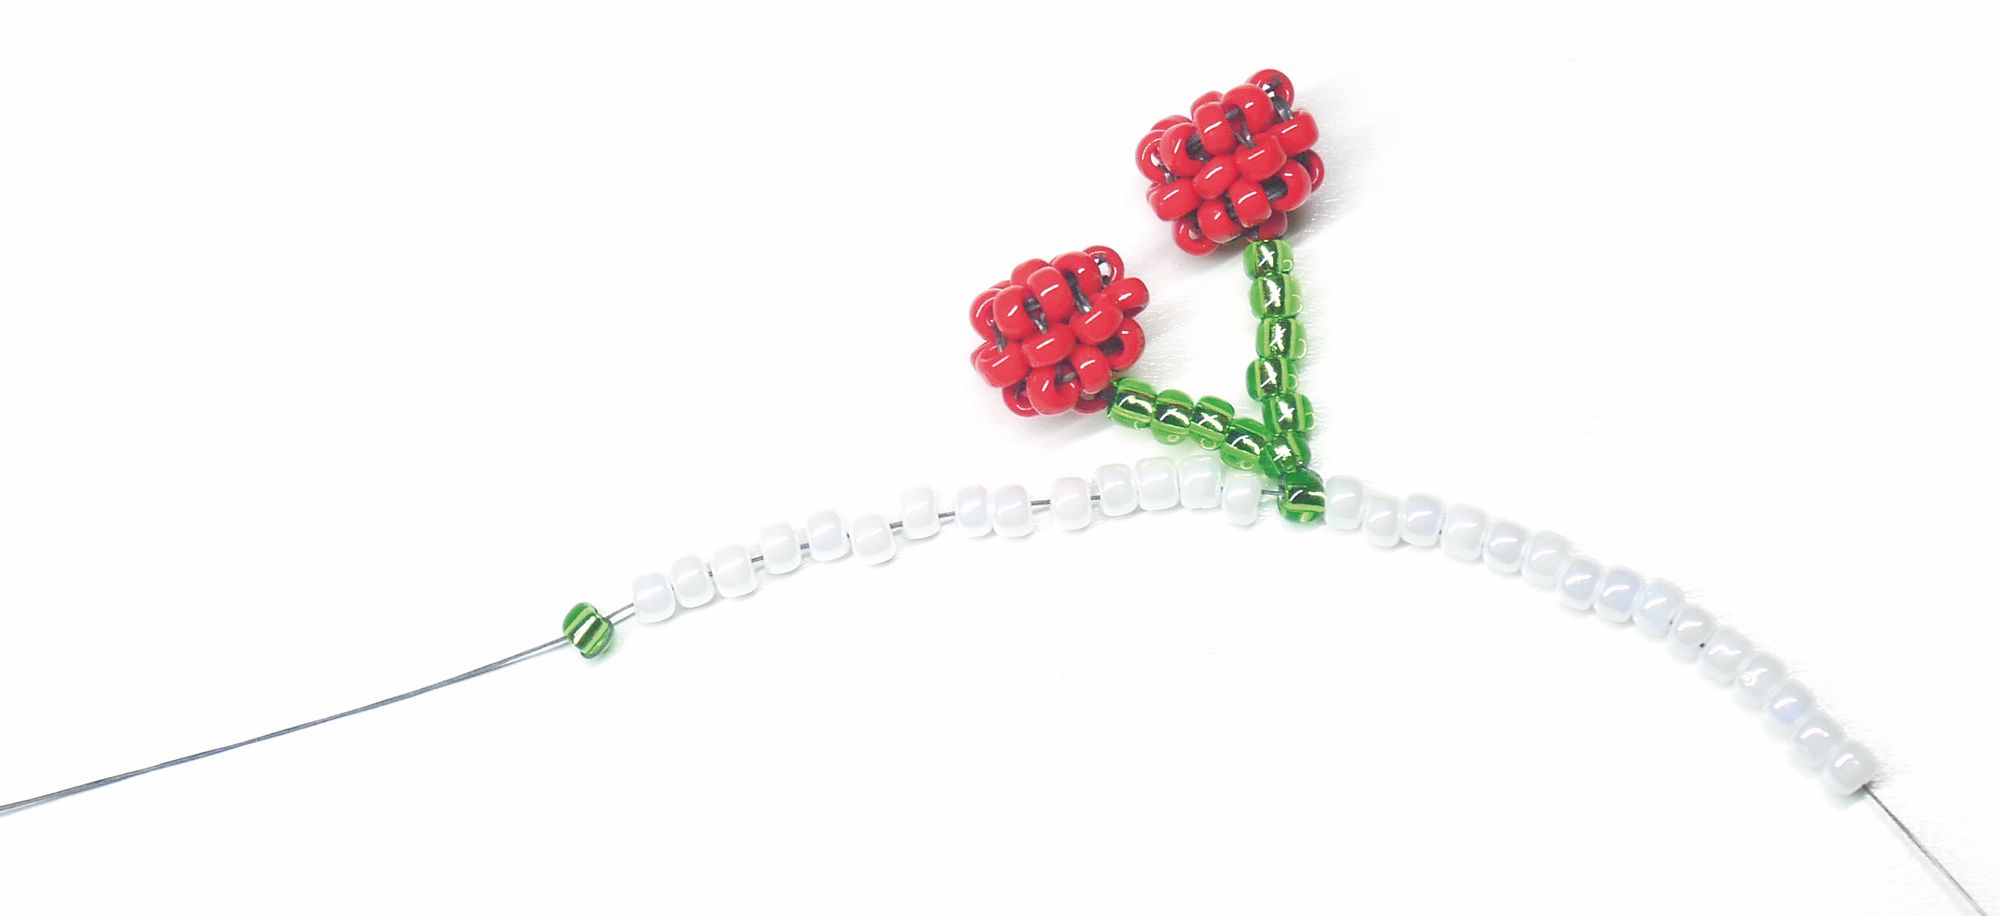
12. Make a second cherry ball using steps 1-9 and weave off threads. Go back to your stalk on the first cherry and go through the middle (A) you added in step 8 & 9 on the new ball. Go back up the (B) beads.
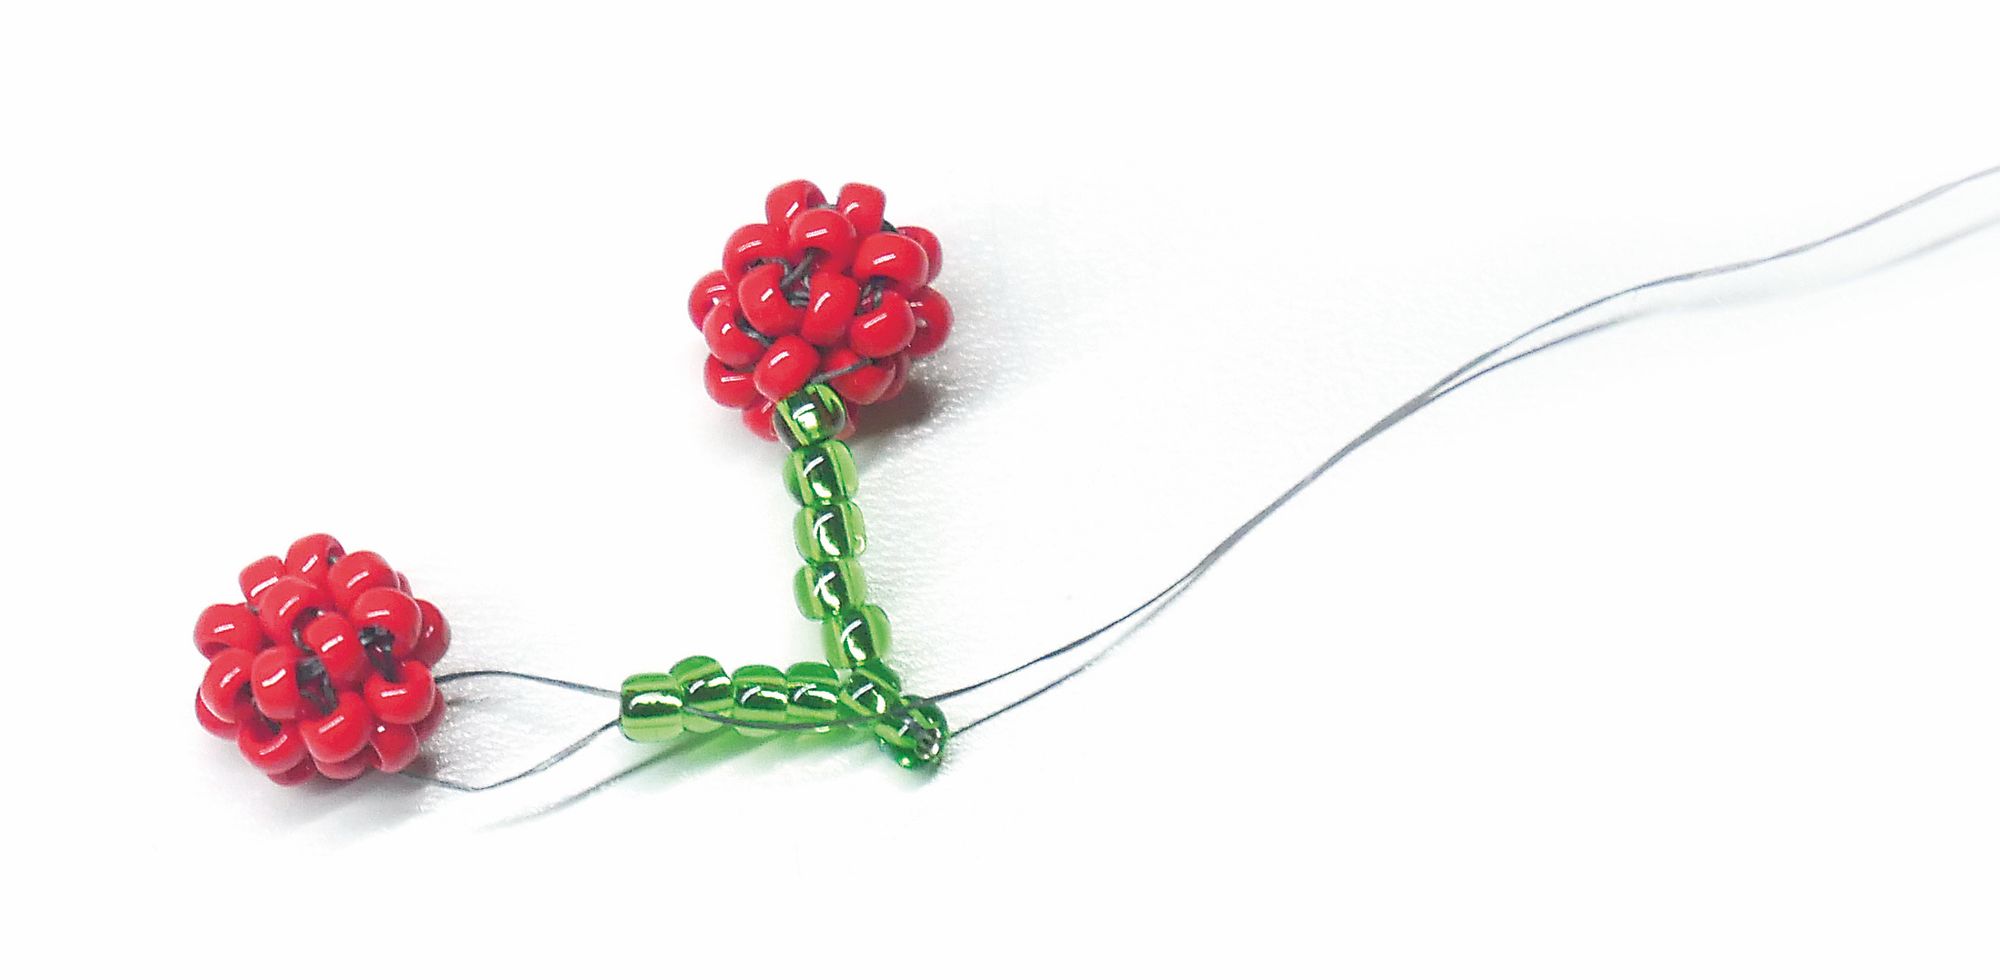
13. Weave back around the (B) beads until you get to the first cherry ball and go back into the middle (A) from steps 8 & 9 from the opposite side. Make another 4 full cherries using steps 1-13.
14. Using a new thread add a stopper bead. Pick up 15(C), a cherry (though the top (B) bead) and 15(C).
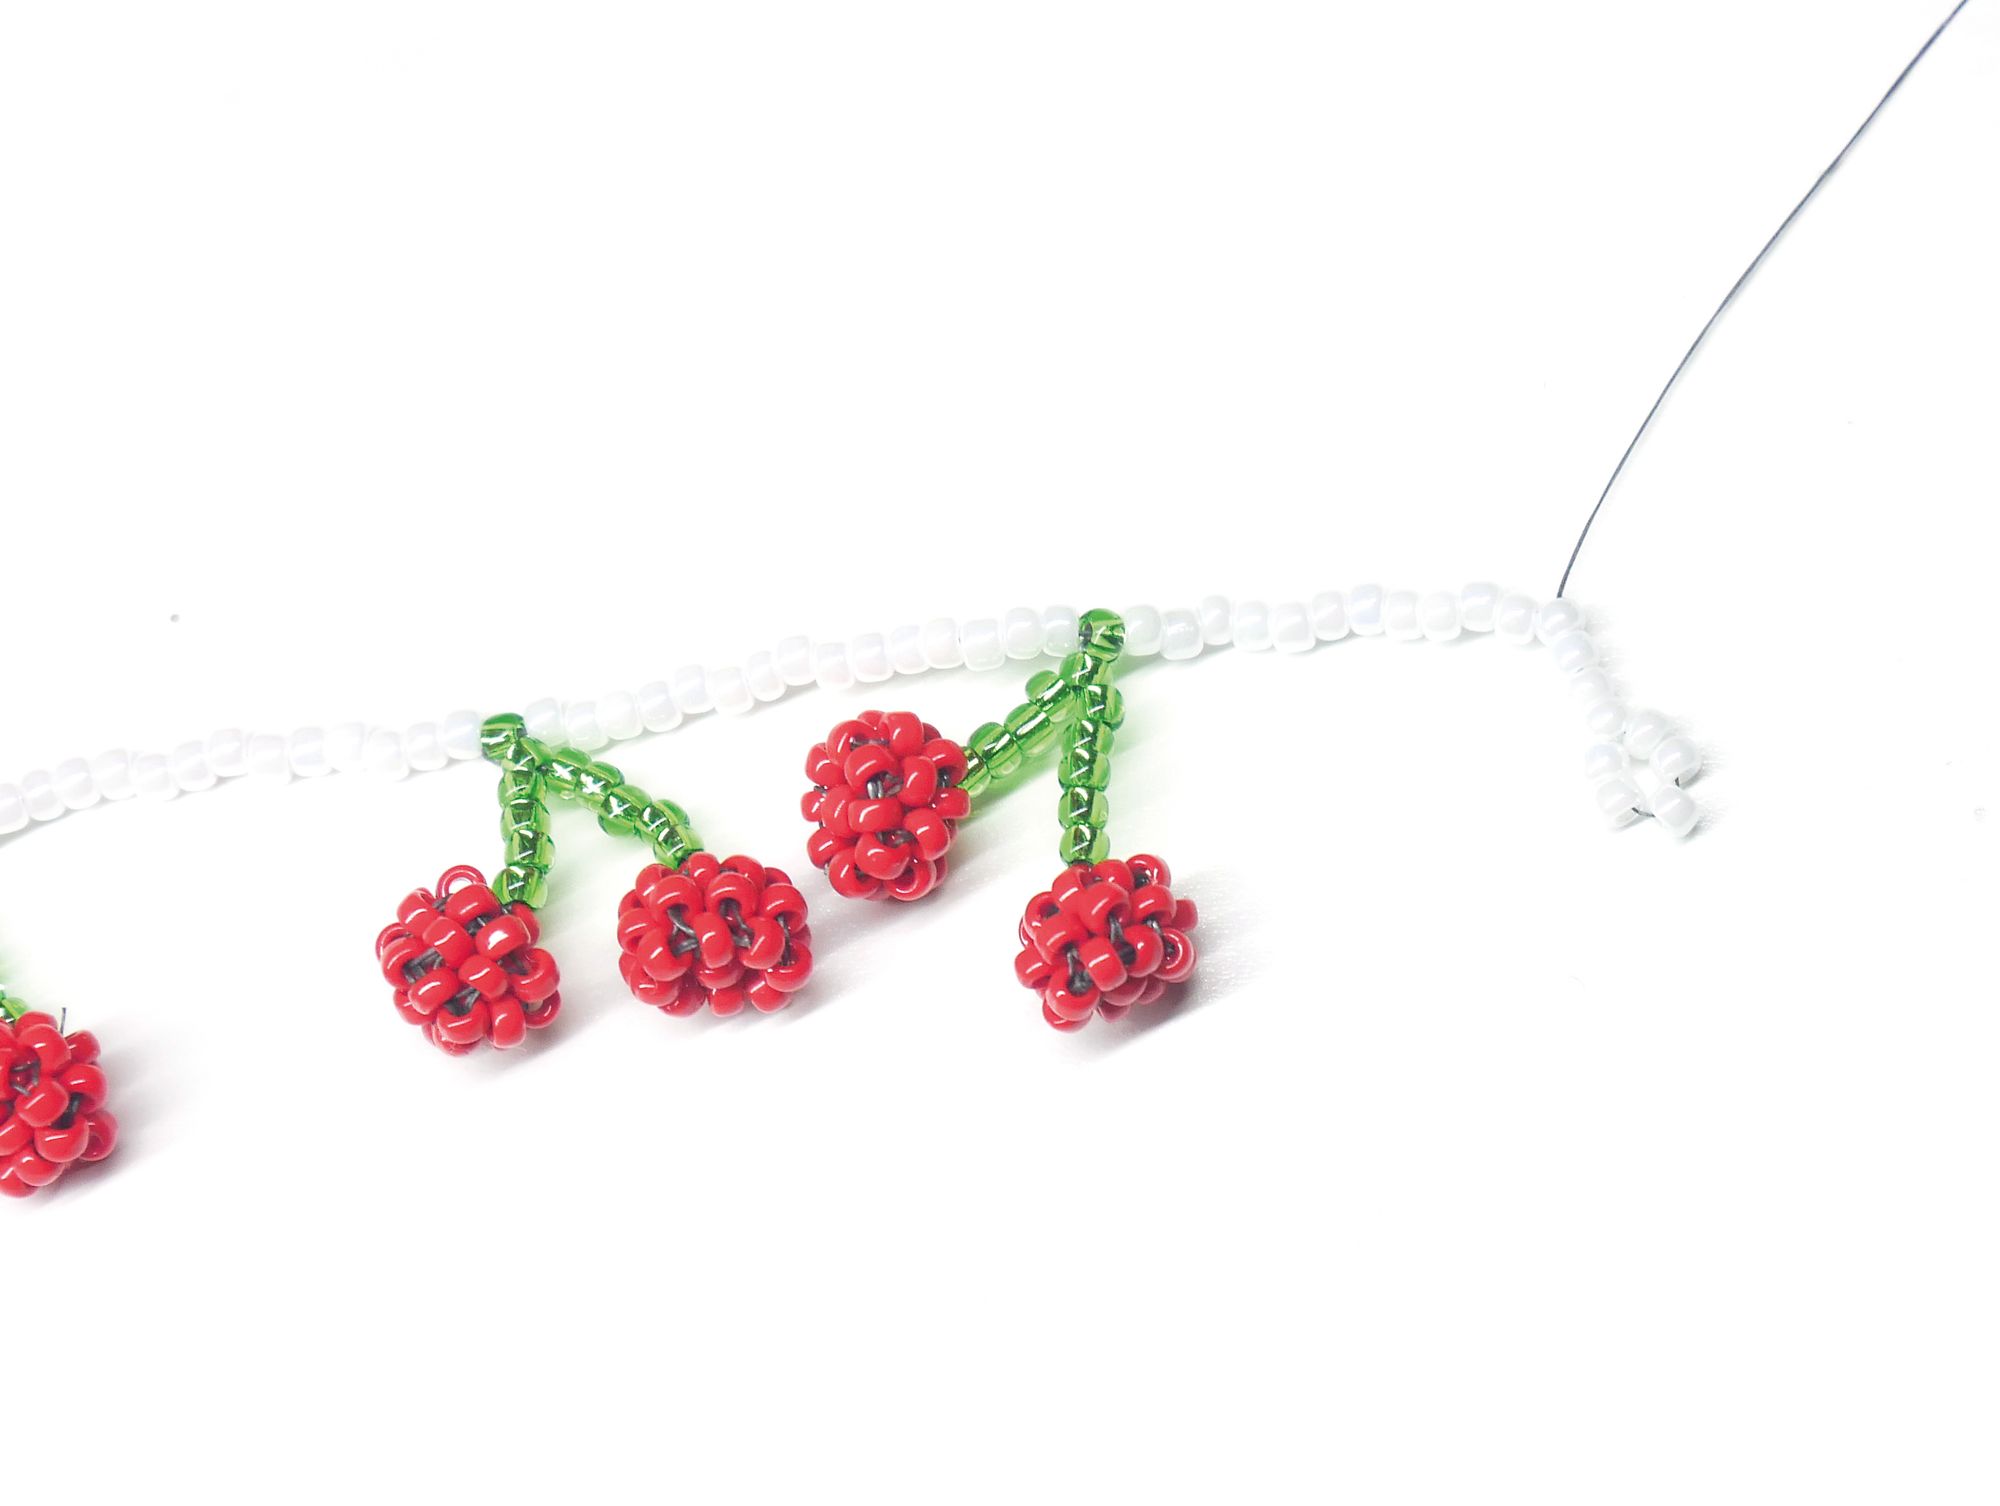
15. Continue adding cherries and 15(C) until you get to the end of your bracelet. Pick up another 5(C) and come back down your bracelet to the opposite side. Add 5(C) on the other end. Weave back and forth until you’re happy and then finish off by adding in knots.
16. Add jump rings and a clasp to the loops on both ends of your bracelet.