

Tip Number One: Always read the pattern! This may sound too obvious to mention, but it is surprising how many times people find themselves in hot water because they haven’t read the pattern properly. I know when you have those beads in front of you, you just want to get beading, but do take a few minutes to read the whole pattern before you start. You may not understand everything exactly, but sometimes there are slightly unexpected steps which it is good to know about before you start. Forewarned is forearmed! It is also a good idea to photocopy your pattern before you use it, then if you want to make notes or mark the point you’ve reached, you can do this without ruining your original pattern.
As you are working through your pattern, it can be a good idea to use a ruler, or a sticky note to mark the point you’ve reached. If the phone rings, or someone starts chatting to you and interrupts you, it’s really easy to lose your place. Also, while you are working from the pattern, remember to use all of it. Most patterns will include a description of what you need to do, along with either photos or diagrams to show you the steps.
Most of us have a natural preference for either words or pictures, so it’s tempting to just follow one or the other, but you will get the most out of the instructions if you read the words and the pictures together. It sounds obvious, but in the excitement of aworkshop, it’s very easy to forget to use everything you have available.
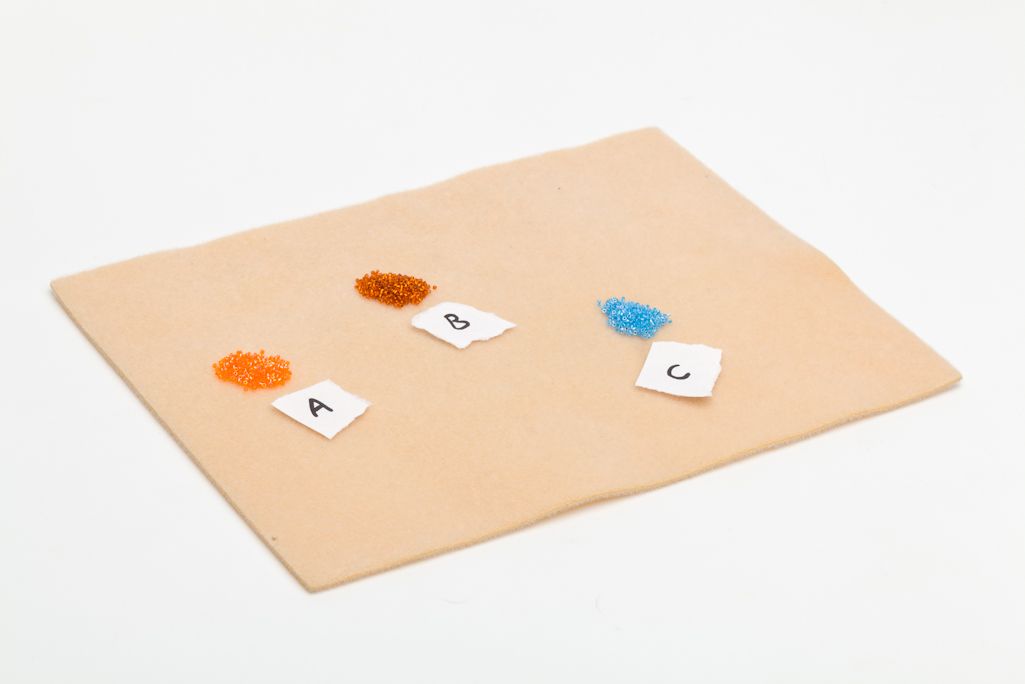
Tip Number Two: Arrange your beading space You can really help yourself by arranging your beading space logically. If you are working with a pattern that refers to the different beads as ‘A’, ‘B’ etc, then arrange your beads in little piles on your mat and label each pile with its letter. This will make it so much easier to see which beads you are picking up as you follow the pattern. See figure 1.
If you are working on a project that requires you to use a certain number of beads for a step, eg a peyote stitch row with ten beads in it, then count out those beads before you start the step. This makes it a lot easier to see if you go wrong and
pick up a mistake before you've gone to far.
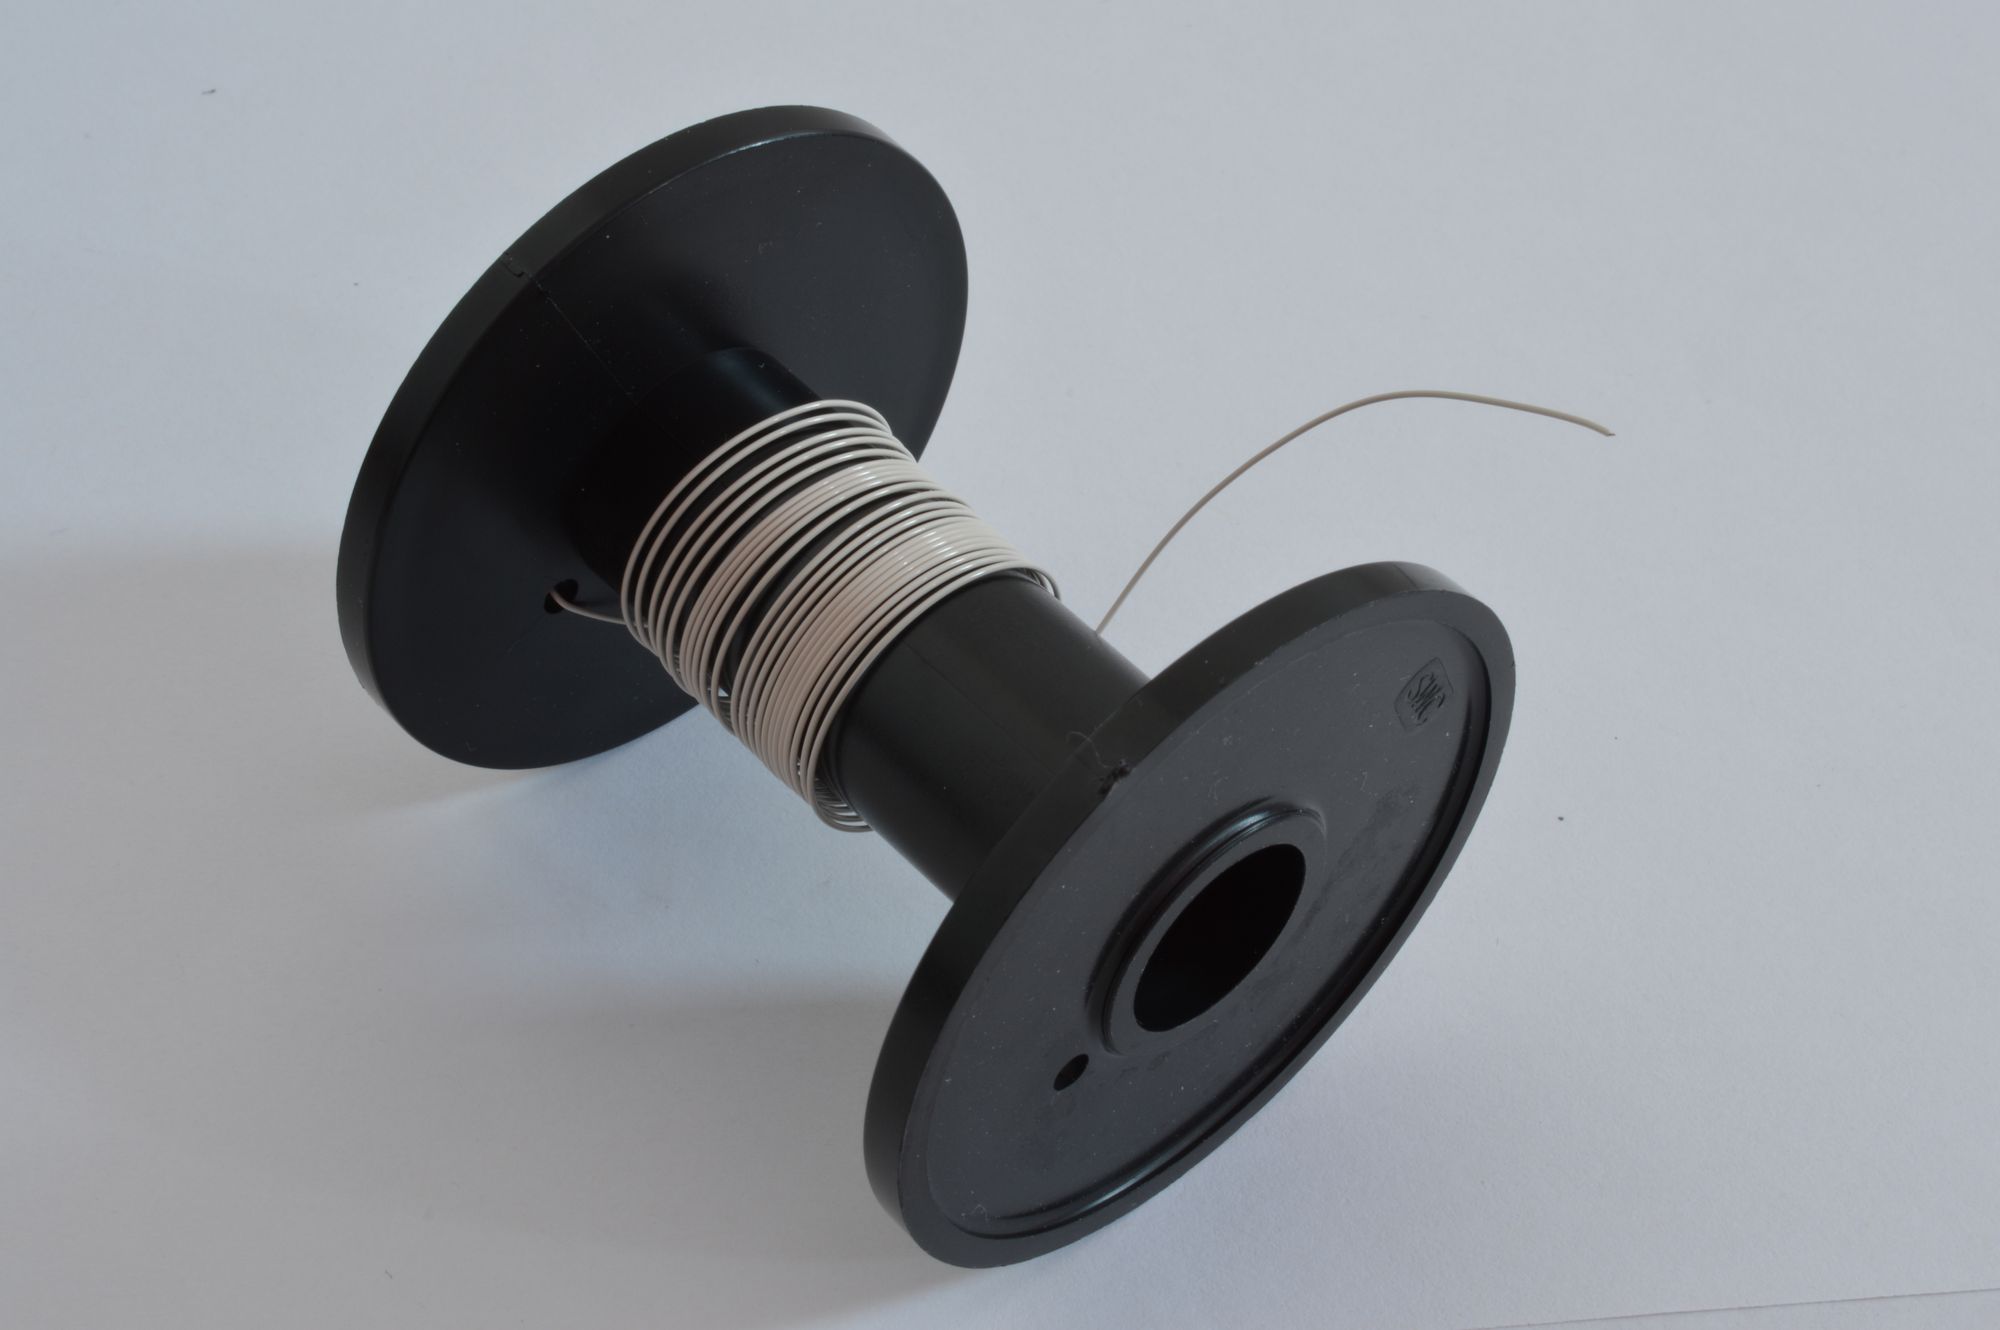
Tip Number Three: Wirework hints Wire can have a mind of its own: it likes to tangle, unravel and kink in the most awkward places. Unless I’m working on a project that requires me to cut off individual short lengths of wire, I like to try and work with my wire on a spool. This is particularly important if you are doing any French Beading. All the wire that I buy comes on spools, but this tends to be in fairly large quantities, so if you have a little project to make, it can be tempting to buy a small amount of wire, which will most probably come in a coil. The thing about coils of wire is they sit beautifully until you start trying to uncoil them to work, then they develop a life of their own, usually ending up in a tangled mess! I try and save up empty wire reels, so if I buy a coil of wire, I can transfer it onto a reel to work from. See figure 2
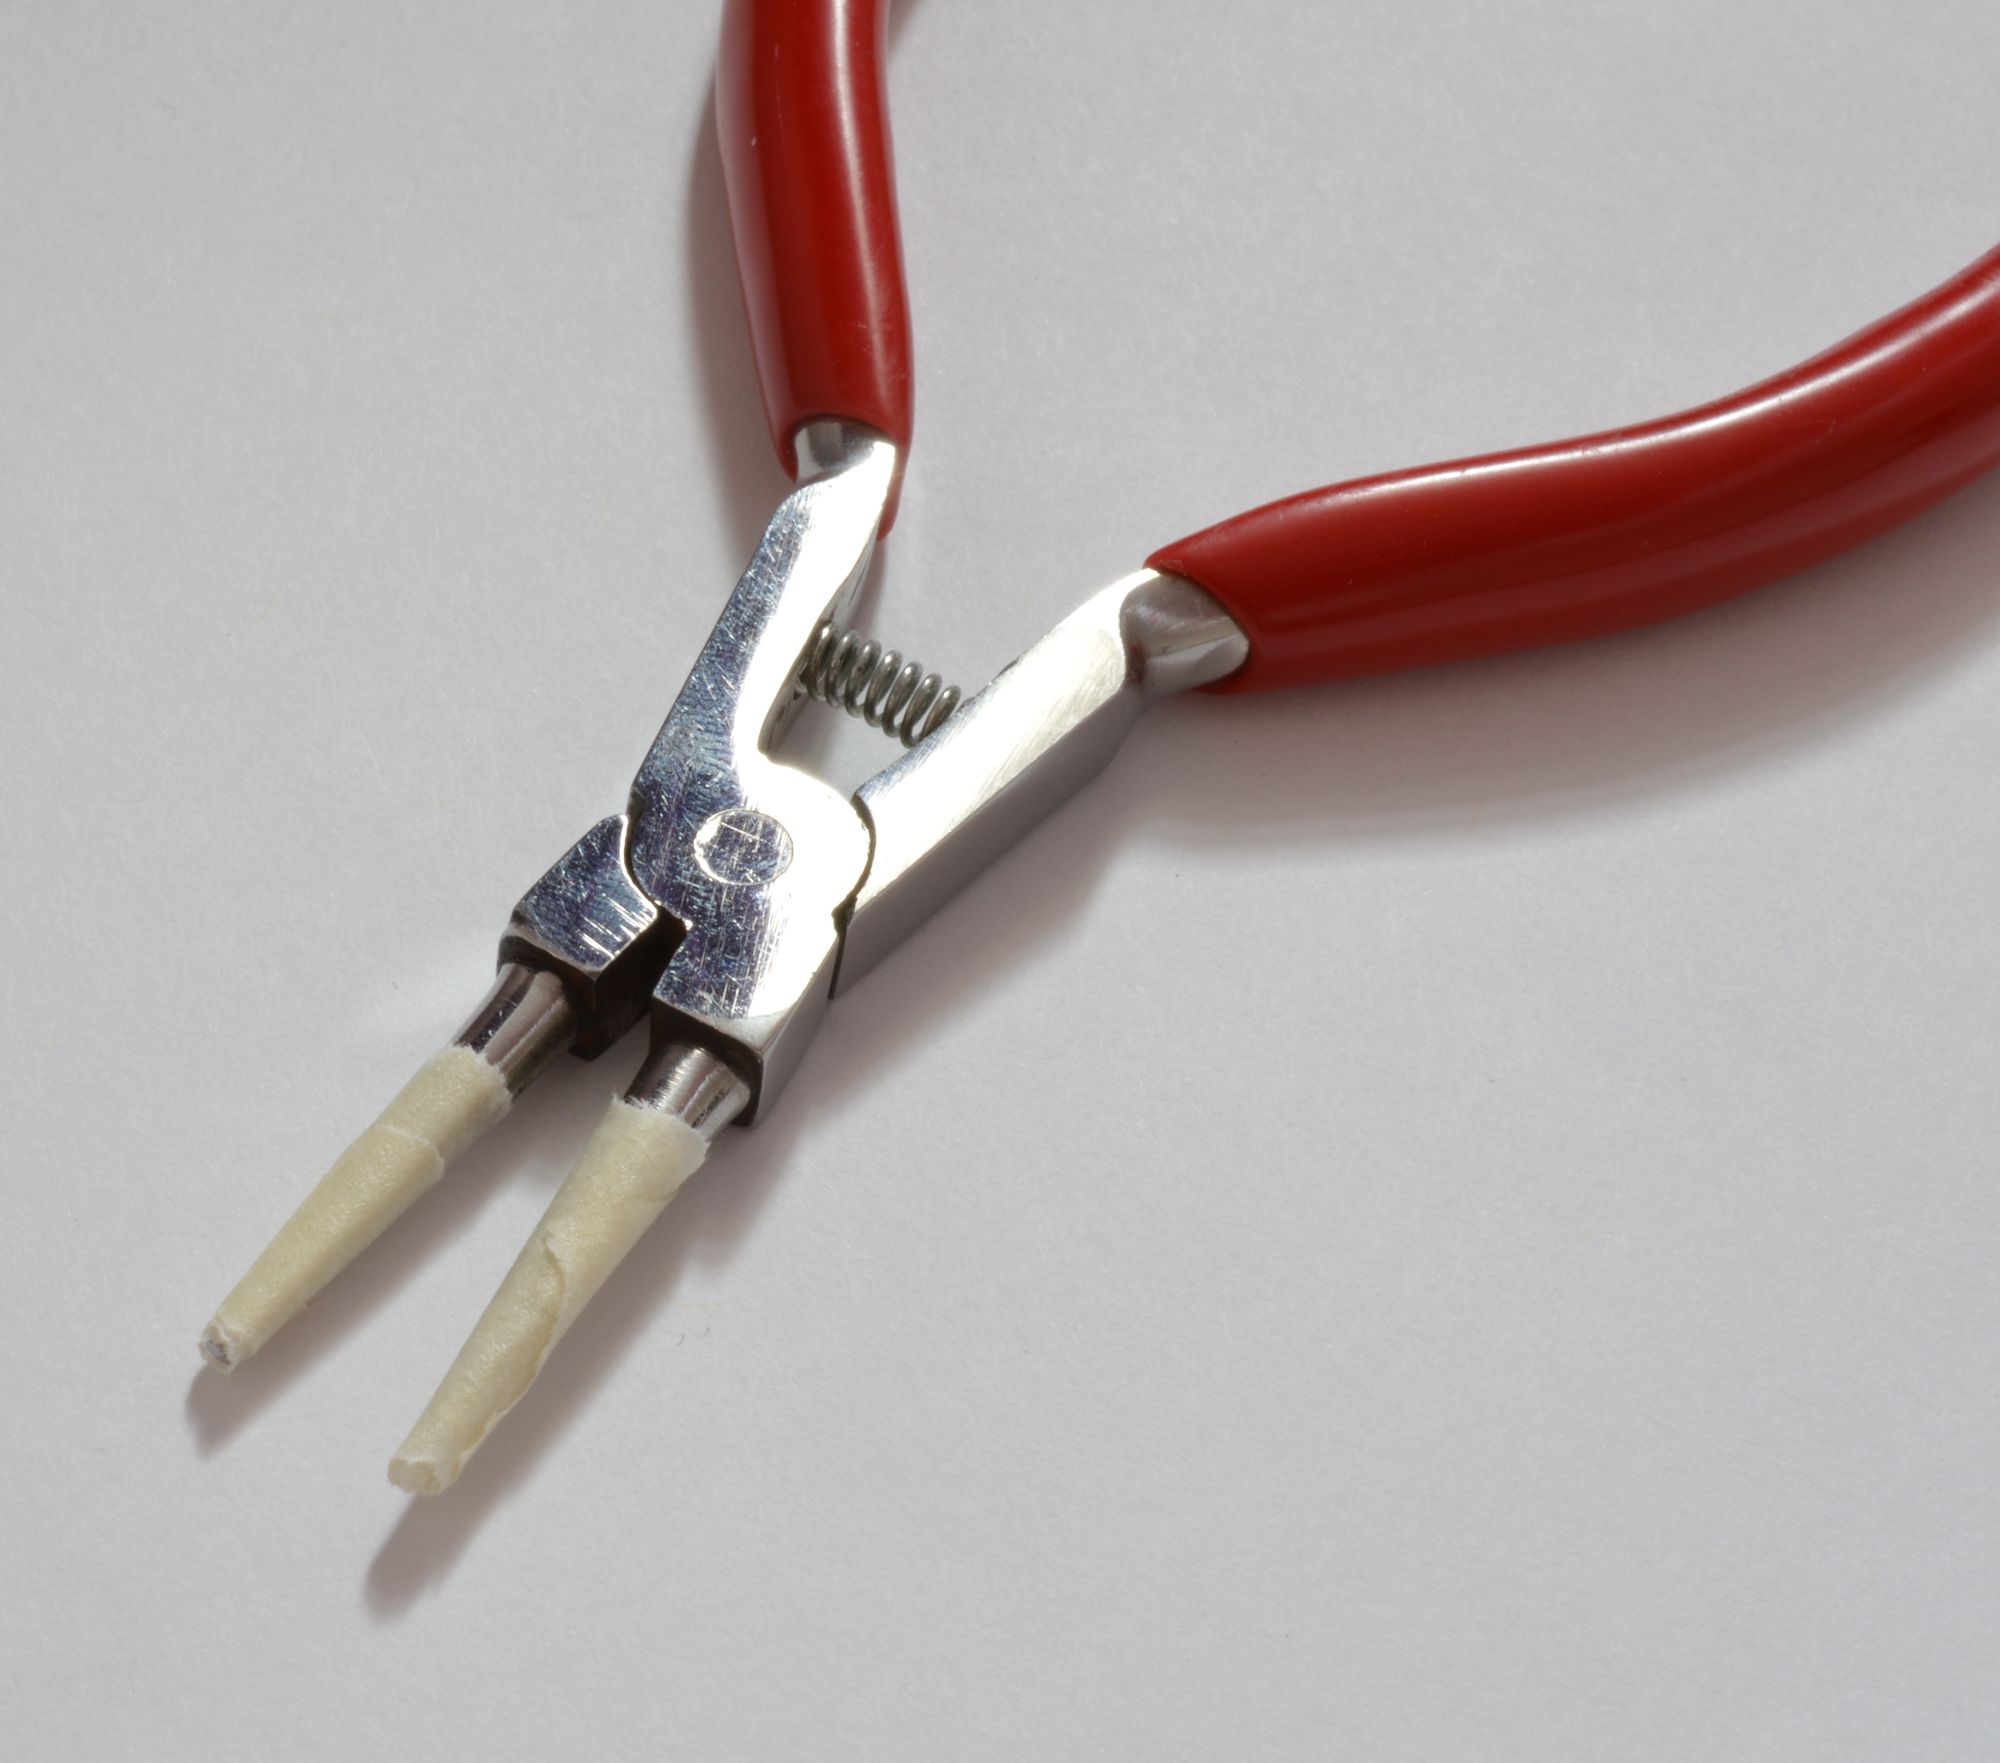
Wire is also easily damaged. In particular, the coloured craft wires are usually coated with the colour finish, so this can be scraped off if you’re not careful. Naturally all the wire- working tools you will be using have metal teeth and there is nothing more likely to damage wire than another piece of metal. So, it can be a good idea to wrap a piece of masking tape around the teeth of your pliers to protect the wire as you are working. See figure 3.
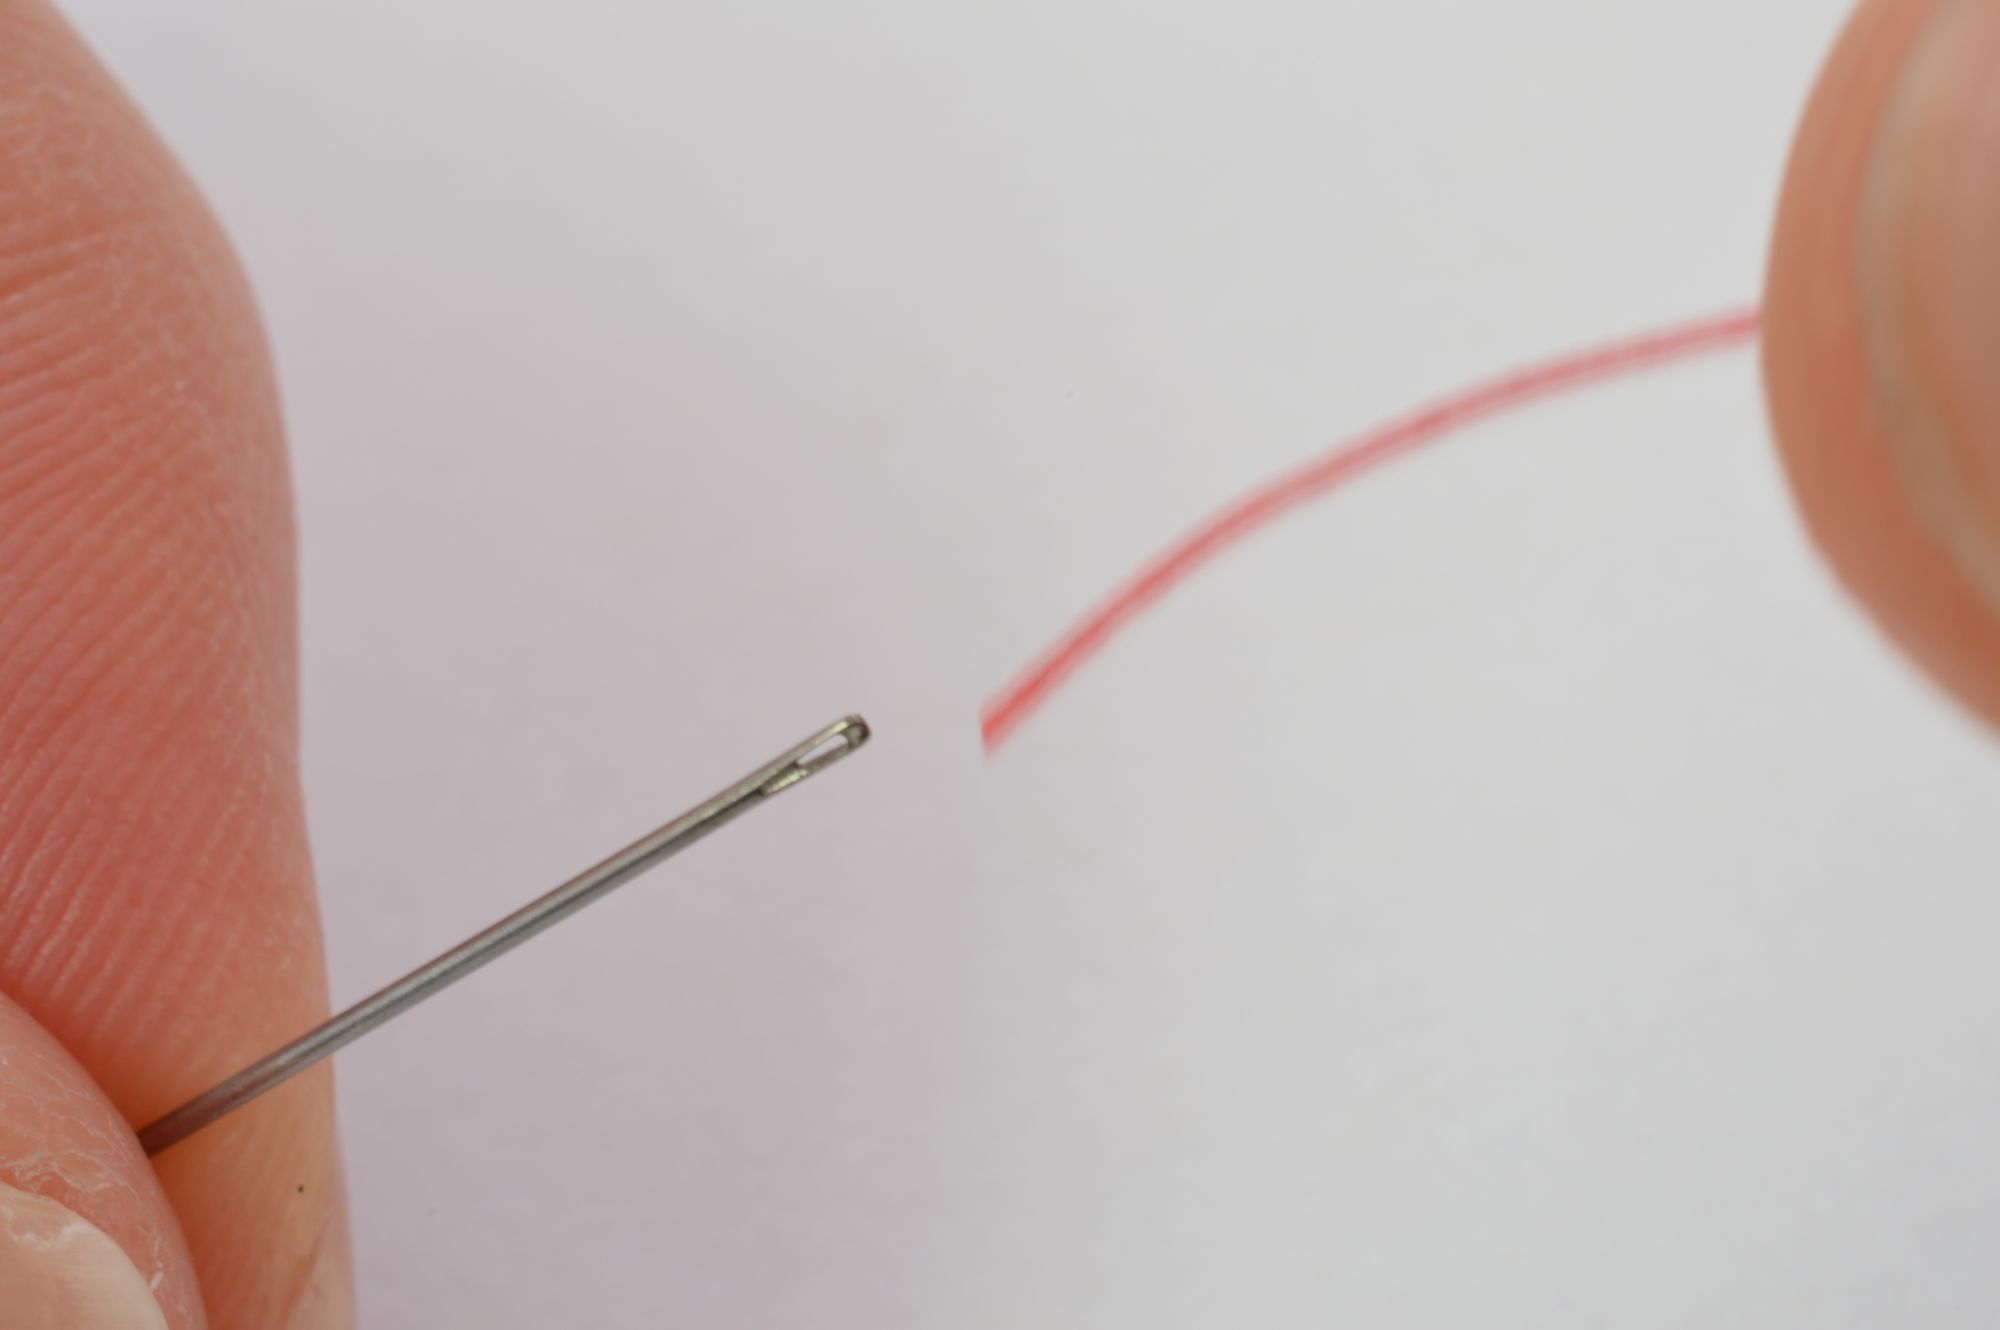
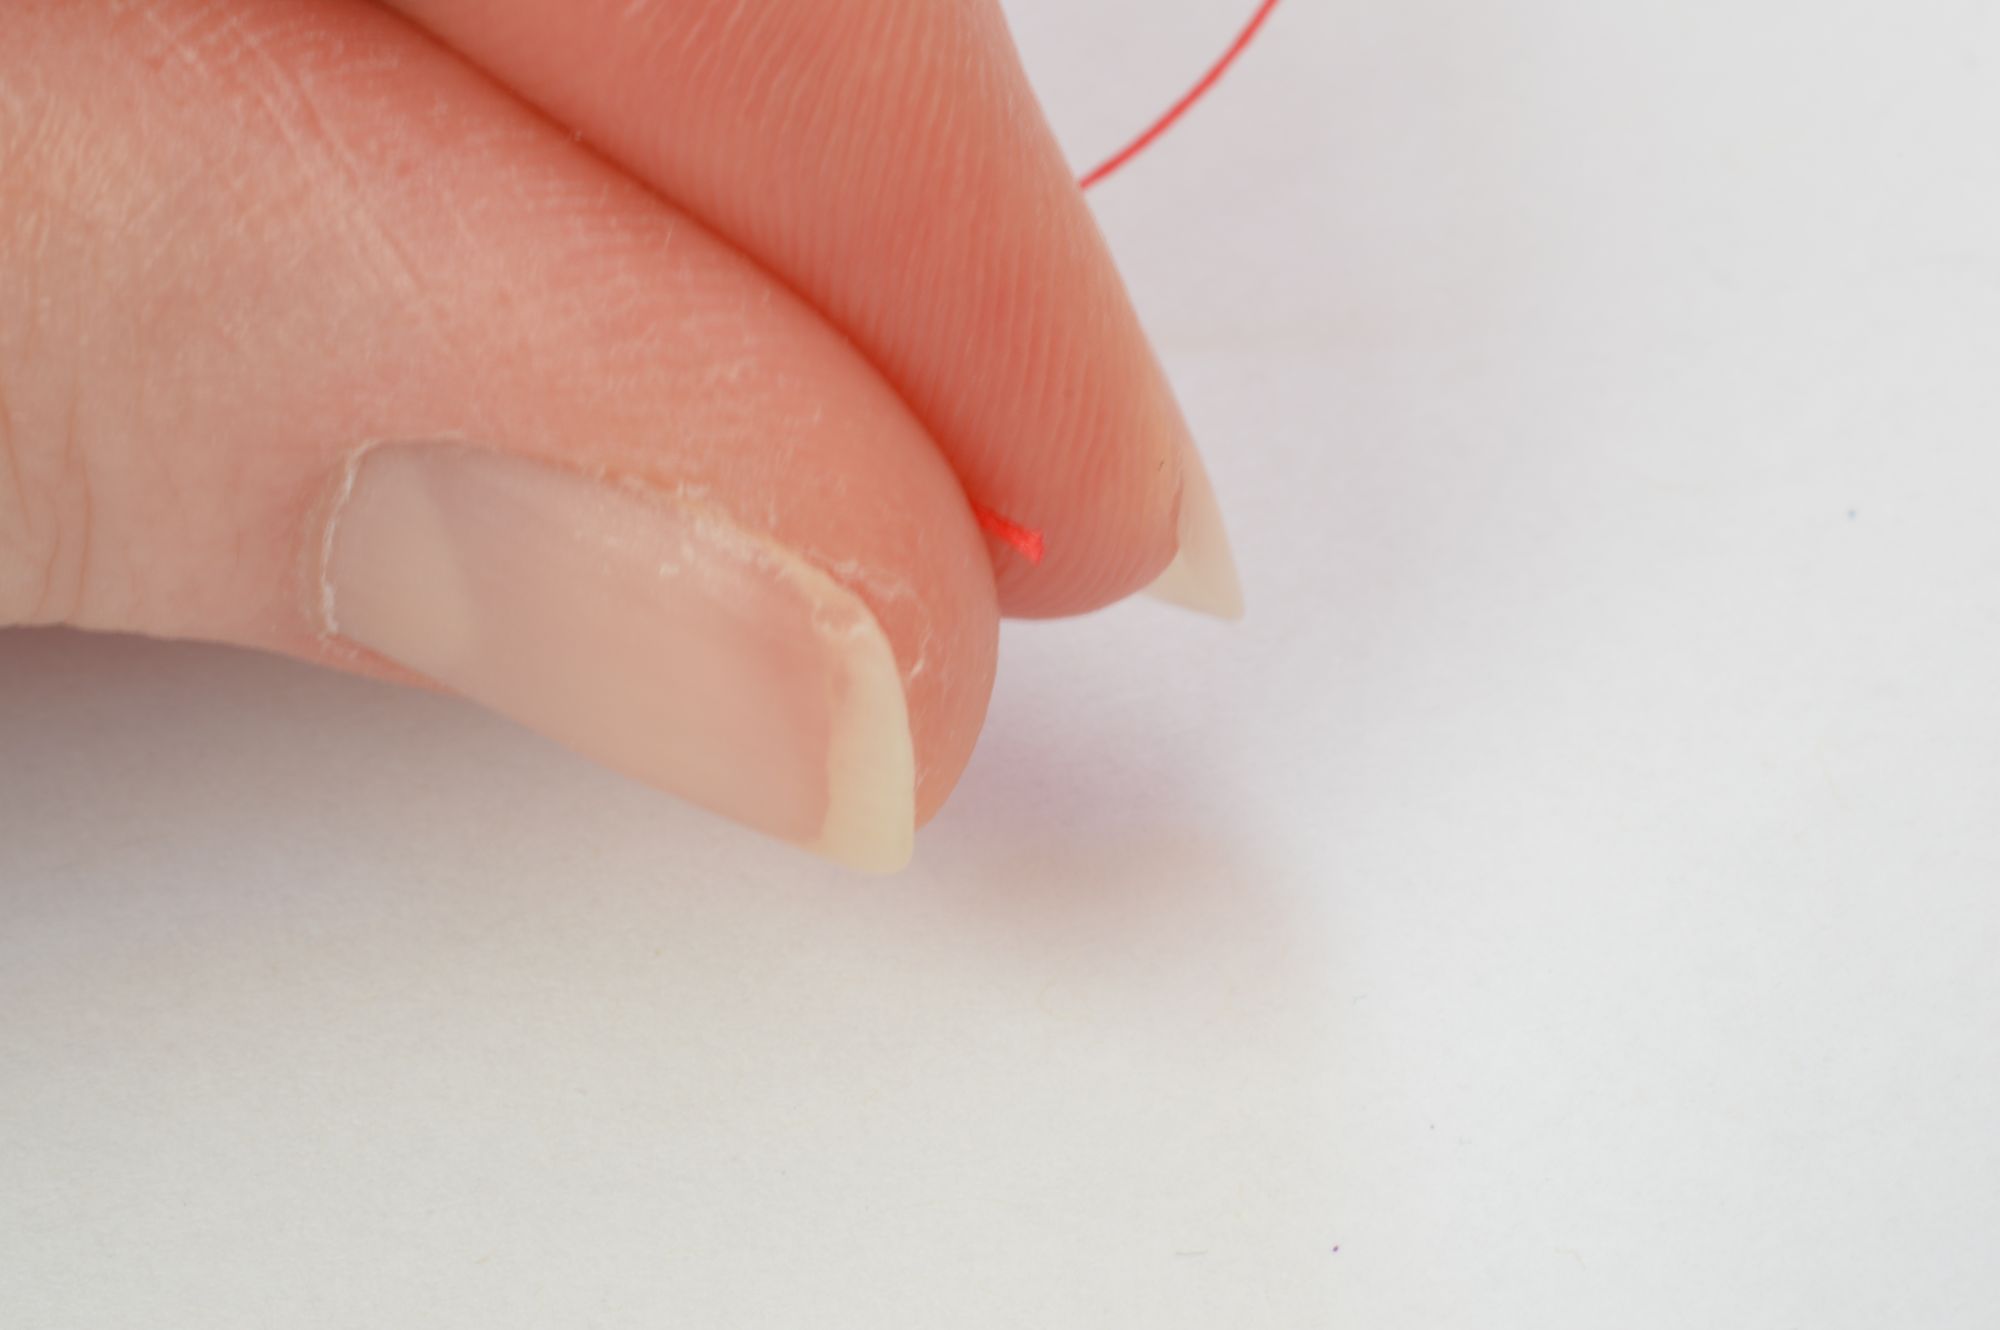
Tip Number Four: Bead-weaving hints. The bane of everyone’s life when bead-weaving is threading a needle! If you happen to be in a workshop, the chances are you can get some help with this, either from the tutor or perhaps from a friendly neighbour. However, if you’re on your own, here is a handy tip to help you. Do not be tempted to hold the thread in your dominant hand and try to push it through the eye of the needle – it will probably just glance off the metal eye and miss (see figure 4).
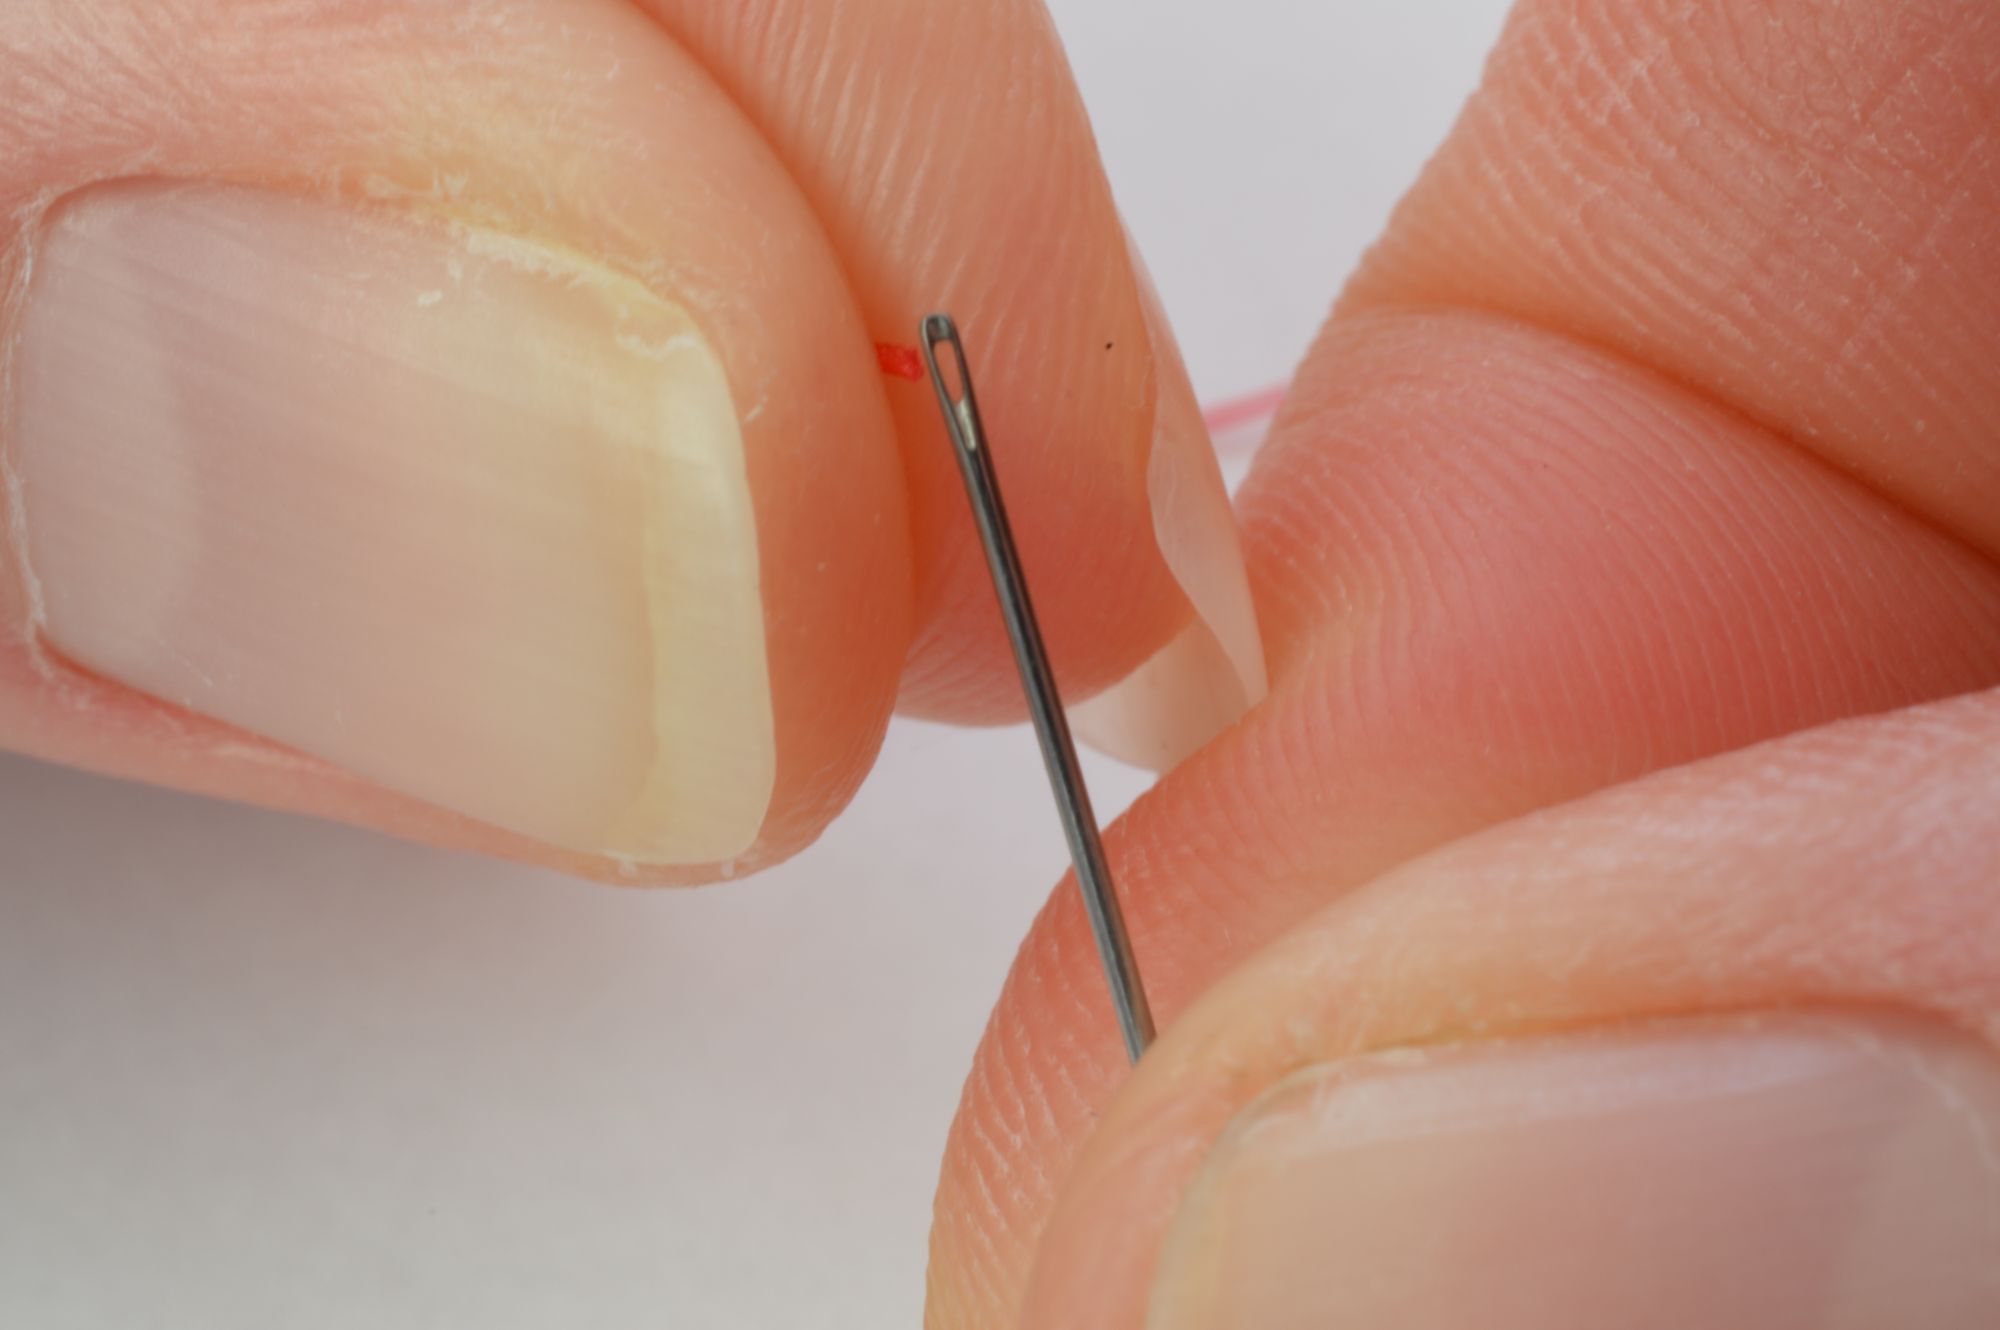
Instead, hold the thread in your non-dominant hand, tucking it between your forefinger and thumb so that it is barely visible (see figure 5).
Then use your dominant hand to guide the eye of the needle between your finger and thumb, so it will more or less be forced onto the thread (see figure 6). This way, the thread is trapped so it can’t go anywhere other than through the eye of the needle.
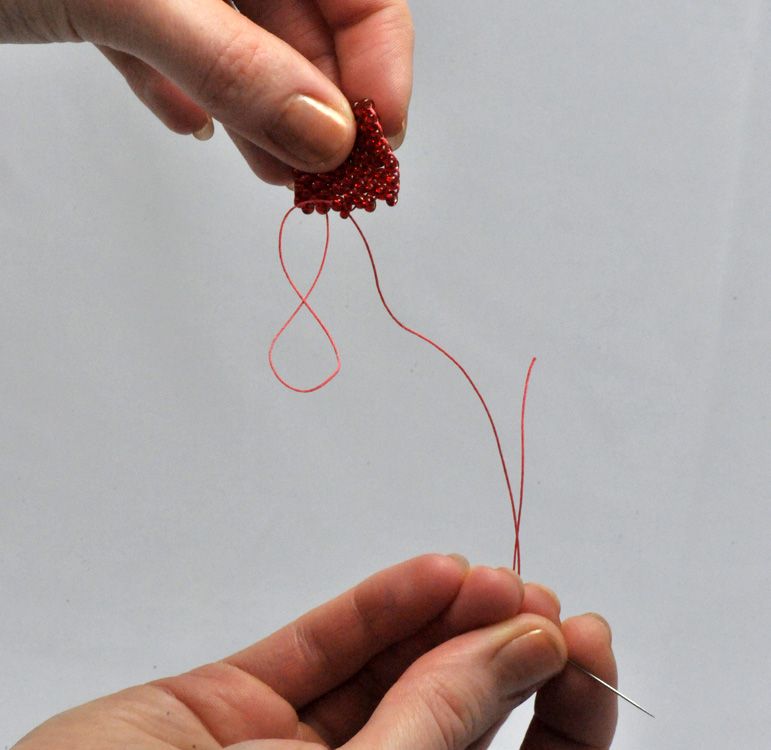
If you find your thread is catching around your work a lot, then there are two things you can think about. Firstly, think about the length of thread you are using – you don’t want to use too short a length or you will end up having to join lots of new pieces. However, if you are using a really, really long piece, it is more likely to tangle and catch on things in the vicinity. The length of thread that feels comfortable to you is quite a personal preference, so don’t be afraid to experiment to get it right. If the thread length isn’t your problem, then you can try another simple tip: make gravity your friend. If you hold your beadwork up a little then gravity will naturally make your thread hang downwards, so as you pull it through it won’t tangle on the beadwork. See figure 7.
Tip Number Five: Be kind to yourself! Whatever beadwork you are doing, remember to be kind to yourself in doing it. If you are learning something new (which you will be in a workshop), then don’t expect to get it all right first time. Don’t compare yourself to others in the class – everyone learns at their own pace and, no matter how long it takes, have faith in yourself that you will get there eventually...you will! If you’re feeling all ‘fingers and thumbs’ or feeling like you’re learning something in double Dutch, just remember you’re learning something new. The older we get, the less we have to learn new things, so it can seem very hard, but you can be pretty sure that everyone else is feeling much the same as you. In many ways the sense of achievement you get when you finally master that tricky technique is much greater when you’ve really had to struggle to get there, so just keep persevering and it will all work out.
With all that practise and perseverance, you can find yourself spending hours at a time working on your craft, so make sure you have really good light and you are sitting somewhere that allows you to maintain good posture as you work. This will really help to prevent you from sustaining injuries that can end up preventing you from working at all. Try and remember to take regular breaks and get up and move around to stop yourself from getting too stiff. So, armed with those handy tips, you’re ready to go and enjoy your workshops and your beading time at home. Don’t forget to keep sending in your photos of your beading projects too – we love to see what you’ve been up to. Send to: editor@beadmagazine.co.uk