
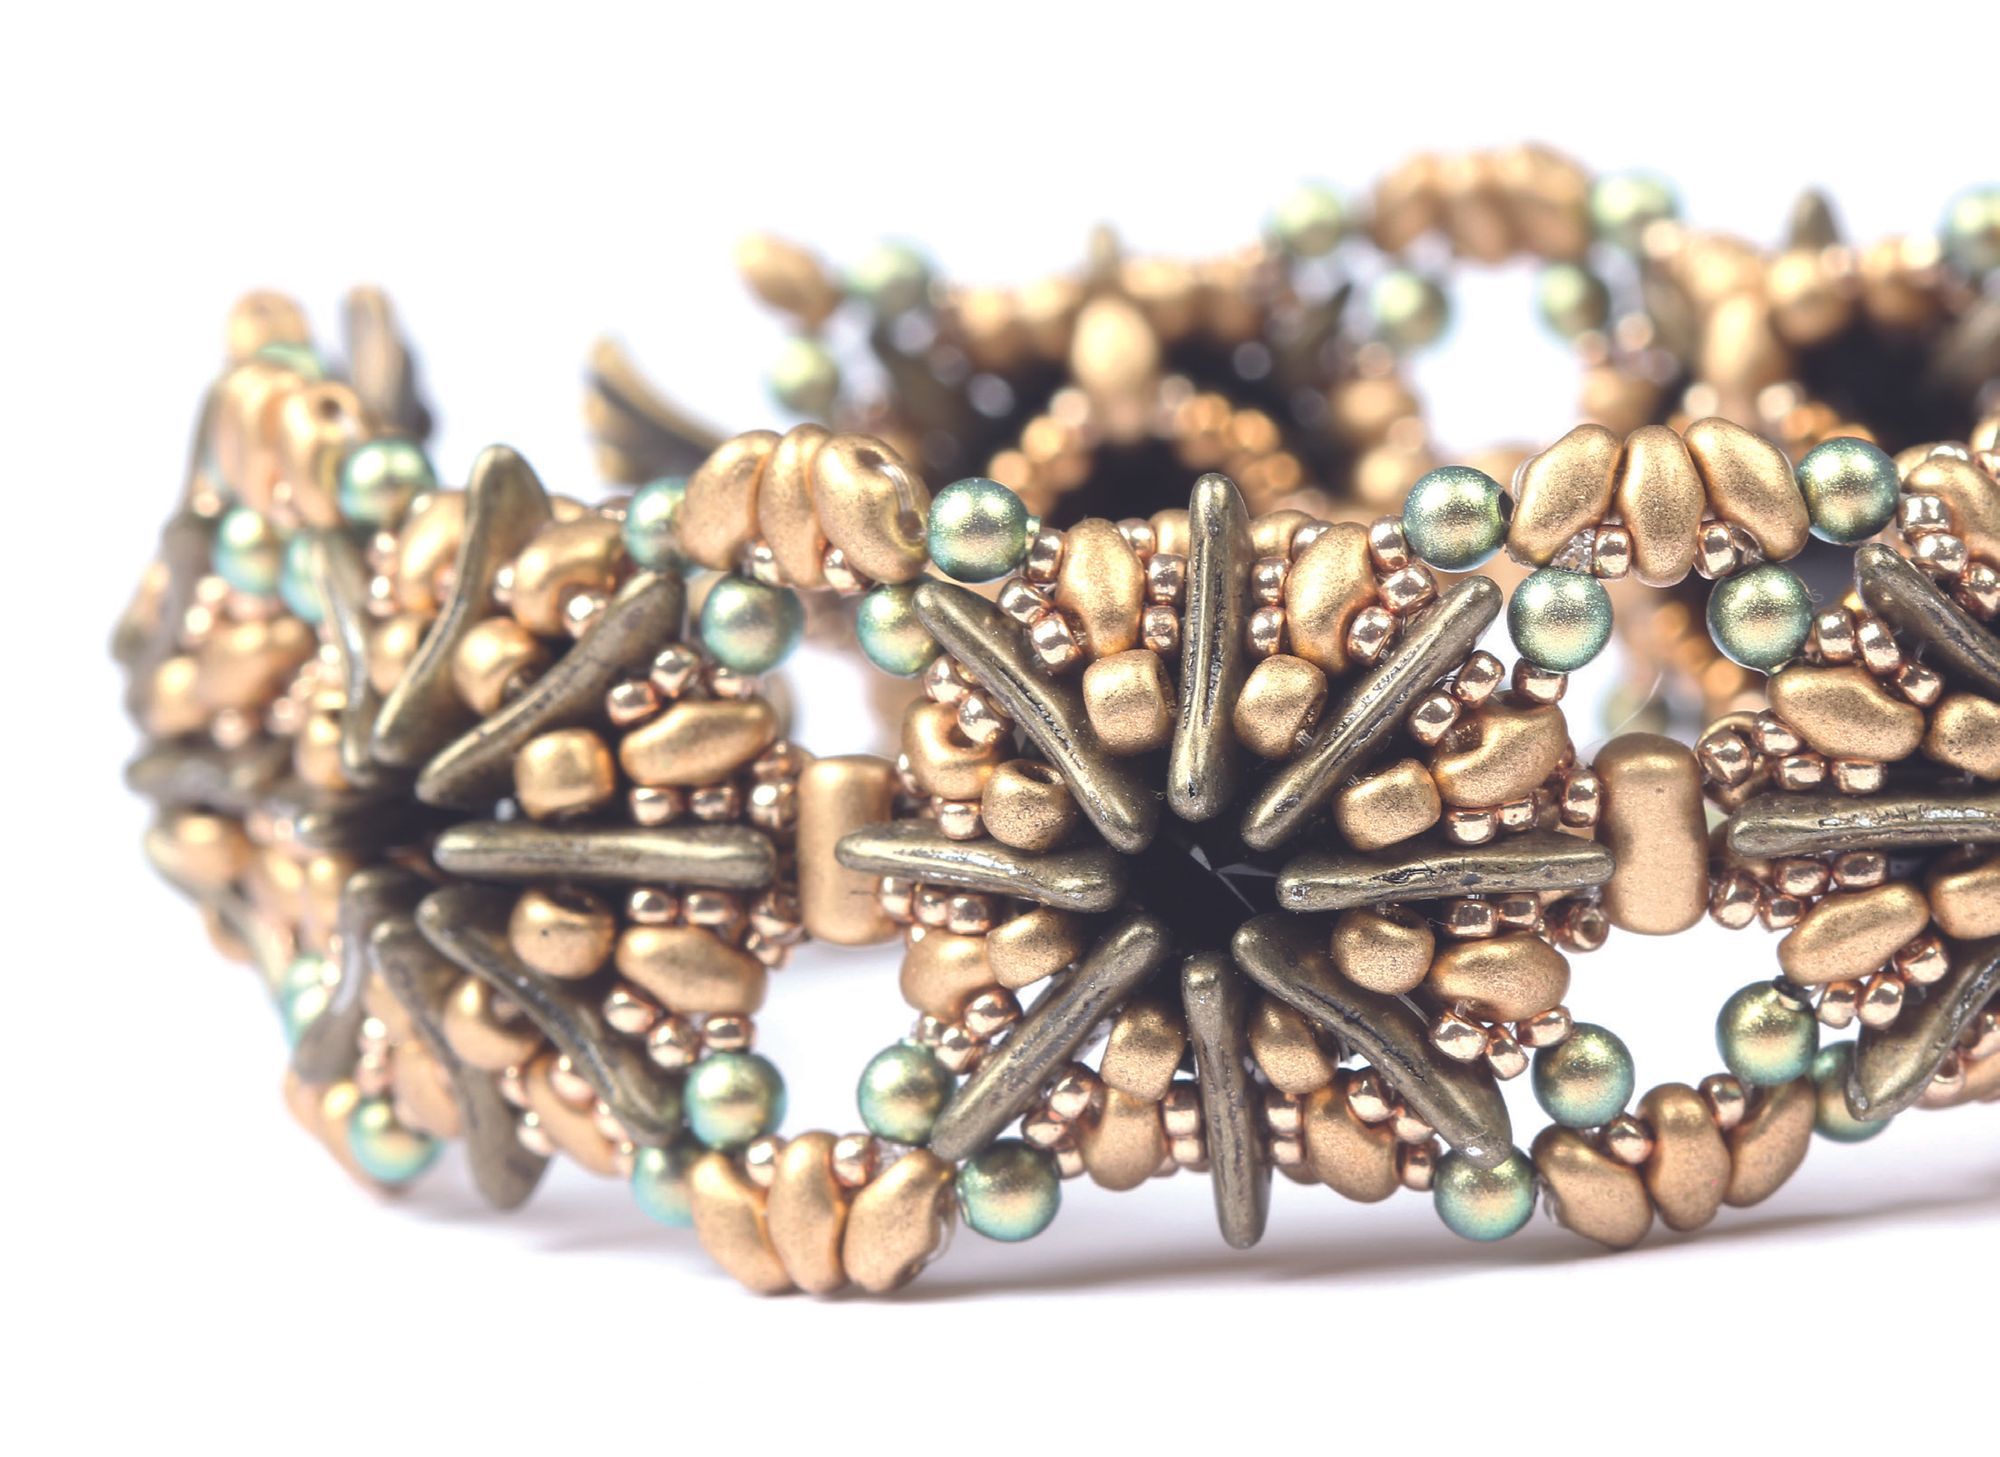
Making component jewellery always gives many options. Once you have made the components, you can join whichever way you choose to get variations on pieces of jewellery. Zoltan has given a couple of options of how to join your bracelet and added how to make matching earrings. Depending on what you choose to make, this design will cost between £5 and £20 and takes anywhere between 30 minutes to 2.5 hours.

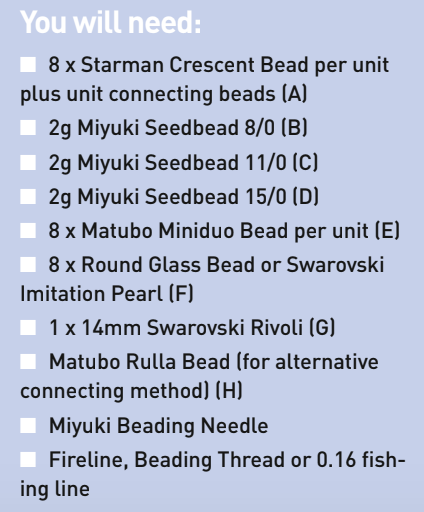
1. Pick up 1(A), 1(B) and repeat so that you have 8 each. Go through all the beads
once more to create a circle. Reinforce to make sure it is secure. Leave a tail thread that you can finish off securely. Tie a knot to hold the circle in place.
Transfer to any of the free holes of an (A) bead. Make sure to keep the line/thread
tight while transferring, so that it will not be visible, but rather keeps nicely to the side of the (A) bead.
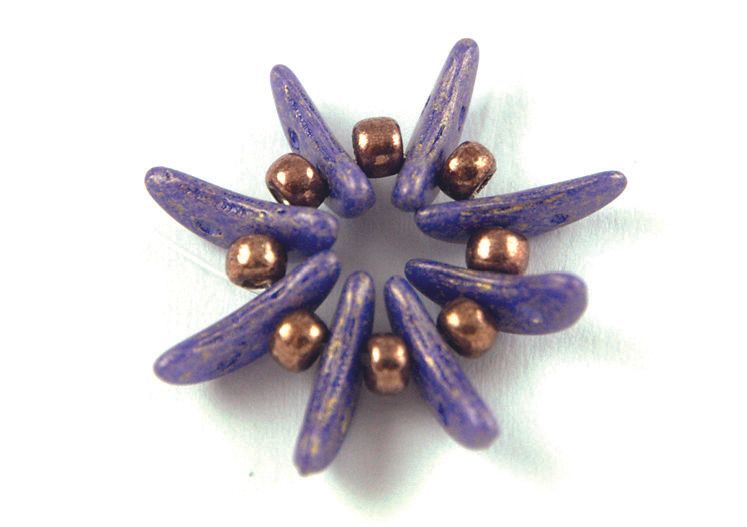
2. Pick up 1(D), 1(E), 1(D) and go through the free hole of the next (A) bead. Repeat 7 more times.
3. Coming out of the same hole used in the previous step (but passing the (D)bead) connect 1(A) and the free hole of 1(E) with 1(D). Repeat the same on the other side of the (D). Go around you work repeating this.
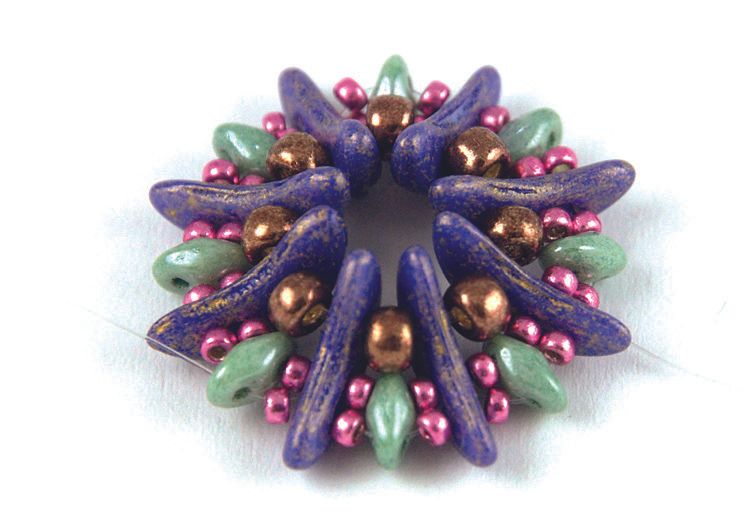
4. Still using the same hole as in the previous two steps (but passing the (D) from Step 3) come out of any (A) bead and pick up 1(D), 1(B), 1(E), 1(B), 1(D) and pass
under the (A) bead and connect into the next (D) bead. Repeat, but this time use
(F) beads instead of the (B)’s. Go around alternating these (see picture that shows view from the bottom).

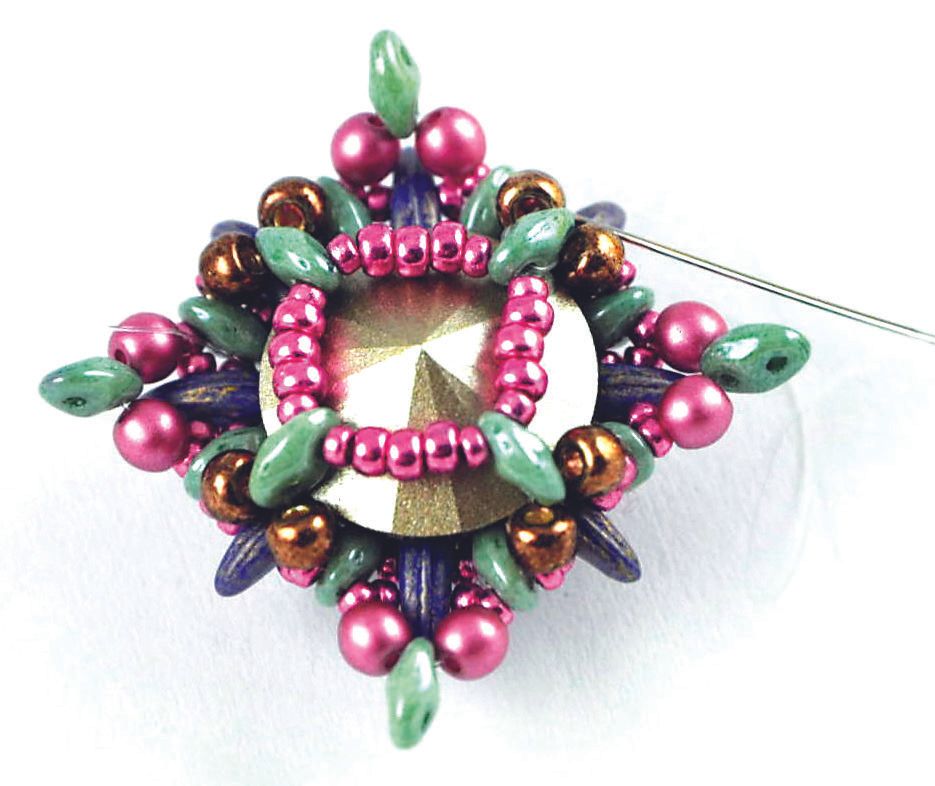
5. Connect the (E) beads from the previous step (these are supported by the (B) beads) with 1(D), 3(C), 1(D). Put the (G) in place before pulling the thread tight. Reinforce 2-3 times, making sure that the beads are tight and the stone is in place.
Your Dragon Pendant base unit is ready. There are two options for joining the
bracelet together. Either follow step 6, or step 7 depending on your preference.
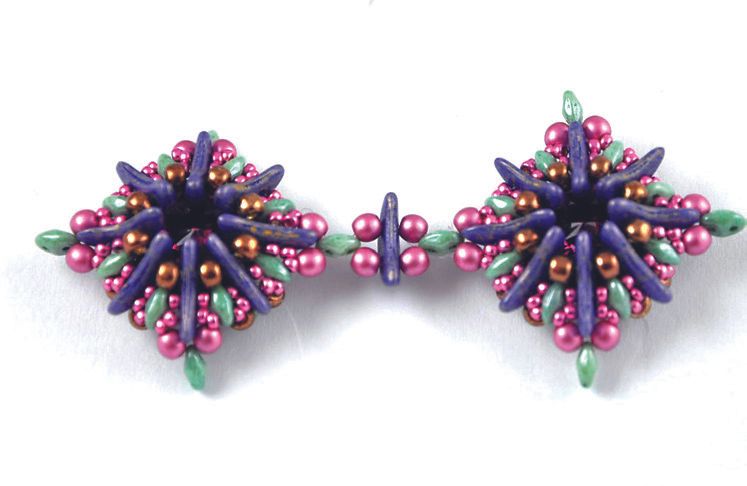
6. Using a new thread, transfer to an unused hole of any of the outside (E) beads and pick up 1(F) + 1(A) + 1(F) and go into the free hole of any of the outside (E)s of
the next unit. Whether the connecting (A) is facing up or down is up to you but I prefer it to be in the same position as the main unit(s).
Pick up 1(F) and go through the free hole of the (A) and pick up 1(F) and go into the (E) you started out from. Transfer to the next (E) you want to connect.
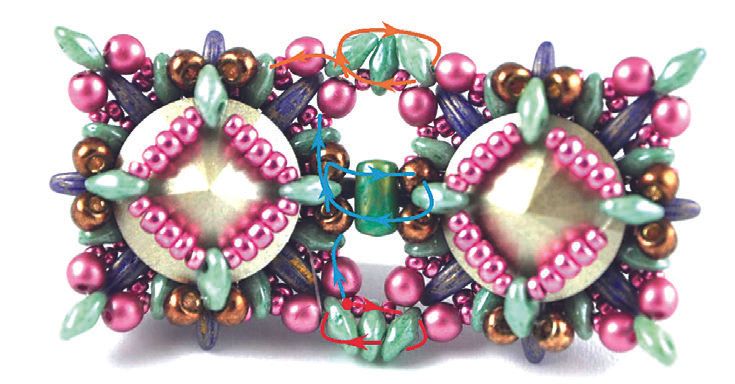
7. Come out of an outside (E) bead (from between an (E) and (F)) from the hole you already used and pick up 1(D), 1(E), 1(D). Go into the same hole of the (E) on the next unit that you used for this one and turn back to the other free hole. Connect the 3(E) beads (RED line). Weave through an (E), (F), (D), (E), (B), (E), (B), then pick up 1(H).
Alternatively you can pick up 1(D) before and after (H) if you like a tighter hold) and go through (B), (E), (B) of the other unit then back through the free hole of
(H) (BLUE line). From here, transfer to the next (E) you want to connect and re-
peat the beginning of this step (ORANGE line).
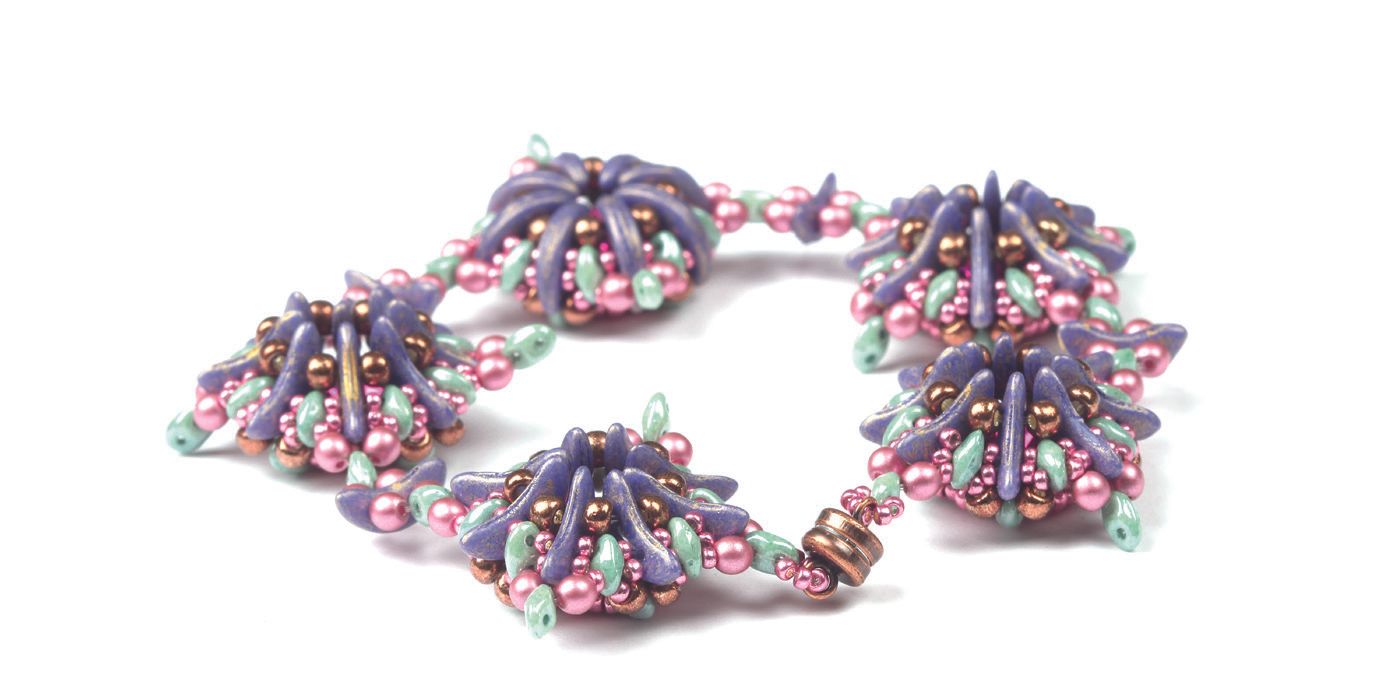
8. Keep joining your components until your bracelet is at the desired length.
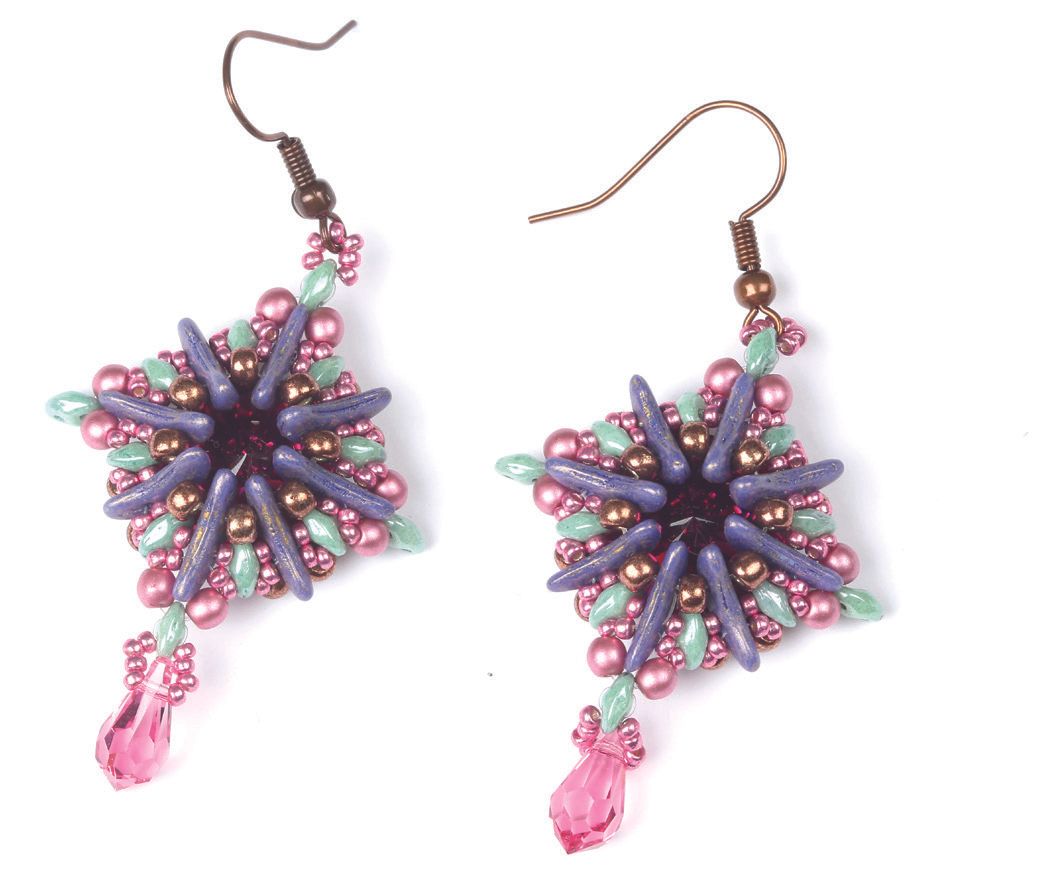
Alternatively once you have completed a base unit, you might wish to make an
earring. To do this attach an ear wire to one of the free holes of the outside (E)
beads and a drop to the opposite (E). If you want to proceed making a pendant
just attach a bail.

BEADLINK: https://gyongysziget.hu/en/